Extracting Data - Simple CSV
Within iGene it is possible to extract results and information directly to a CSV file. This file can be used in Excel for further analysis or can be used on equipment as a quick interface between the two systems.
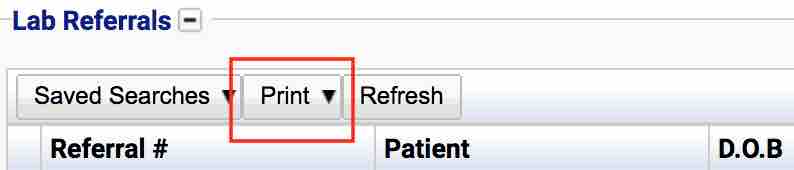
In order to get a CSV result out, the user must have permissions to do this. At the places where it is possible, the ‘Print’ button is visible. Pressing this button will list the reports and items which can be generated from that location. The ‘Print’ button is on the top of all the tables within the application.
An example of when to use this option is if a quick ad-hoc result is required to be sent in an Excel document. The CSV option provides an unformatted solution to retrieving data out of iGene.
Filtering lists
CSV reports display the results from a table. If the user was to click ‘Print’ then ‘Export to CSV’ on the patient table (Patients > Patients Search/Add) this would export every patient in the system. This would be slow and not of much use.
Avoid exporting results which are unfiltered. It will slow the system down!
A better solution is to limit the data which is coming out of the system to start with. In order to do this, a search filter can be applied to the table to limit the results down. For information on how to do this, see the searching and ordering guide.
Creating a search filter to limit items in a table down is a good way to provide quick answers to questions. Such as if a physician telephones to ask how many individuals they have referred for a reason, this number can be given without any report generation at all.
Standard Print Items to CSV
By default, each of the ‘Print’ buttons within iGene allows the ‘Export to CSV’ option. Pressing this will export the data in the columns which are displayed on the screen. e.g. on the below screen image, the CSV report will contain the columns:
- Referral #
- Patient
- DOB
- Ref. Date
- Priority
- Physician
- Referral Reasons
- Tests

Sometimes, this is not very helpful as different information is needed. In the above example, sample type would have been useful. For how to do this, see the creating the report section.
Creating the Report
For this section, it is useful to have a simple scenario.
A user wishes to know details to submit for a project. They are required:
- Referral Number
- First Sample Type
- Date of Referral
- Reason for Referral
- Primary Referring Physician
Creating custom exports for CSV files is a lot similar to creating reports however, Jaspersoft Studio is not required and everything can be created within iGene.
An important item to remember is that a CSV file is a flat file. That means if there is a model with multiple items, each one will need to be specified. e.g. a referral can have multiple samples, so a CSV file would have columns for each sample:
- Referral No
- Sample 1
- Sample 2
- Sample 3
- Sample 4
In this case, it is important to have enough columns for the potential samples which might be produced. If no data is present then the column will appear blank.
Using the scenario detailed at the top of this section the user will create a new report:
In order to find the model to base the report off, go to the table where the report needs to be generated and click the ‘Print’ button. At the top of the list it will either say:
“Reports for Referral”
or
“No Reports Setup for Referral”
The last word of this is the model to base the report off. In this case, it is the ‘Referral’ model.
- Navigate to Administration > Reports.
- Click the + button or go to Actions > New Report.
- Give the report a name and select the model for the report type.
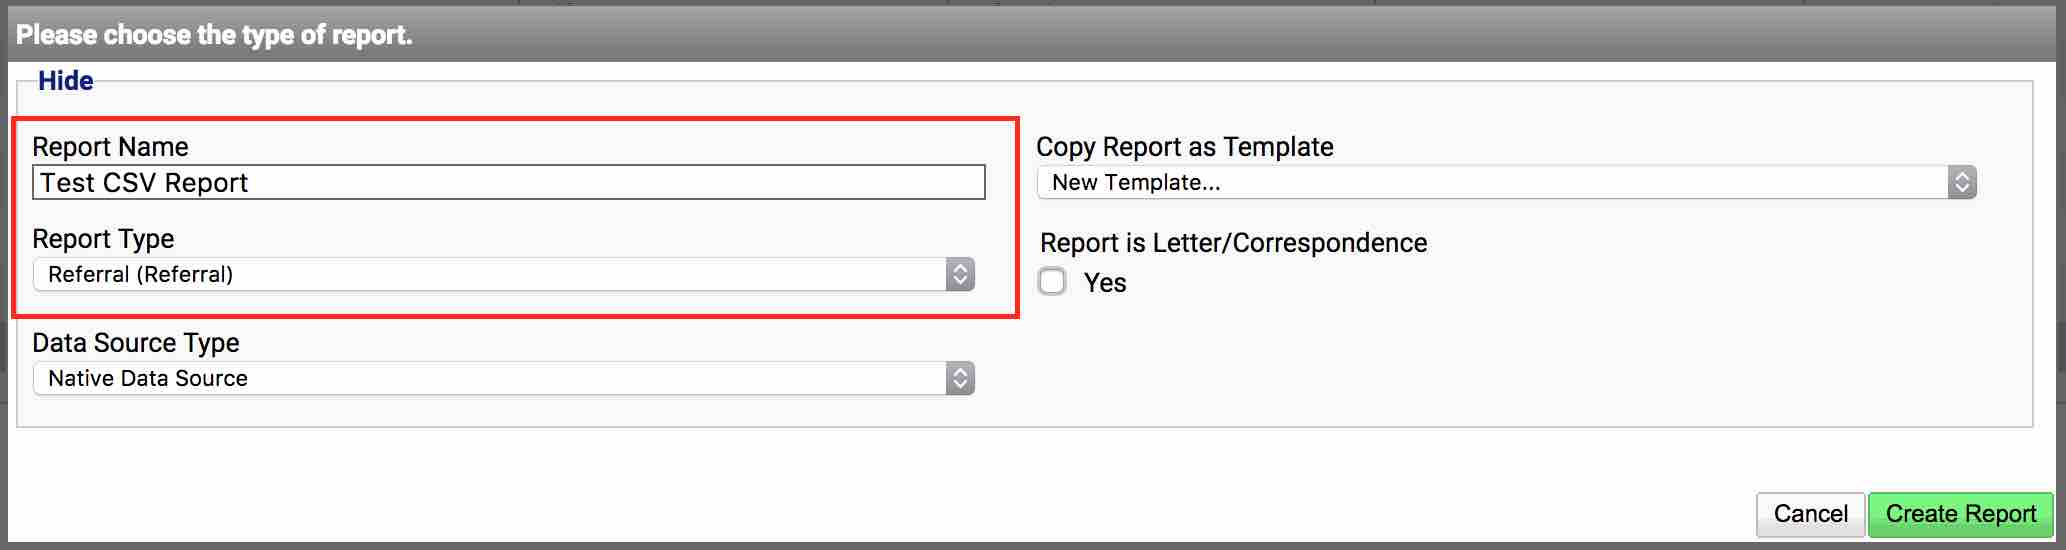
- Click ‘Create Report’.
- The report format needs to change from ‘PDF’ to ‘Simple CSV’. In the first row, on the right of the screen, there is a drop down. Select ‘Simple CSV’.

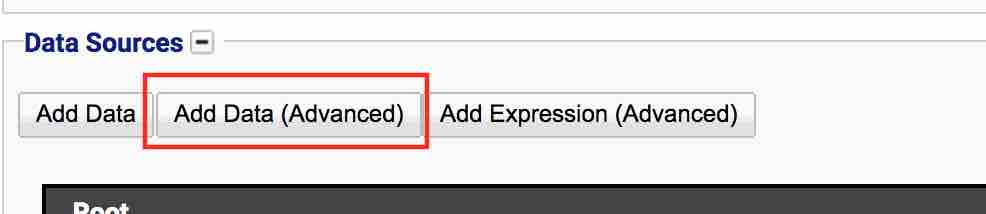
- The next stage is to select the data sources. Click the ‘Add Data (Advanced)’ button.
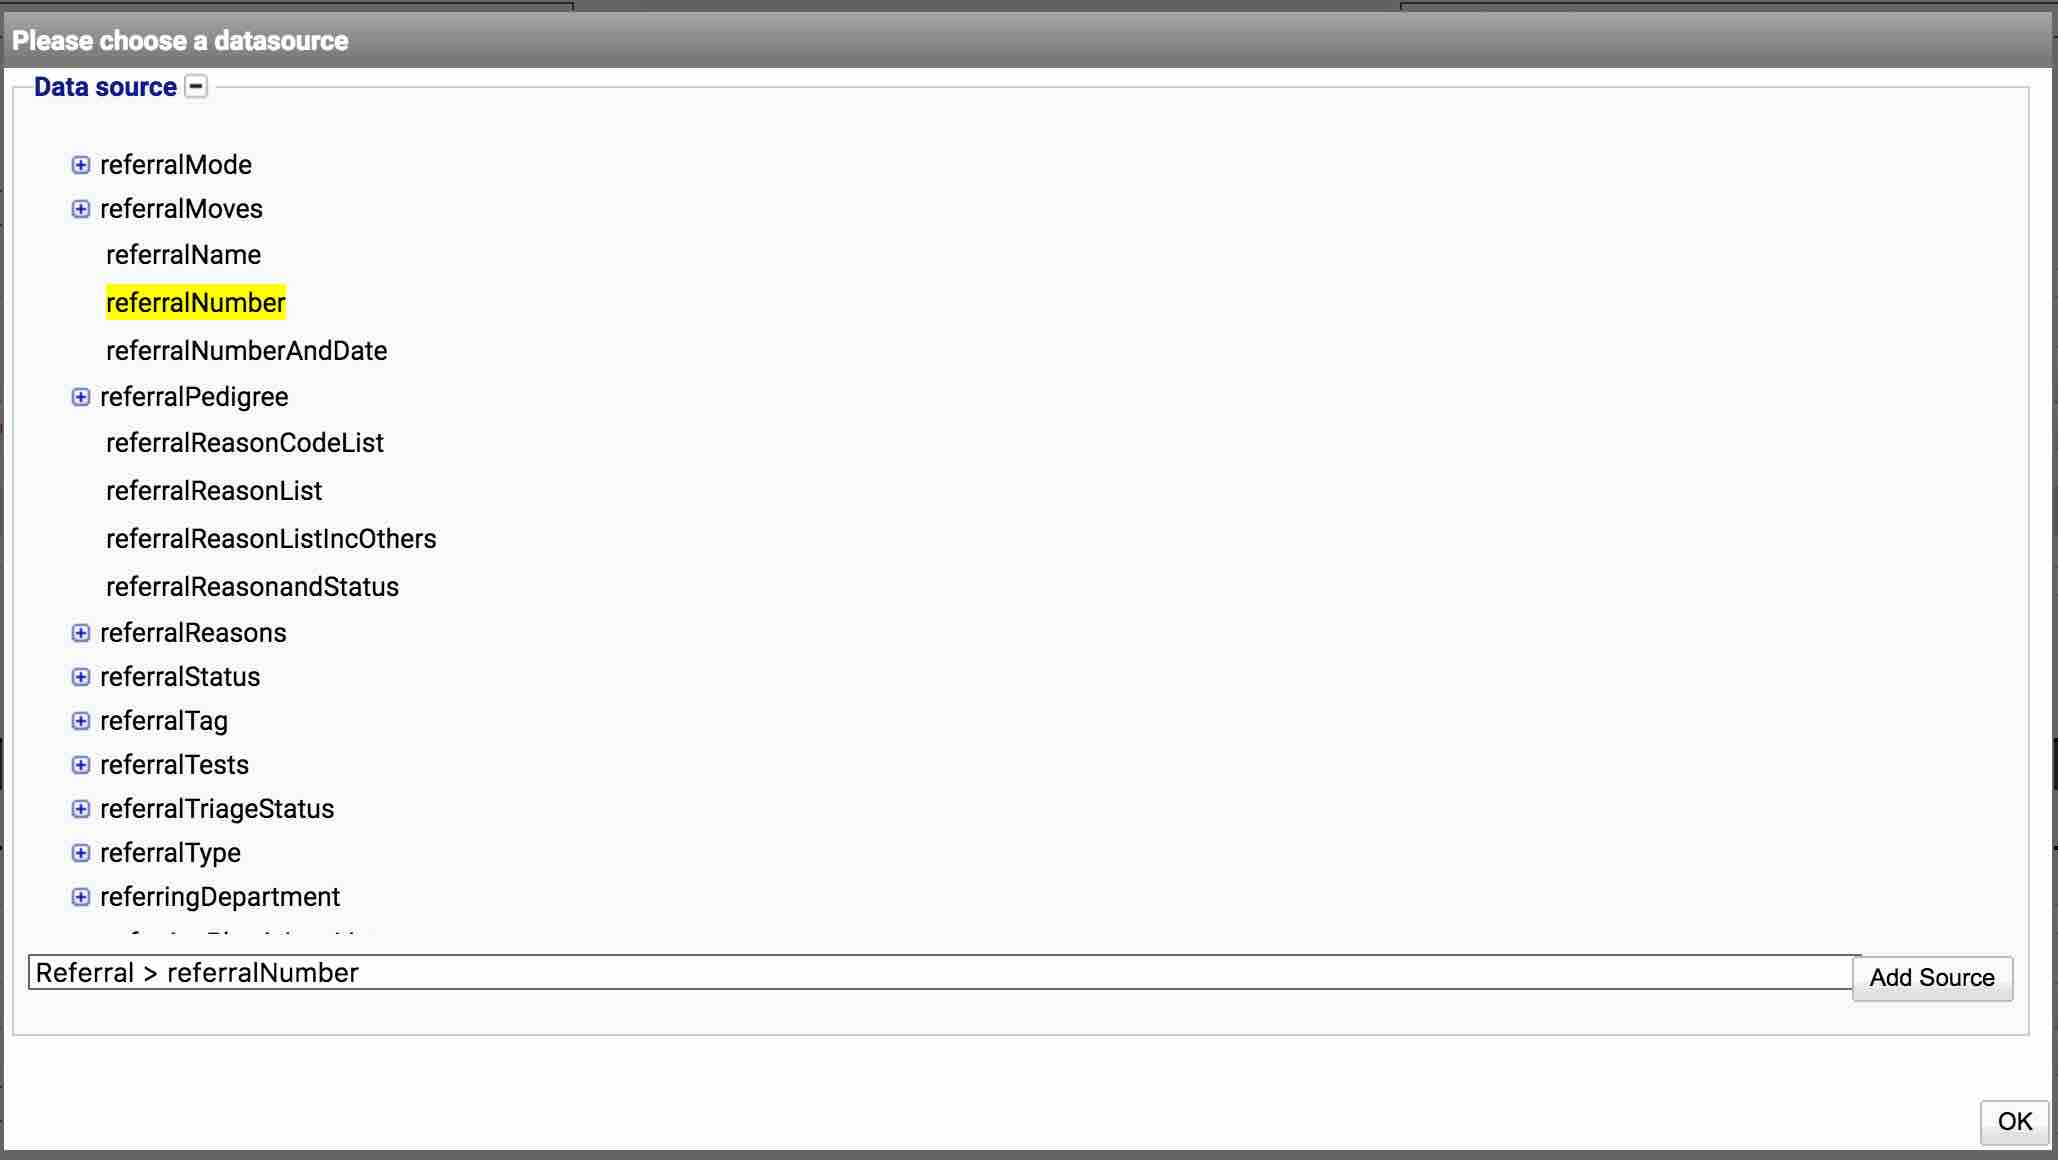
- Using the tree, scroll to find ‘Referral No’ and double click it.
- Repeat steps 6 and 7 for:
- dateOfReferral
- referralReasonList
- primaryReferrer > name
- A sample type needs to be added. In the tree, navigate to samples > sampleType > name
The list of fields should look like:
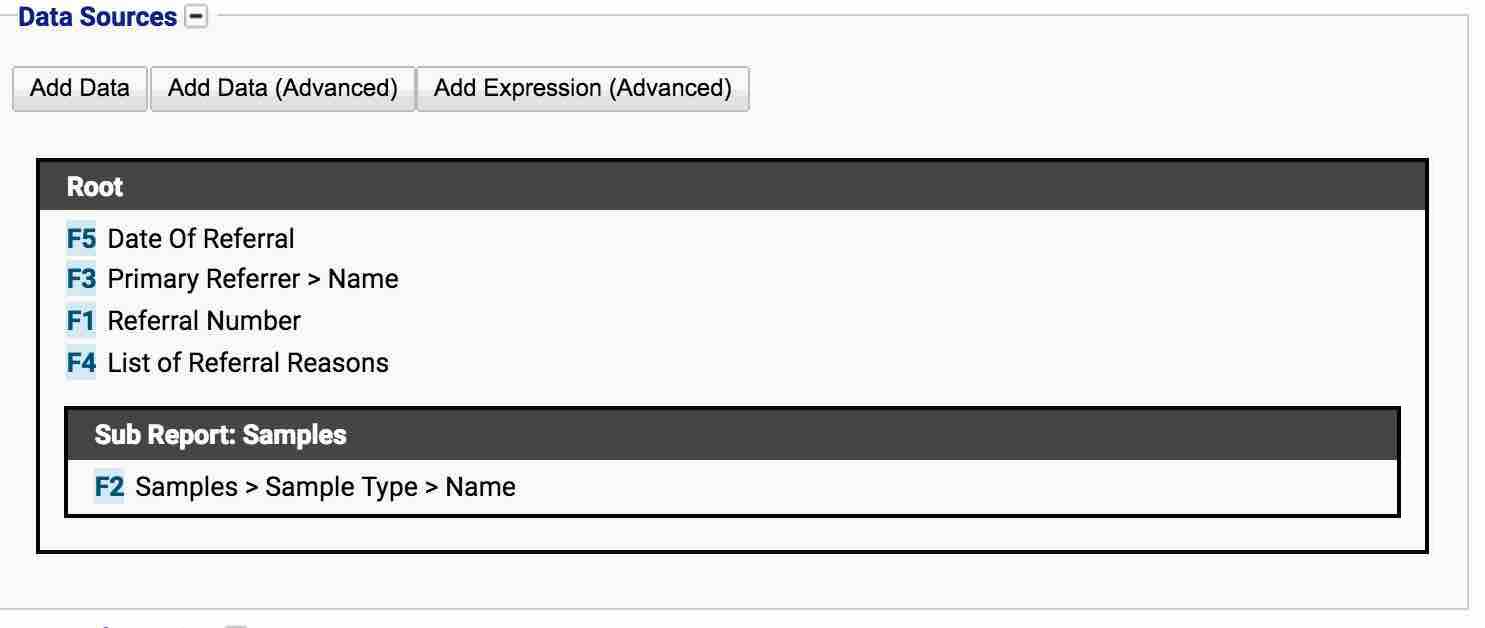
Note the Sample Type is in a sub report. This will need to be resolved as we have many of those items. To do this:
- Hover over the field and options for ‘change’ and ‘remove’ appear.

- Select the change button.
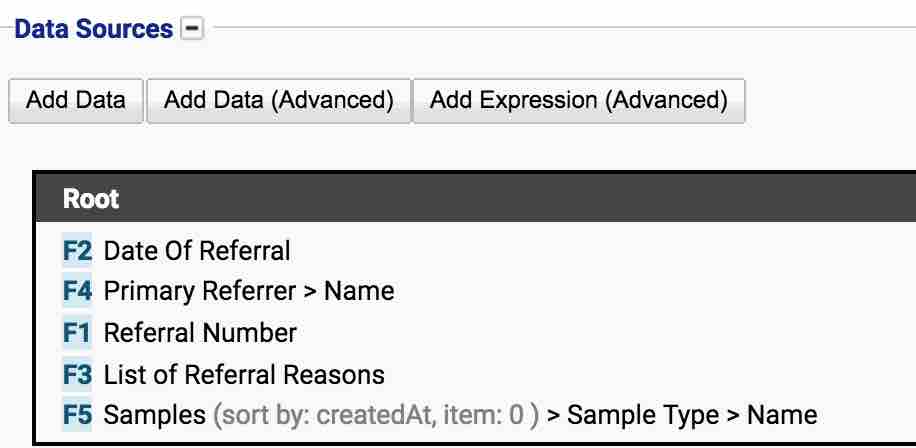
- After the word ‘samples’ at the start, add ‘(0)’ after it so the row now looks like this.

Adding the ‘(0)’ tells iGene to get the first sample. The list is zero based so:
- (0) = First Sample
- (1) = Second Sample
- etc.
- Before pressing apply, if more than one sample is needed to be listed, copy the text in the box.
- Press apply.
- The list of fields should now look like:
- If more samples are required, add another data field using the ‘Add Data (Advanced)’ button. It does not matter which field is added.
- Hover over the field and select change.
- In the text box, paste in the value from step 1.
- Change the value at the end of ‘samples(0)’ to be ‘samples(1)’.
- Click apply.
Now the fields are all set, there is a section of CSV information which can be edited to move fields around and also give them meaningful titles:

Complete the report by pressing the ‘Save’ button.
In order to view the details, navigate to the table which was used to base the report on. Select the filter which to apply and then press the ‘Print’ button and select the report which has just been created.