Sample Processing Review
The features discussed here are specific to Manchester and are not available as part of the core iGene product.
The sample processing review is the third step in Manchester’s booking-in process. This screen takes the information from the referral and the beginning of the workflow selected by the Disease Team Allocation users in order to start processing the samples.
Items appear at this stage once the Disease Team Allocation has been completed.
Field Details
There are 2 main areas of the Sample Processing Review screen, the table of items which are awaiting review and the review screen itself.
Sample Processing Review - Selecting A Sample
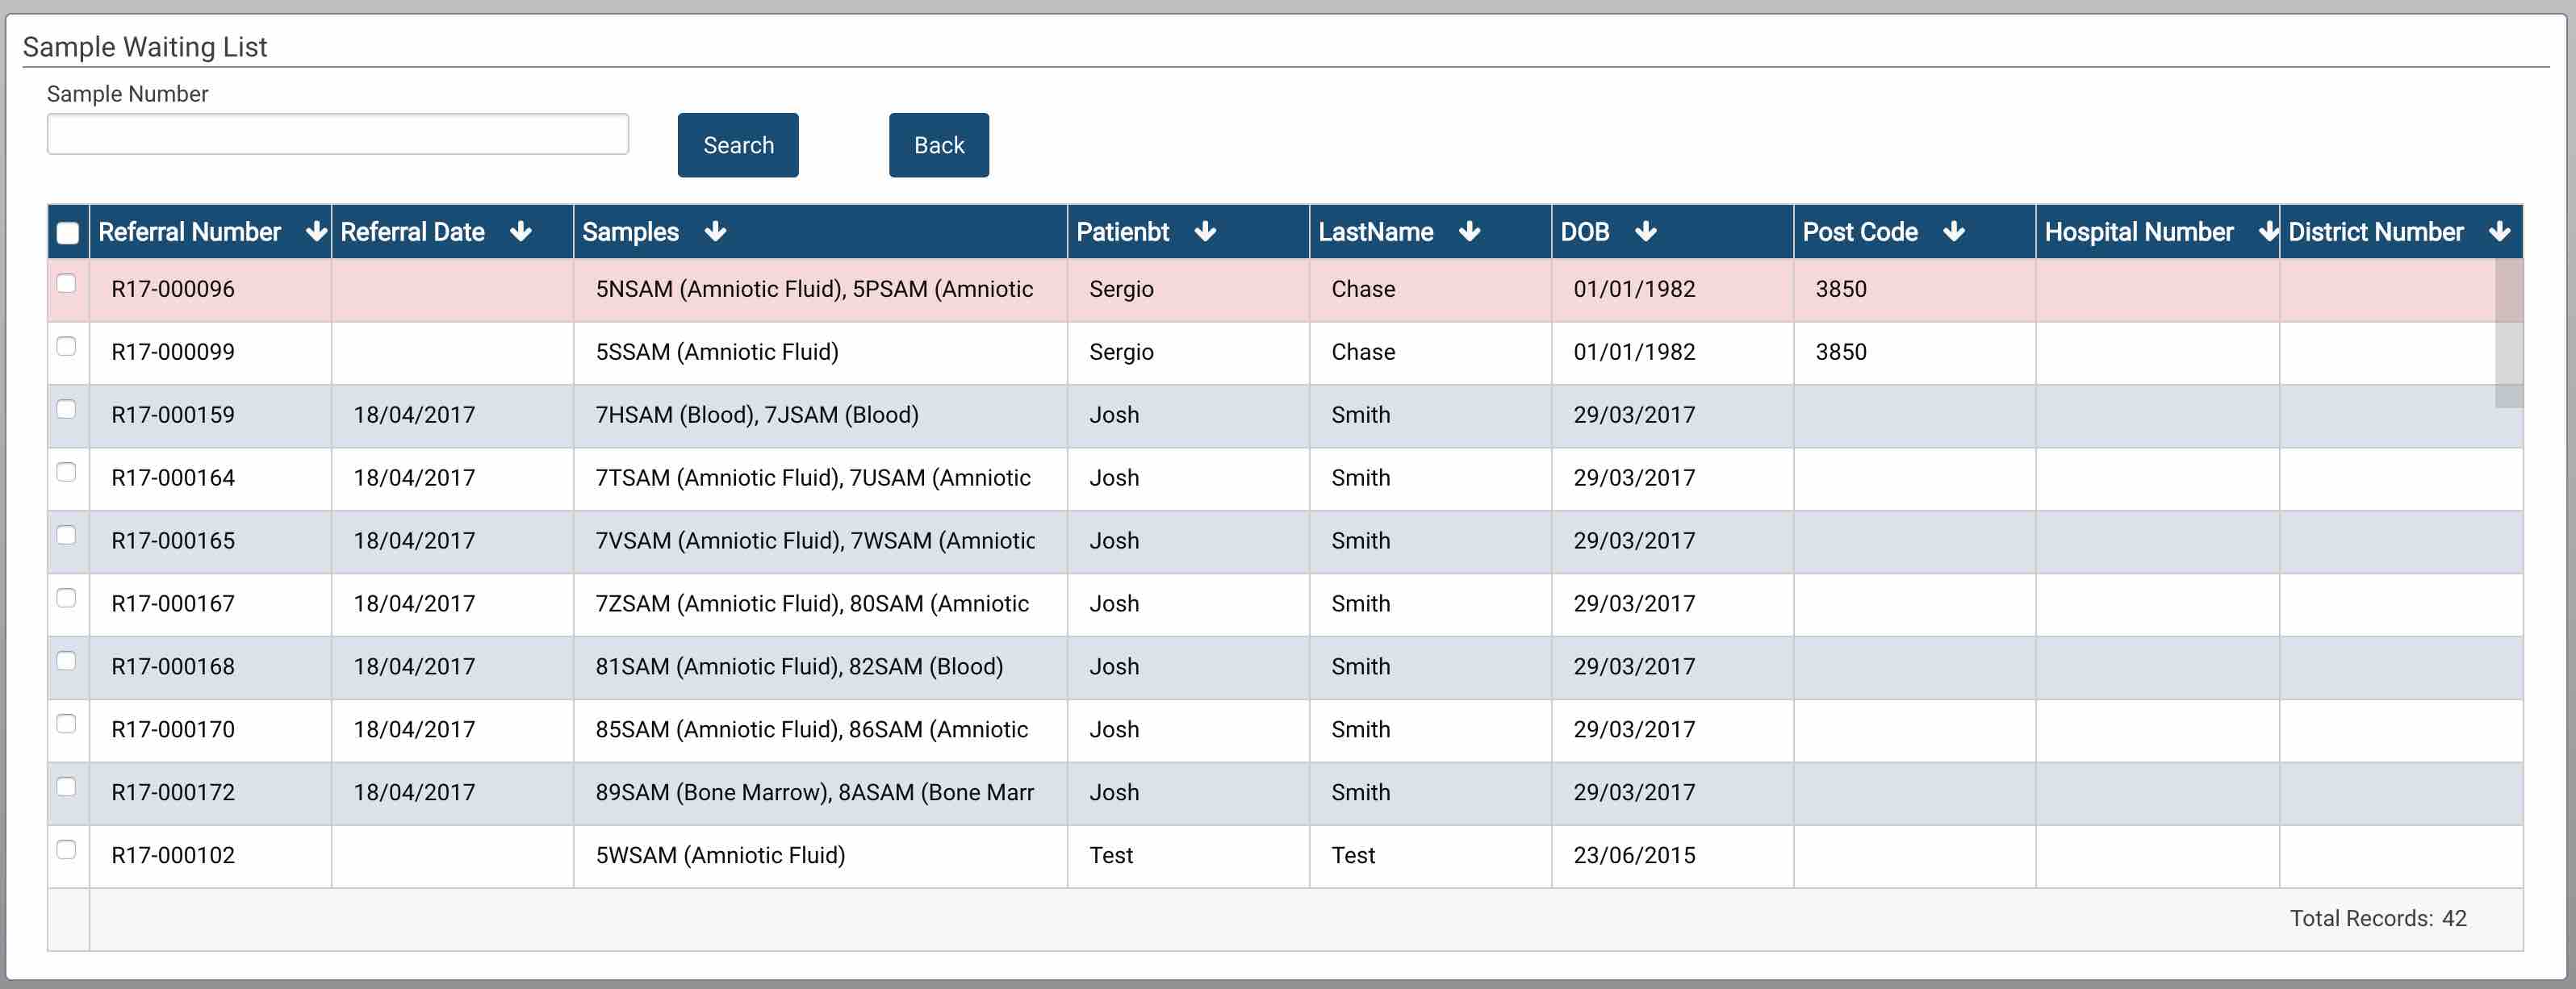
When the user first clicks the link for Sample Processing Review they are presented with a table with all the items which are at this stage of the workflow. The user can either: select the sample using the scrollbar, arrow keys or search using a sample number. This list is sorted by date with the oldest referral at the top of the list.
It is possible to scan a barcode into the sample number text box. Make sure the cursor is in the box and scan the barcode label with a scanner, this will trigger the search action for that item.
The form has the following fields:
- Sample Number - A text box where the sample number, the user is working with, can be entered.
- Search button - The button to press to search for the sample.
- Back button - Resets the form by removing the search applied.
There is also a results table which is displayed which has the following columns:
- Referral Number - The unique referral number generated by iGene.
- Referral Date - The date the referral was entered.
- Samples - A list of the sample numbers and sample types on the referral.
- Firstname - The first name of the patient.
- Lastname - The last name of the patient.
- DOB - The patient’s date of birth in the format dd/mm/yyyy.
- Post Code - The post code of the patient.
- Hospital Number - The hospital number of the patient.
- District Number - The district number of the patient.
Once the desired item has been located, double click the row or press the enter key with the row highlighted. This will open the screen to begin the review process.
Sample Processing Review - Reviewing a Referral
The Sample Processing Review screen is mainly read-only. Anything changed regarding the referral will not be saved at this point. The screen can be split into two main areas, the patient and referral details and the pre-analytical processing workflow area.
Patient & Referral Details
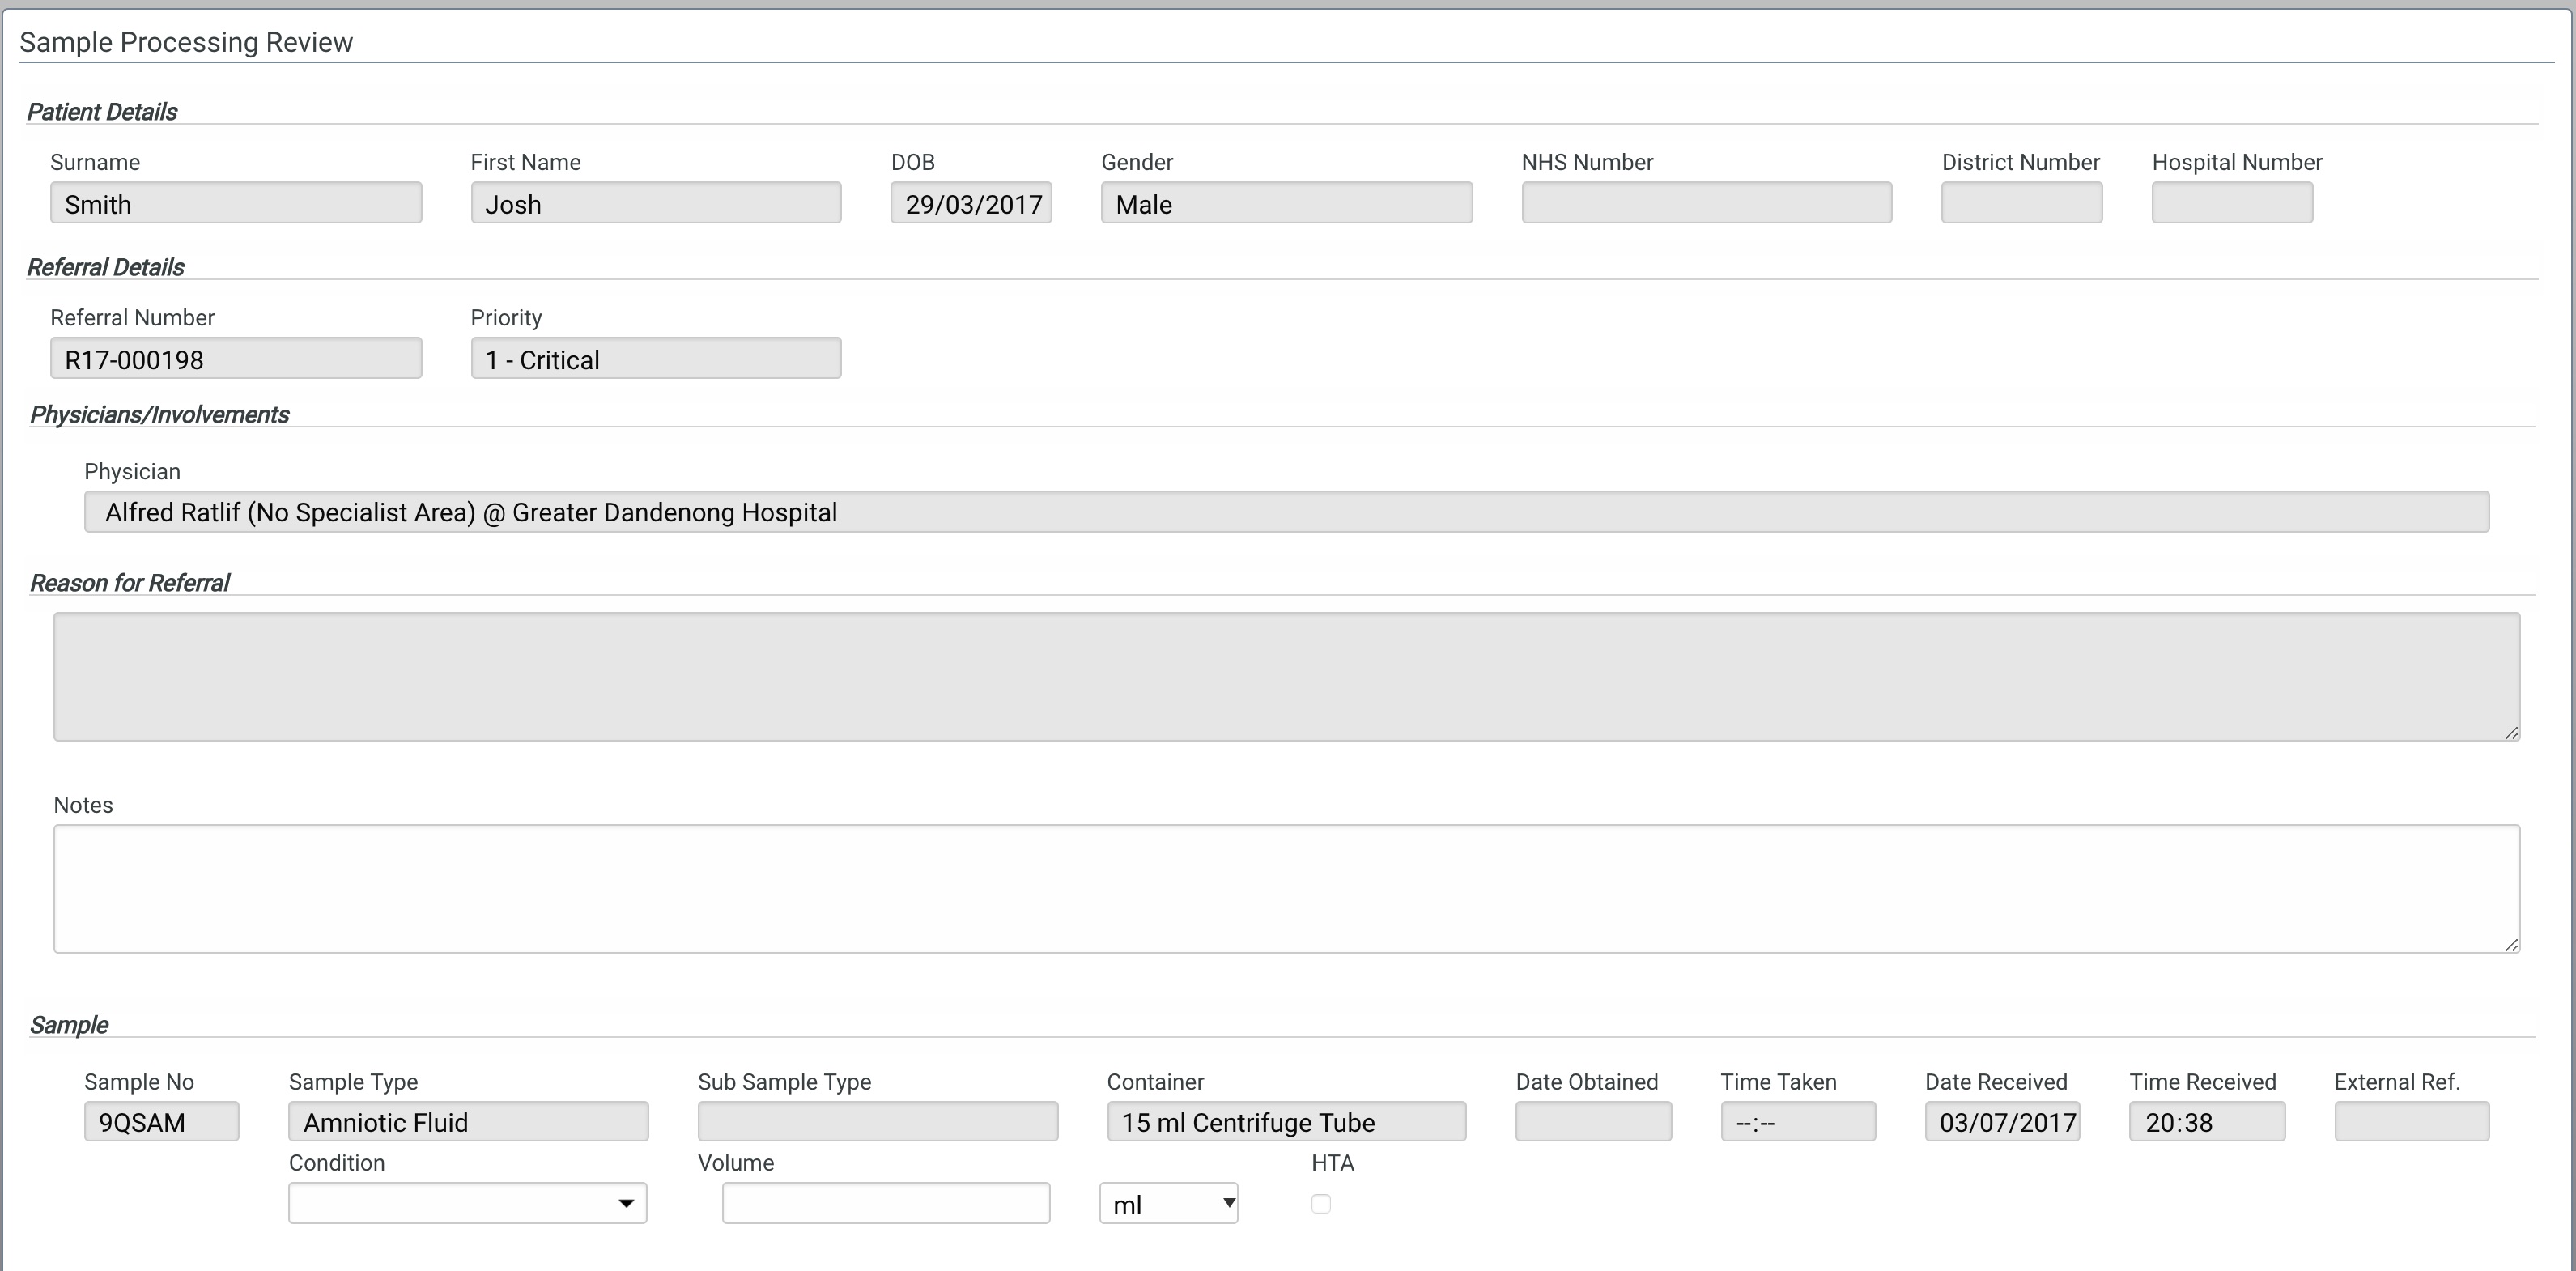
Patient Details
- Surname - The patient’s surname.
- Firstname - The first name of the patient.
- DOB - The date of birth of the patient.
- Gender - The gender of the patient.
- NHS Number - The NHS Number of the patient displayed in the 3-3-4 format.
- District Number - The district number of the patient.
- Hospital Number - The hospital number of the patient.
Referral Details
- Referral Number - The referral number generated by iGene.
- Priority - The referral priority as assigned during the sample processing review.
Physicians/Involvements
- Physician - The physician’s name and location selected when the referral was created.
Reason For Referral
- Reason For Referral - The reason for referral as entered during booking-in.
- Notes - Any notes for the referral. This is the only field which can be edited for the referral.
Sample
- Sample No - The sample number assigned by iGene.
- Sample Type - The sample type entered at booking-in.
- Sub Sample Type - The sub-sample type entered at booking-in.
- Container - The container type entered at booking-in.
- Date Obtained - The date the sample was obtained entered at booking-in.
- Time Taken - The time the sample was taken, entered at booking-in.
- Date Received - The date the sample was received, entered at booking-in.
- Time Received - The time the sample was received, entered at booking-in.
- External Ref - The external reference for the sample, entered at booking-in.
- Condition - A drop down to select the sample condition.
- Volume - The amount of sample which is available.
- HTA - Marks if the sample is subject to the Human Tissue Act.
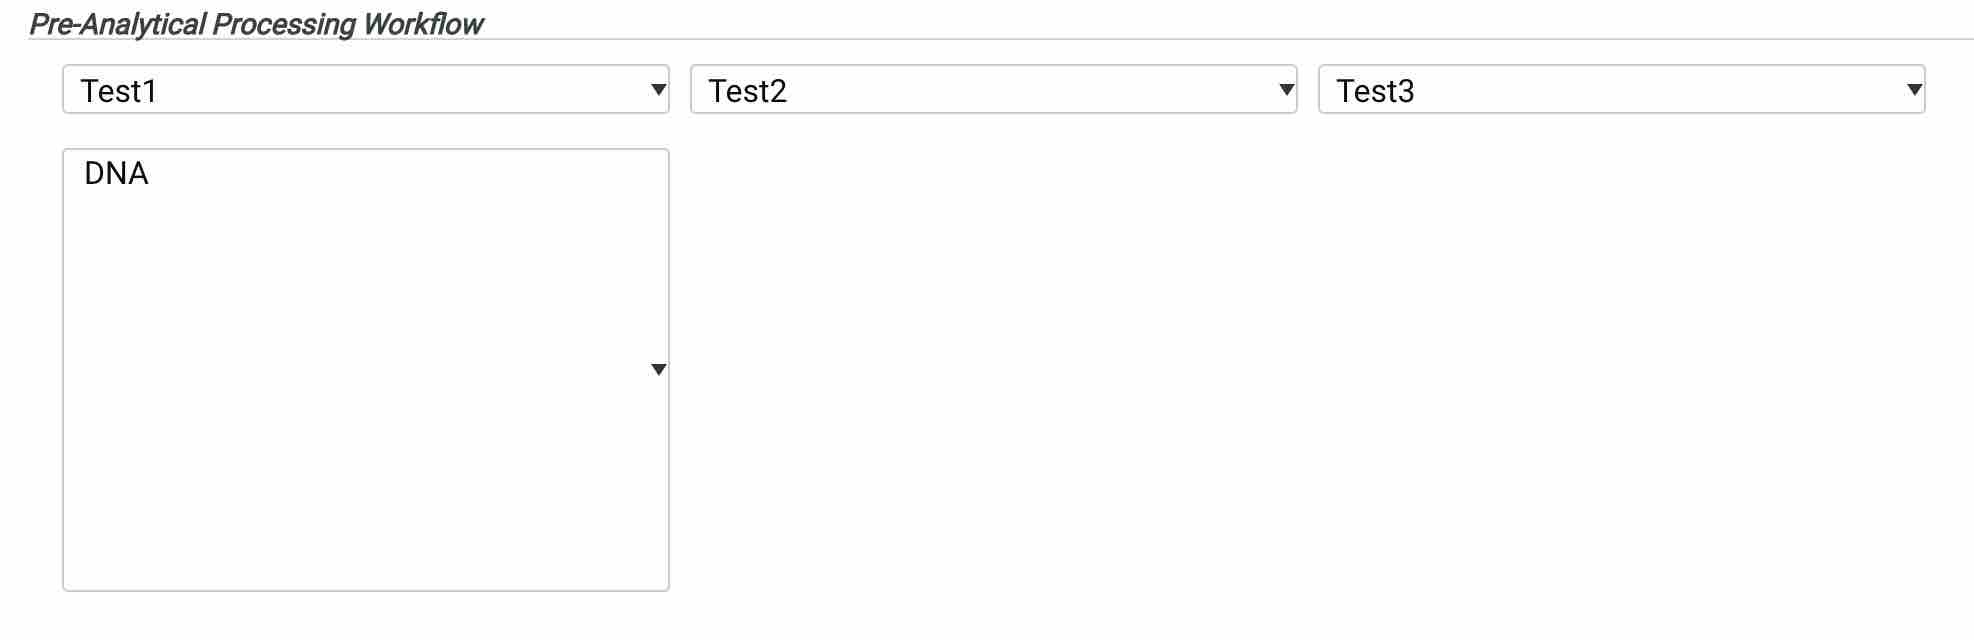
Pre-Analytical Processing
The pre analytical processing section aims to select the path which a sample will flow. The aim is to generate a list of actions to perform on the sample in order to get it to the desired state for the proposed tests.
This method works using a set of dropdown lists which work on a path to select the final group of parent child tests to form the instructions. Initially, there is a single dropdown list for the user to select. This contains the start of the path and is specified by the user performing the disease team allocation process. There can be more than one option in this initial list.

Selecting the option from the first dropdown list will force others to appear to a maximum depth of four drop downs. At each stage, if there is only one option to select from, the next dropdown is automatically displayed in order to avoid the user clicking unnecessarily.

Once the final dropdown is selected, the user is presented with a list of parent tests to select from:
In the box which has appeared, double-click the line which relates to the parent workflow to order items from. In this case, the only option is DNA. This will display the test options to the right of the selection box.
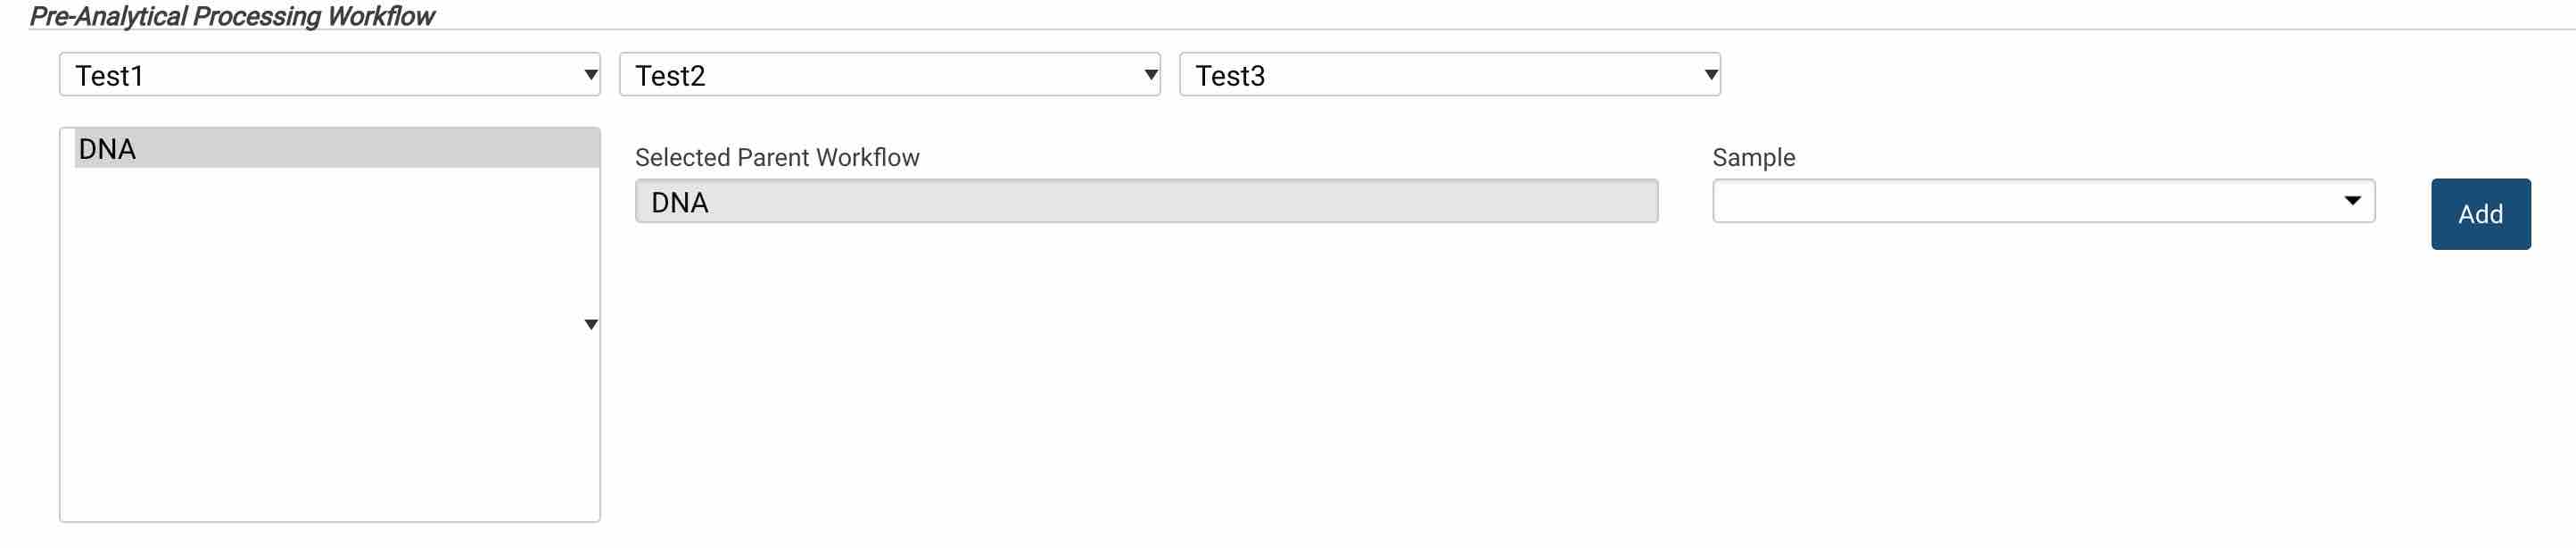
From the options which have appeared, select the sample to perform the test on and click ‘Add’.
If the item selected is a child of the parent path, the parent test is automatically added without a sample assigned to it. This is in order to indicate which path the sample is being progressed down to other users. e.g. an EZ1 Extraction will have a QF-PCR Aliquot. If the user orders a QF-PCR Aliquot orderable then the orderable tree will look like:–EZ1 Extraction
| – QF-PCR Aliquot
The above indicates that the sample will progress down the EZ1 Extraction method but a QF-PCR Aliquot needs to be taken as well.
Once the ‘Add’ button has been pressed, the orderable item moves to the orderable table below it. If it is a child orderable (e.g. QF-PCR Aliquot) then the item is removed from the options to select from. Parent tests remain as they can be triaged again to another sample.

The above image shows that there is a DNA sample to be produced from performing this test. When the ‘Save & Submit’ button is pressed, the output samples are created and are ready to be used.
If the referral is complicated, the user can escalate this to the duty scientist by pressing the ‘Send To Duty Scientist’ button.
On saving the referral, some background tasks run.
Background Tasks
When a referral is saved the following actions take place:
- If the ‘Save & Submit’ button is pressed, the workflow sets the ‘Sample Processing Review’ hold reason to be ‘Completed’.
- The referral is no longer waiting for sample processing review.
- Labels are printed for any output samples which are created from the orderable.
- The user is moved back to the list to select another sample.
If labels fail to print, they can be reprinted from the V1 referral screens.