Searching & Ordering
iGene has a comprehensive and configurable custom search feature which allows lists and tables to be searched and filtered throughout the system. Searching is configurable per user on each screen. This configuration can be either performed by the user or by an administrator with the appropriate permissions.
There are over 14,000 fields within iGene and the majority of them are available to perform searches on, but they are not all selectable at first. This is to limit the amount of options within the search area; allowing the user to find the most important fields without searching through a lot of options.
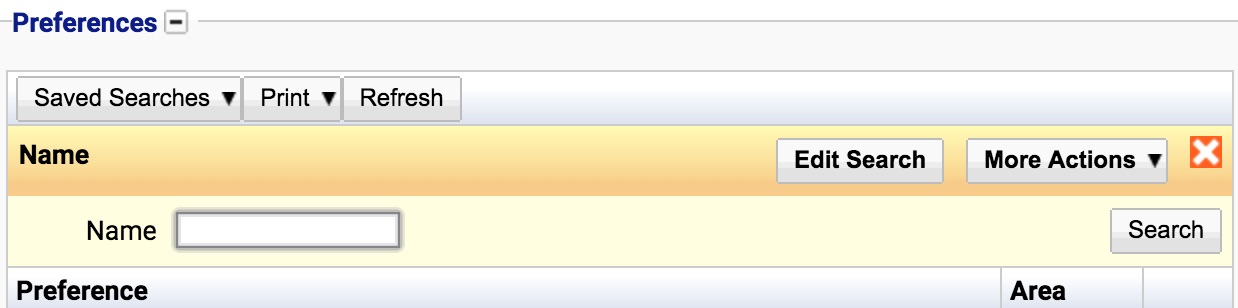
Search filters can be created on tables where the button ‘Saved Searches’ appears (highlighted in the below image). Typically, this is the majority of tables within iGene. The search area on top of a table will look like this without any default searches applied:

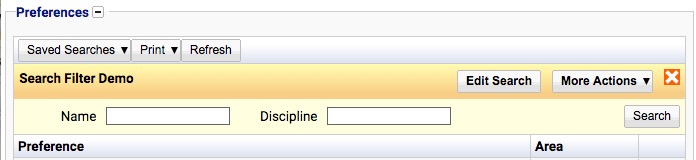
When first navigating to a form, if default searches have been setup either by the user or applied via an administrator, it will look like this:
Click here to find out how to create or remove a default search filter.
Search filters are also used in order to limit data before generating reports e.g. a turn-around-time report can be limited using a search filter to find all the data required before being generated. The same method can also be used to generate CSV files which can be edited in Excel or used to interface with other equipment. See creating reports for more details.
Creating Search Filters
Search filters are created using the following method:
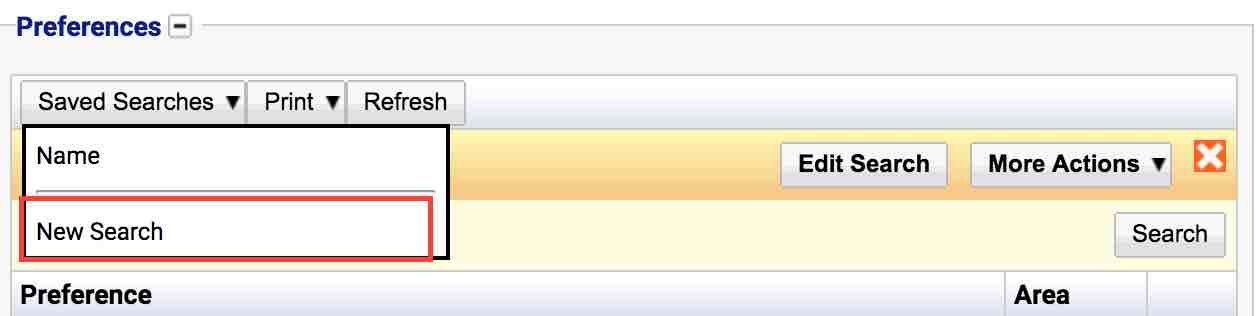
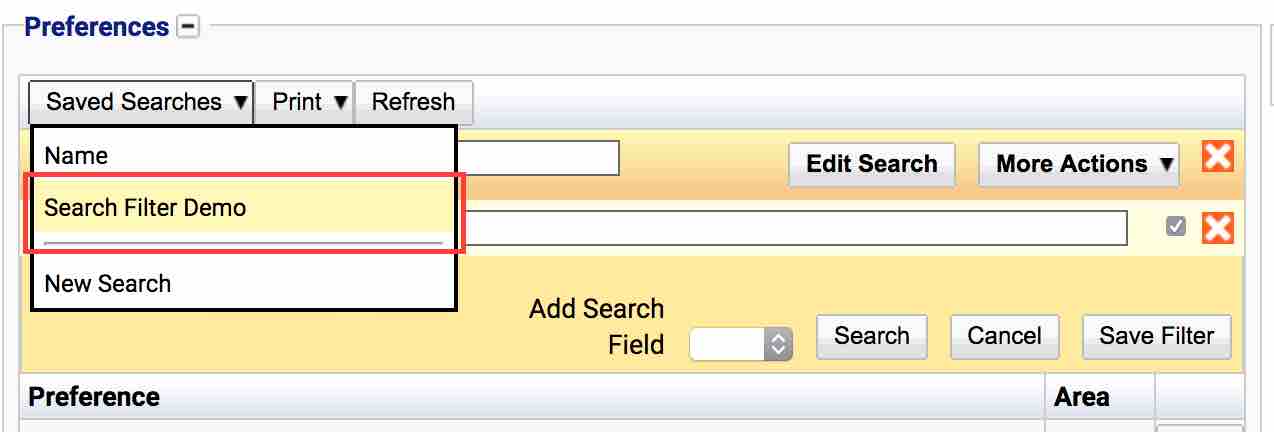
- From a table with the option to create saved searches, click the ‘Saved Searches’ button.
- Select the ‘New Search’ option.
- A selection of fields are displayed to the user.
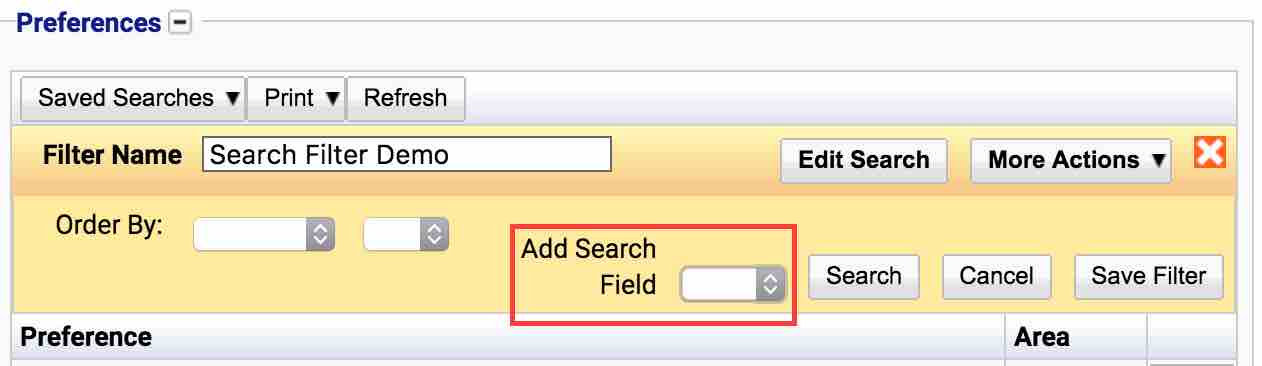
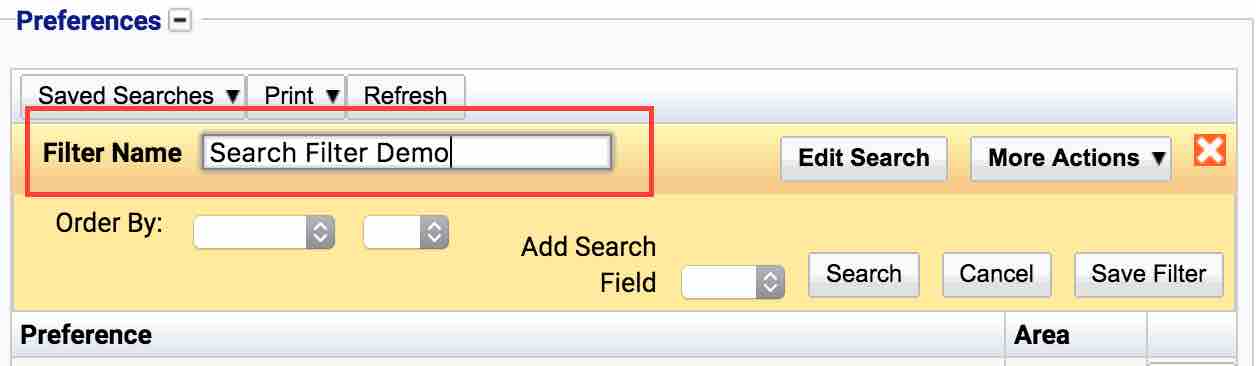
- Begin by entering a name for the search filter. For the purposes of this document, the filter is called ‘Search Filter Demo’.
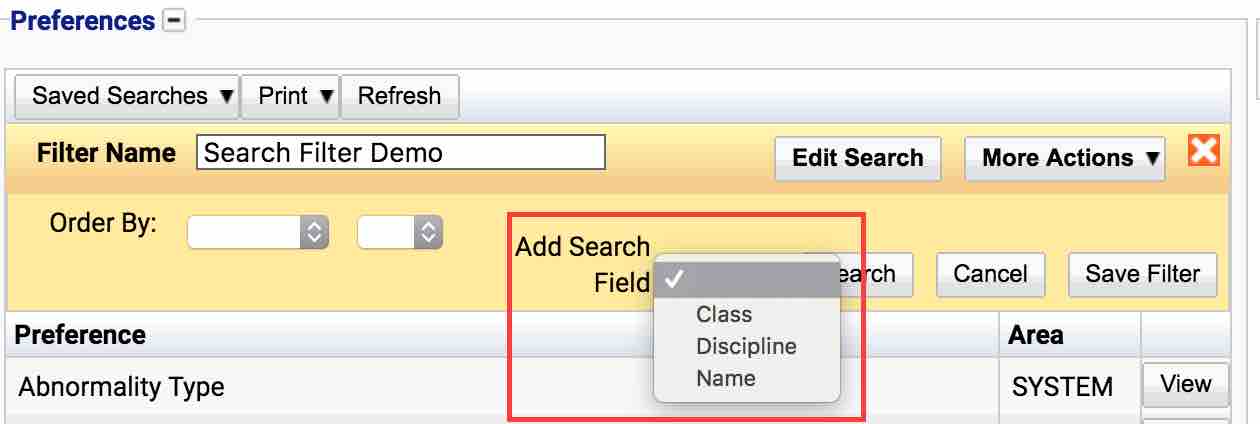
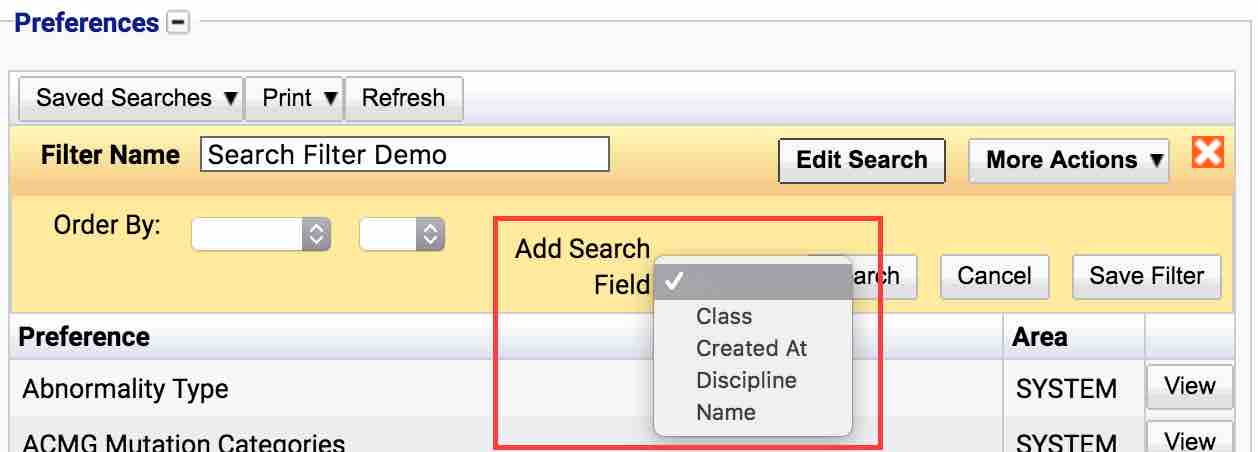
- To Add items to search, click the ‘Add Search Field’ drop down
- From the options, select one of the search fields. To select a search filed here it must have already been set up in System Search Filters preference area. (If the option required is not listed see adding additional fields to search options.)
- A new item will appear in the selected search area.
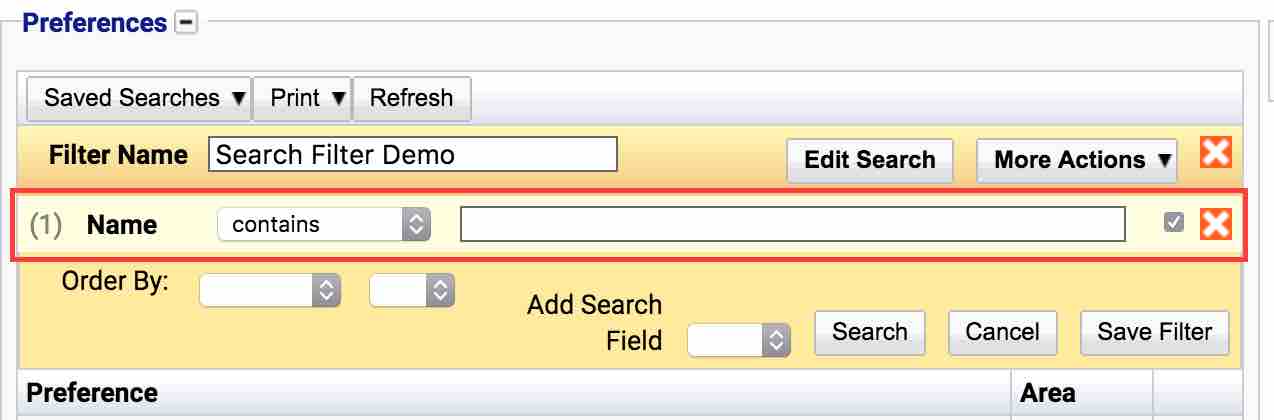
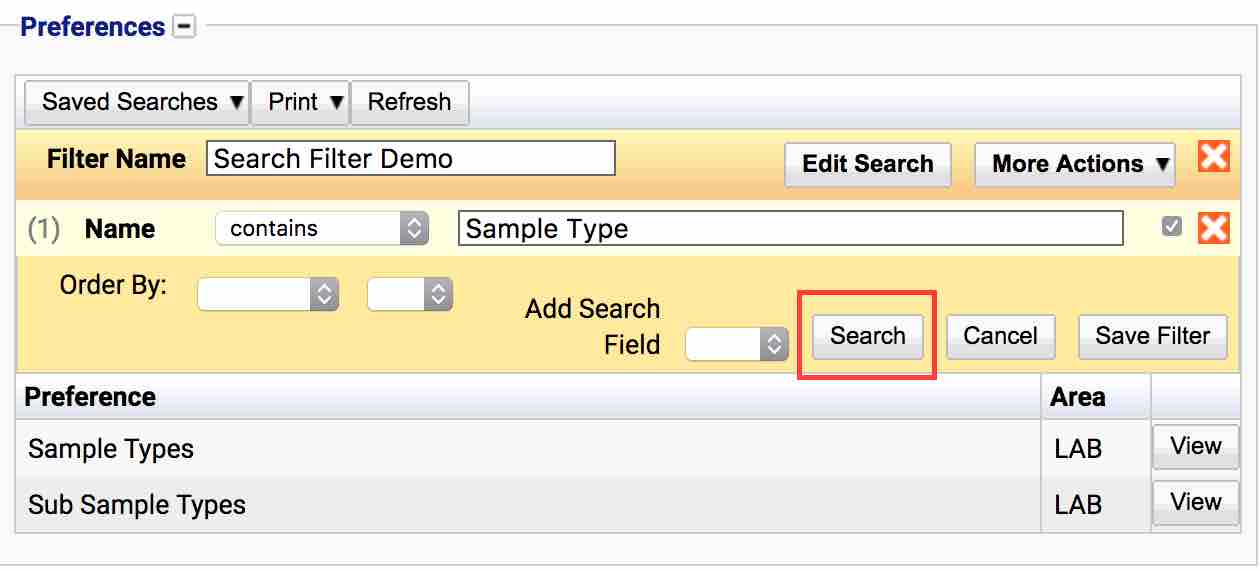
- Type into the new field and press the search button or press the enter key. In the image below, the search term ‘Sample Type’ has been used.
When selecting items to search from, they will not all be in a text box. Options as to what items will be displayed are:
Drop Down Lists
These are lists of specific items. They allow you to select a single item such as a sample type or a specific test. The drop down will display a list of items the user can select from.
Autocompletes
Similar to drop down lists, these display a specific list of single items to the user, such as sample types or specific tests. The advantage an autocomplete has over a drop down list is the user can filter items down by typing into them. Autocompletes are best used for longer lists.
Dateboxes
Date boxes are used to enter date details. These are also used to filter between dates. Further information on this can be found in the filter between dates section.
Checkbox
The checkbox option allows the searching of boolean items (true or false). Examples of this are ‘deceased’ on a patient or ‘active’ on all models.
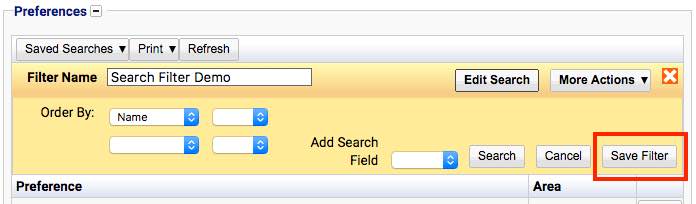
Saving Search Filters
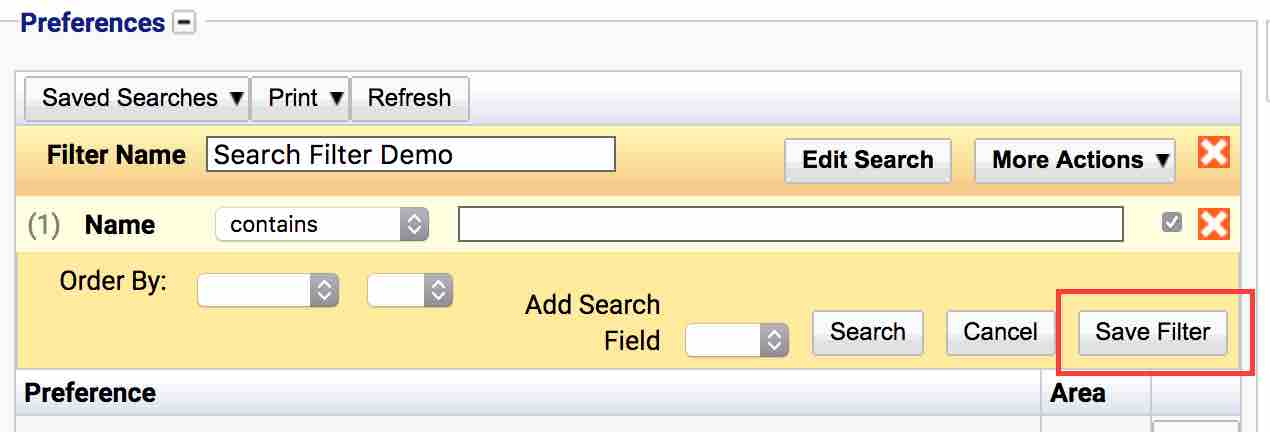
In order to save a search filter, first, begin by creating one. Follow the creating search filters guide. Once a search filter has been created, it can be saved by clicking the ‘Save Filter’ button.
The search filter will now be available to select from the ‘Saved Search’ button. Click on the ‘Saved Searches’ button and select the search with the name it was called after following the create search filters guide.
In order to make sure that the filter is blank whenever it is selected, ensure that all text fields, drop downs and autocompletes are set to blank values or empty before pressing save.
Setting A Default Search
Begin by following the creating a search filter and then saving a search filter guides to create a filter which you wish to make default.
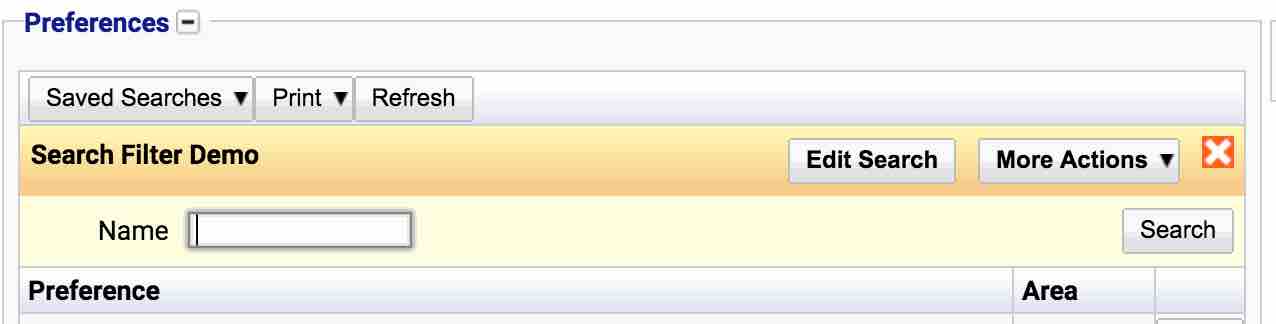
- From the screen that the default needs to apply e.g. Preferences. Select the search filter from the ‘Saved Searches’ button.
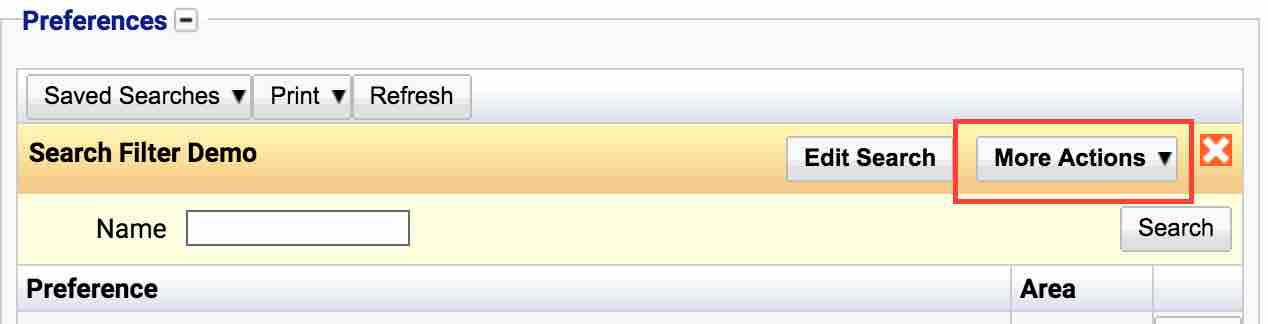
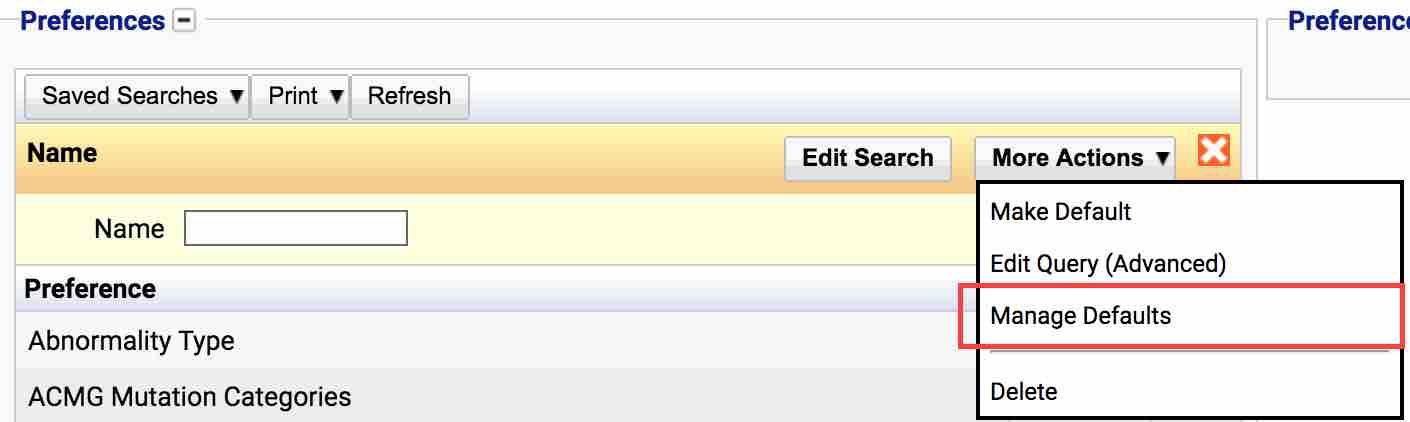
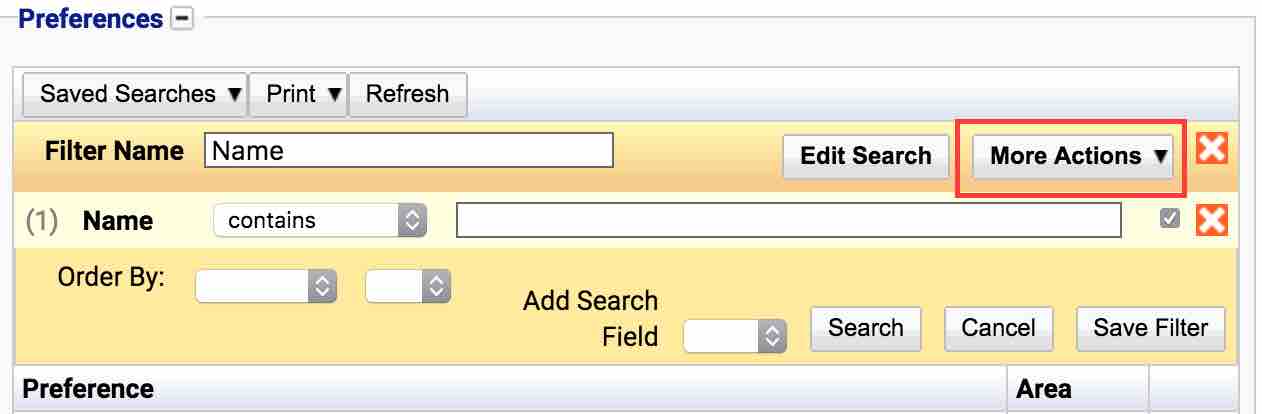
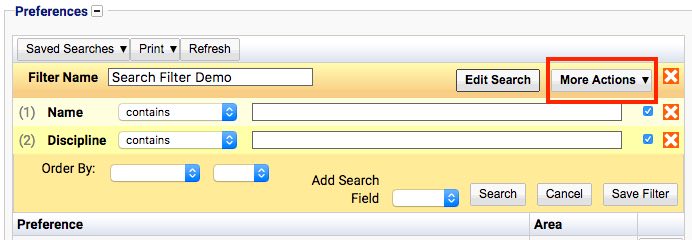
- Click the ‘More Actions’ button to the top right of the panel which is revealed.
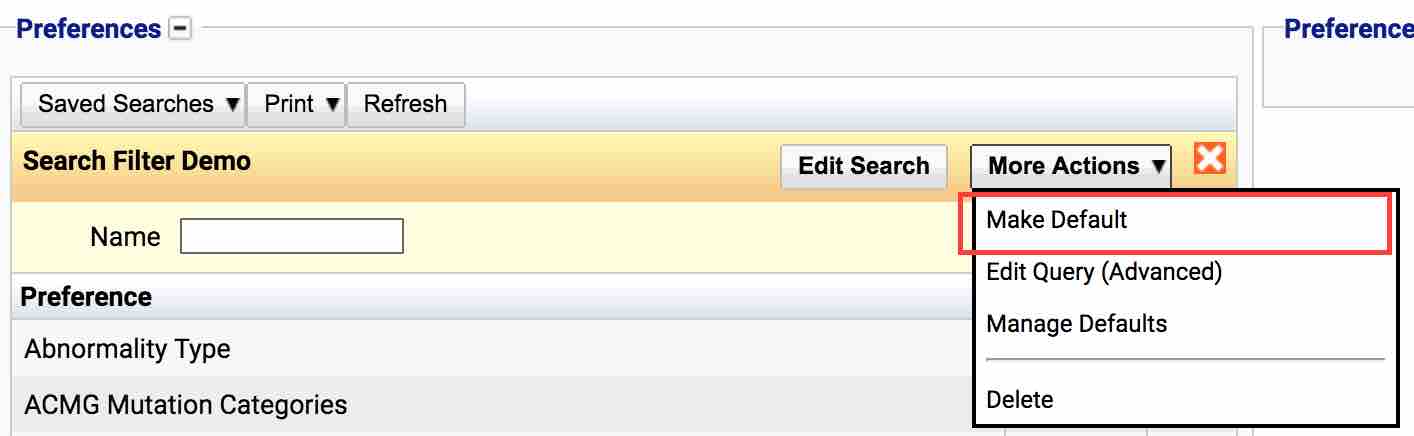
- Select ‘Make Default’ from the list.
Whenever the screen is shown, that search filter will be the default for that table.
Using Existing Saved Searches
In order to use a saved search which has either been configured by the user or assigned by an administrator:
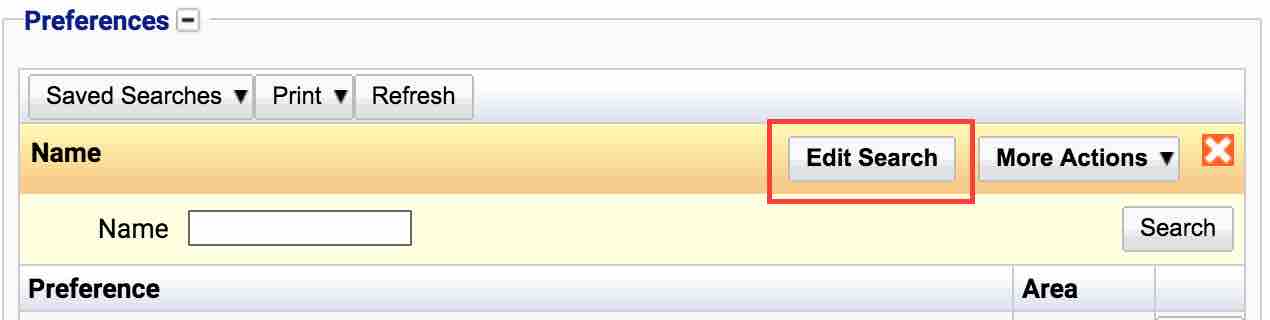
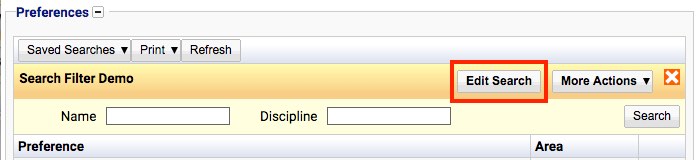
- From the location to search within e.g. Preferences. Select the search filter from the ‘Saved Searches’ button. Press the ‘Edit Search’ button.
- Complete the details within the search and either press Enter or press the ‘Search’ button.
Assigning Existing Saved Searches
Saved searches can be configured by administrators of iGene and assigned to users as either a default search (if the user does not already have one setup) or an option for the user to select from the Saved Searches button. First, begin by creating a search filter and then save the search filter using the saving search filters instructions.
To assign a search filter to any user who does not have one setup for that particular screen:
- From the search screen that the default needs to apply e.g. Preferences. Select the search filter from the ‘Saved Searches’ button.
- Click on the ‘More Actions’ button to the top right of the panel which is revealed.
- Select the ‘Manage Defaults’ option
- A modal popup window will appear in the center of the screen.
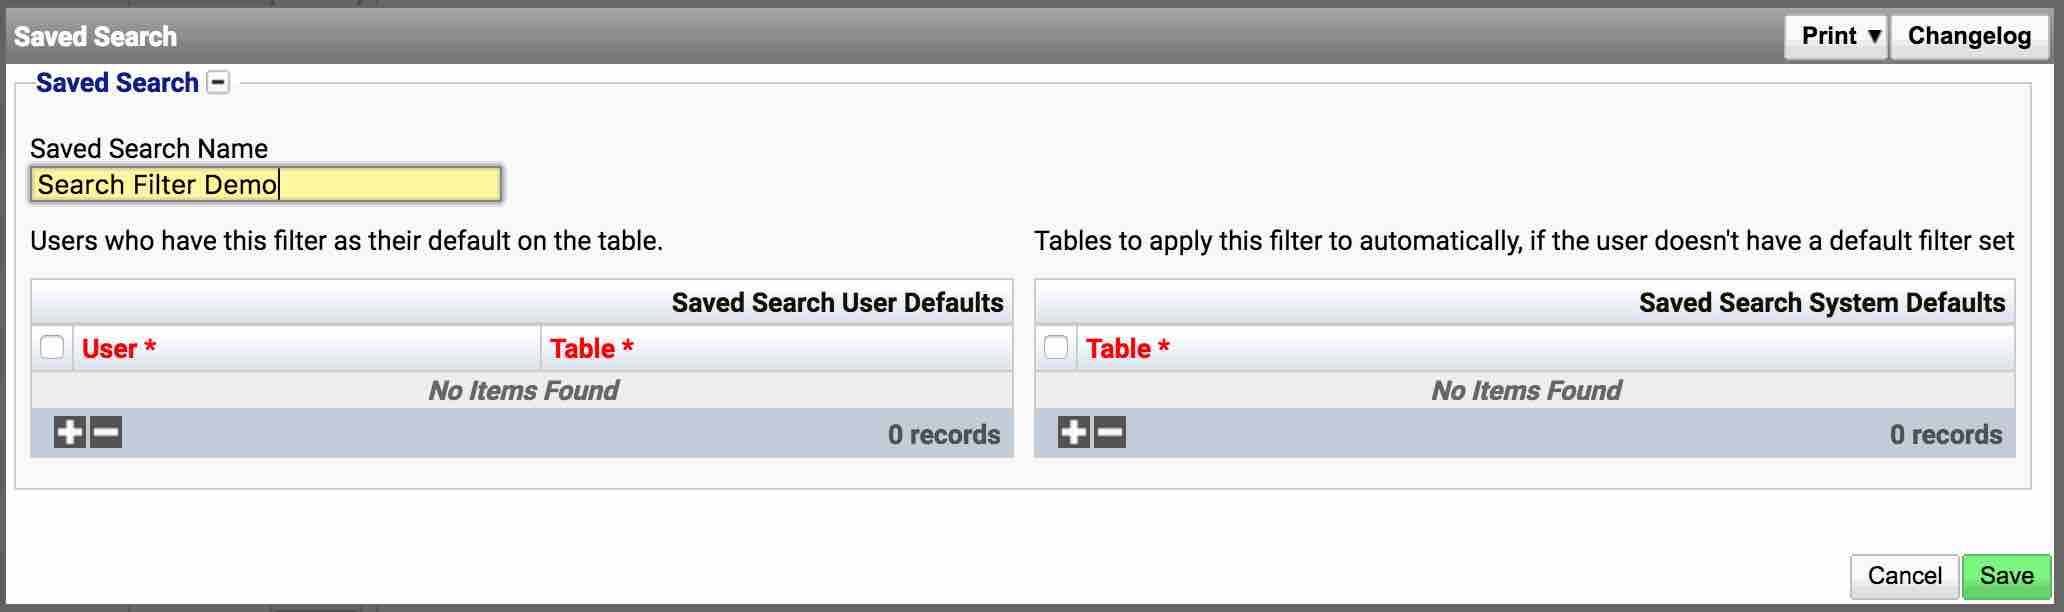
Within this popup two tables are used to specify which option to apply the search filter. The filter can be applied;
Per User The search filter can be applied to a specific user if you want that individual to share the same default search filter. To do this:
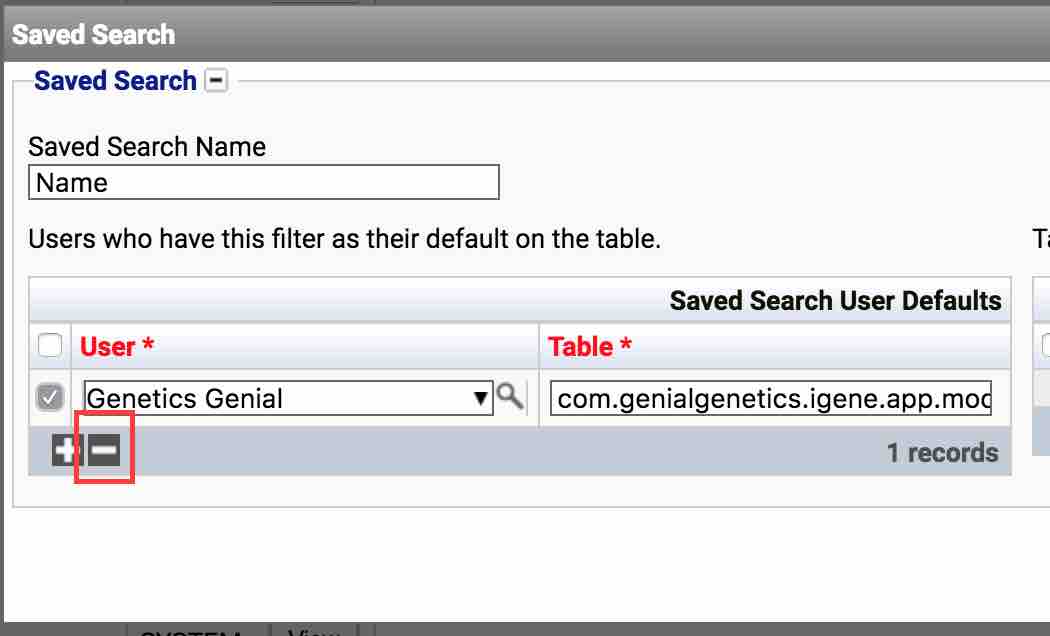
- Click the plus button at the bottom of the table on the left side of the popup window.

- A new line will appear in the table. Using the highlighted autocomplete, type the user into this box.
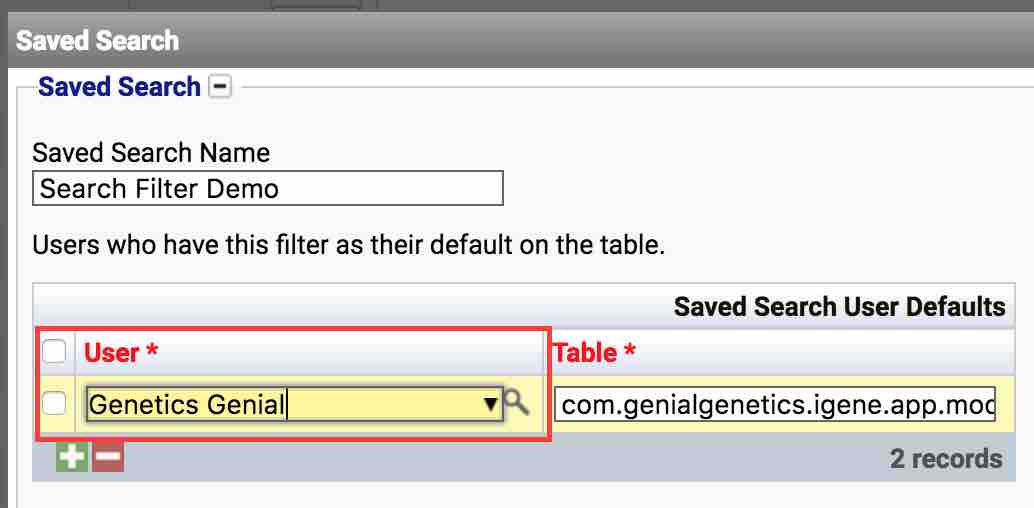
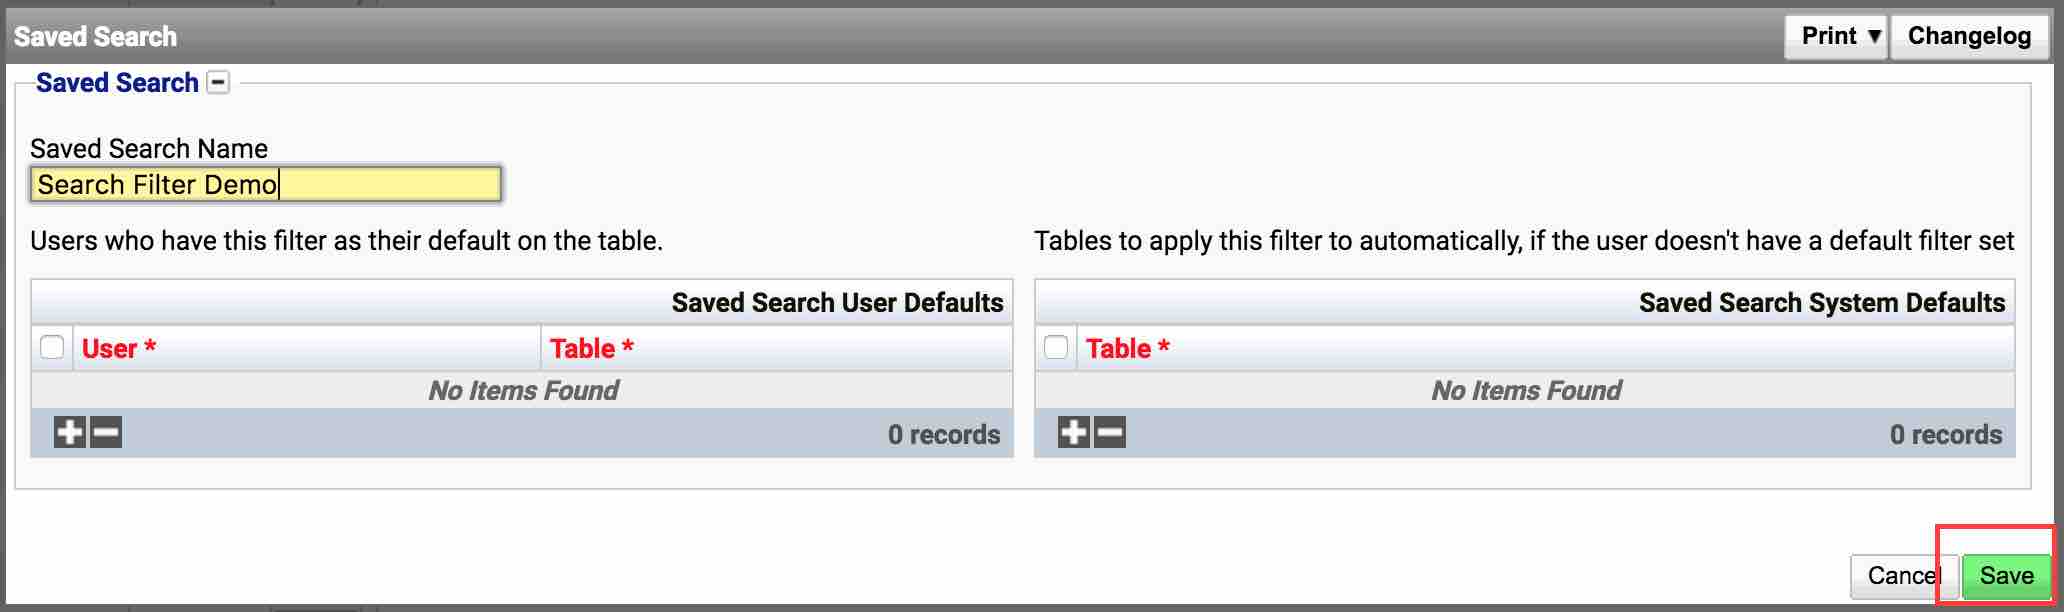
- Then press the save button in the bottom right of the popup window.
All Users: The search filter can be applied to all users who do not already have a default search filter setup for that location. To do this:
- Click the plus button at the bottom of the table on the right side of the popup window.

- A new line will appear in the table. Nothing needs to be changed within this line.
- Then press the save button in the bottom right of the popup window.
Removing Default Search Filters
If the user no longer wants to have the default search filter set at that location, it is possible to remove this without deleting the filter completely.
- Load the location up. The default search filter will already be applied when the user views this page.
- Select the ‘More Actions’ button to the top right of the search
- Select ‘Manage Defaults’
- A modal popup window will appear in the center of the screen.
- In the left hand table, start by ticking the checkbox next to the users name
- Click the minus button at the bottom of the table
- Finally, press the save button in the bottom right of the popup window.
The search filter will still appear but the next time the user navigates to that location, the default will not be applied.
To replace a default search filter, simply follow the setting a default search process. There can only be one default search filter per location so it will replace the current default.
Deleting Search Filters
Deleting a search filter from the list of ‘Saved Searches’ can be performed from the location which that search filter can be used. To do this:
- Click the ‘Saved Searches’ drop down and select the search filter that needs to be removed.
- Click on the ‘More Actions’ button to reveal the options.
- Click on ‘Delete’
- A confirmation box is displayed to confirm that the user wishes to do this.
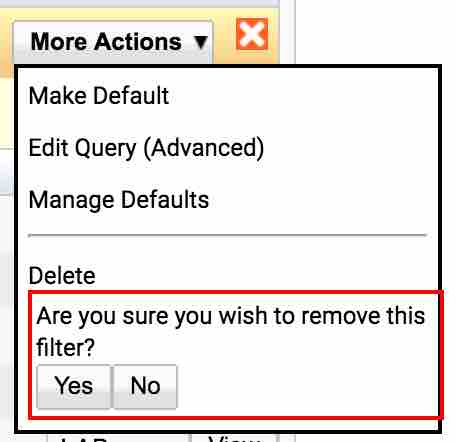
- Click ‘Yes’ to delete the search filter.
If the user did not create the search, the user will not be able to delete the search. Only the user who created the search can delete it by this method.
Making A Search Publicly Available
The action to make a search publicly available can only be performed by a user with access to the ‘Administration’ area of iGene.
- Begin by making a note of the search name and the screen which you wish to make that search available on.
- Navigate to Administration > Saved Searches’
- Either navigate through the table using the arrows to select a search by name or create a search filter to search based on the name.
- Once the user has located the saved search within the list, click the ‘View’ button to the right of the line

- A modal popup window will appear in the middle of the screen.
- Within the popup, click on the visibility drop down
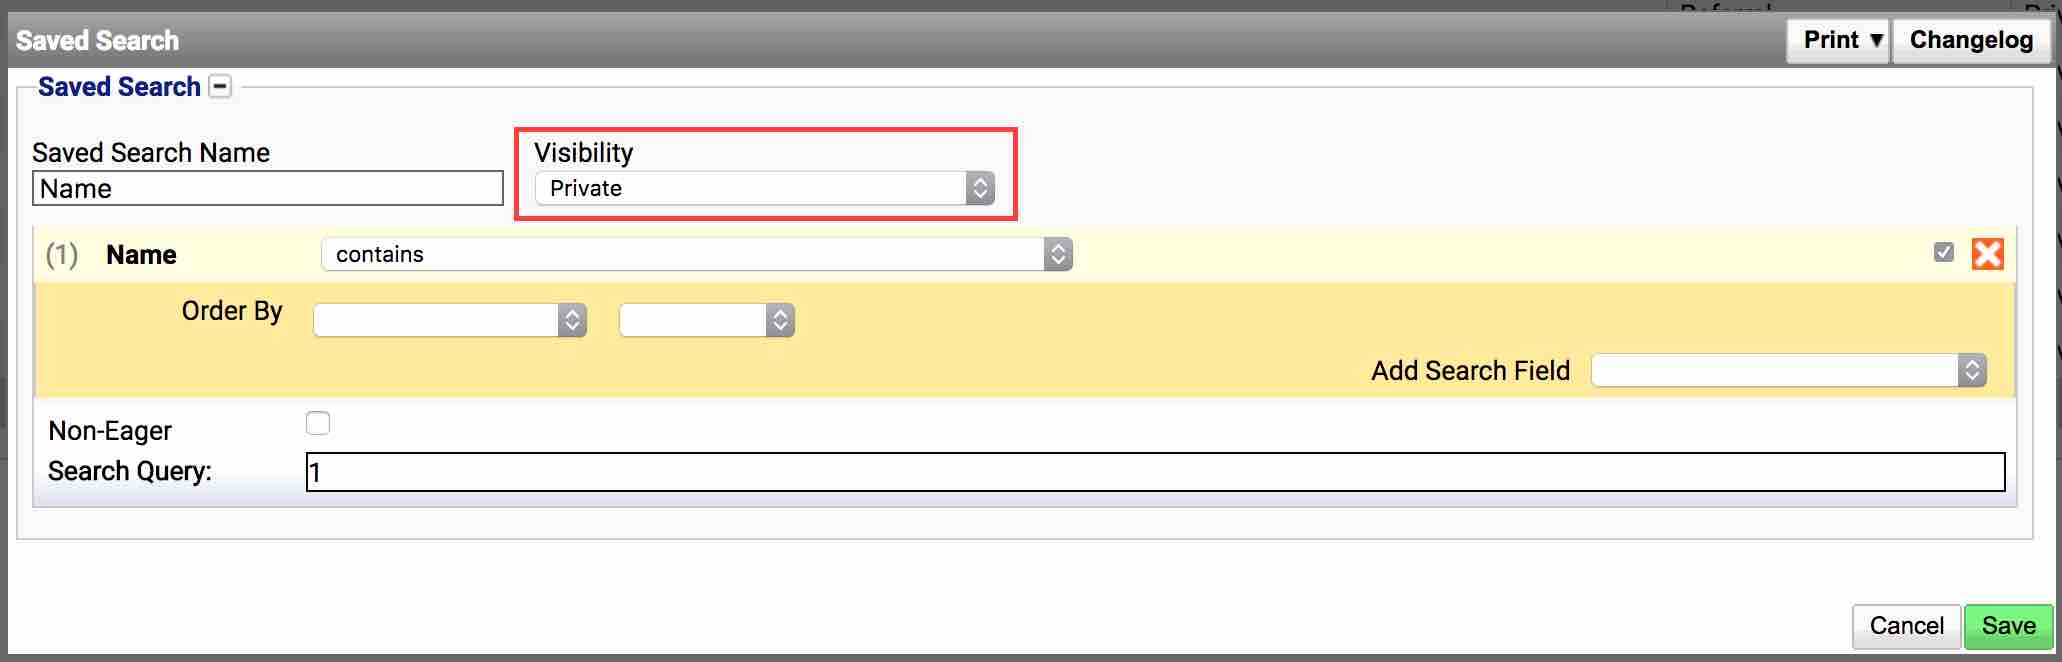
- Select ‘Public (OU)’ from the drop down
- Save the search filter by clicking the green ‘Save’ button in the bottom right of the popup window.
Editing Searches - Adding Fields
Search filters can be edited from the screens on which they were created.
- Click the ‘Saved Searches’ drop down and select the search filter that needs to be changed.
- In the top right of the search which has appeared, select the ‘Edit Search’ button.
- To Add items to the search, click the ‘Add Search Field’ drop down
- From the options, select one of them (if the option required is not listed see adding additional fields to search options)
- A new item will appear in the selected search area.
- Save the search filter by pressing the ‘Save Filter’ button.
Editing Searches - Removing Fields
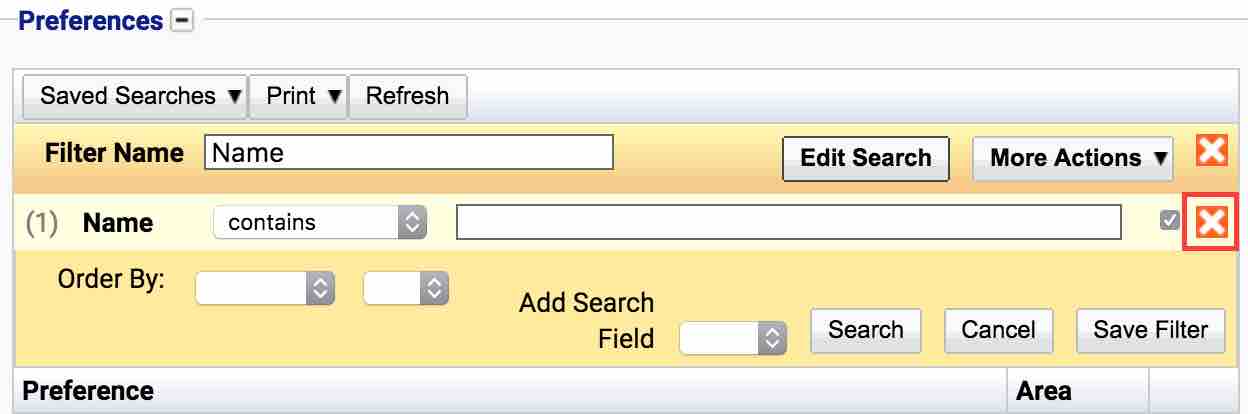
Remove a search field which has been added by clicking the cross at the right of that field.
Stop Using Current Search Filter
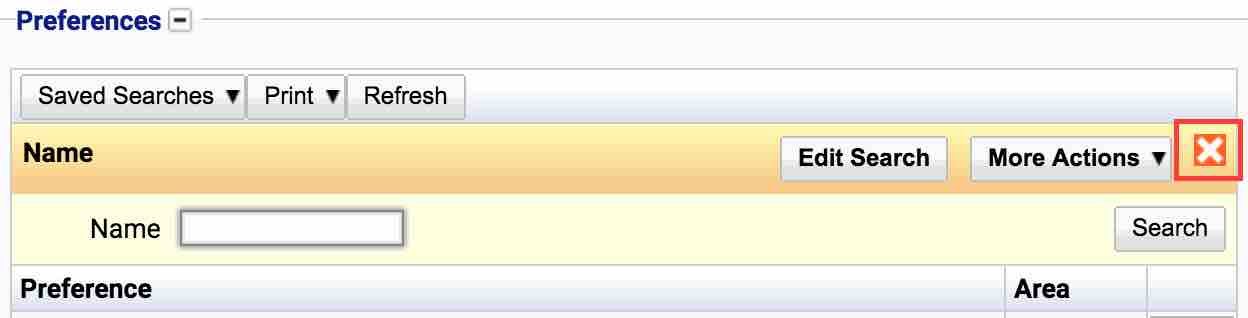
To remove the current search filter, click on the cross to the top right of that search filter. This will remove it from the table but it will not delete it.
Non-Eager Searching
A non-eager search will not perform the search process until the search criteria are completed. This means that a table will load without any data and force the user to search for what they want. The opposite of this, an eager search, will return all the records and allow the user to filter them down using the search criteria.
To set a search as ‘non-eager’:
- Click the ‘Saved Searches’ drop down and select the search filter that needs to be changed.
- In the top right of the search which has appeared, select the ‘Edit Search’ button.
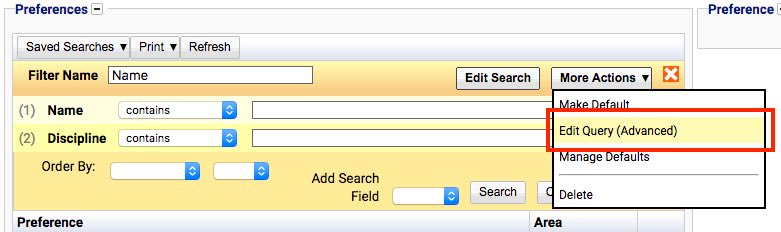
- Next, select the ‘More Actions’ button
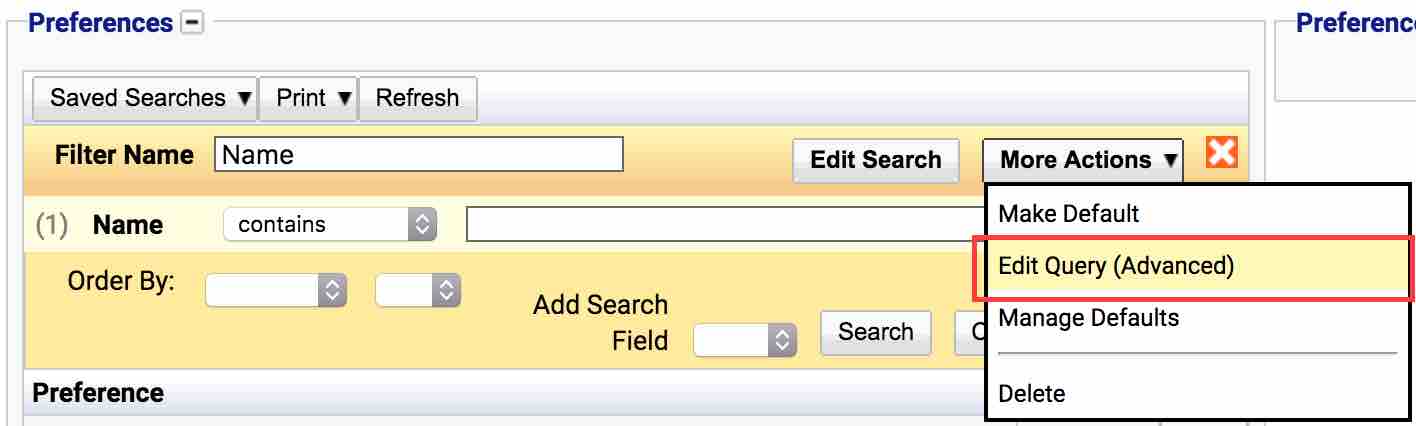
- Select ‘Edit Query (Advanced)’
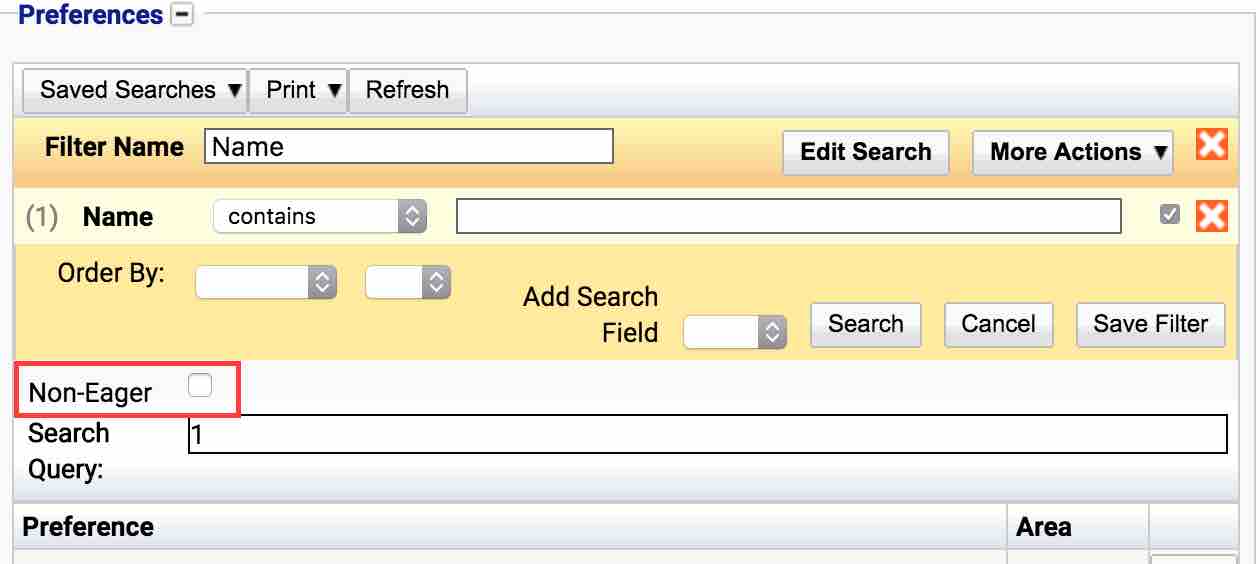
- More options become available.
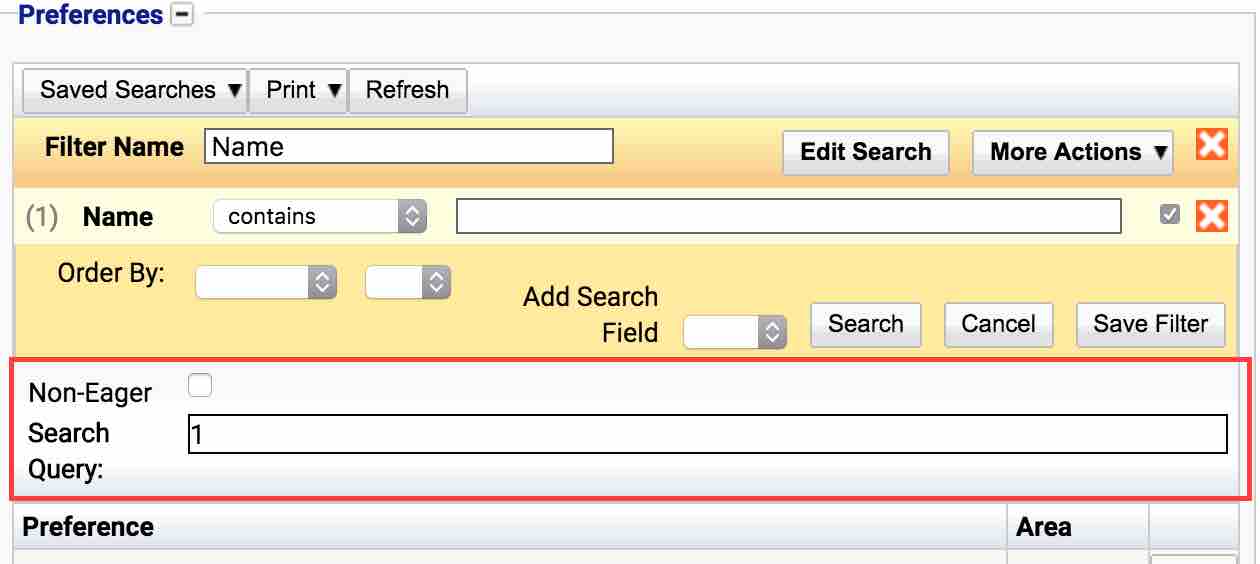
- Check the ‘Non-Eager’ checkbox
- Save the search Filter
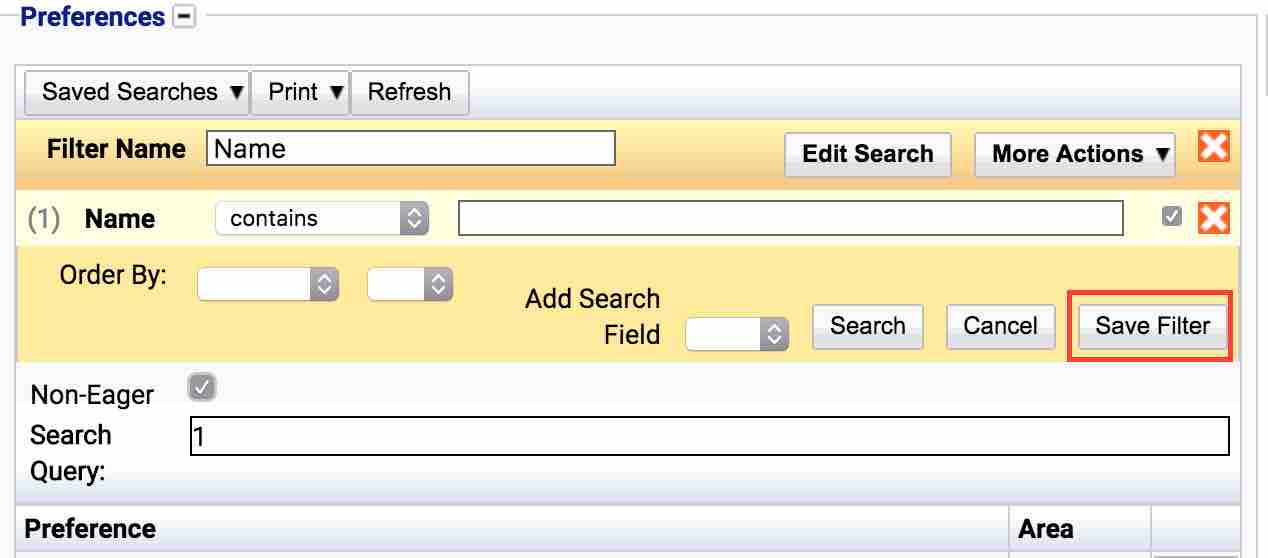
The next time the user goes to that location (if the search is a default) or the search is selected, it will not perform a search until the criteria are completed and the enter key/search button is pressed.
Searching For More Than 1 Option
Should the user wish to search for more than 1 options, you can add multiple items. See the editing searches - adding fields section for how to add more fields.
Searching Between Date Ranges
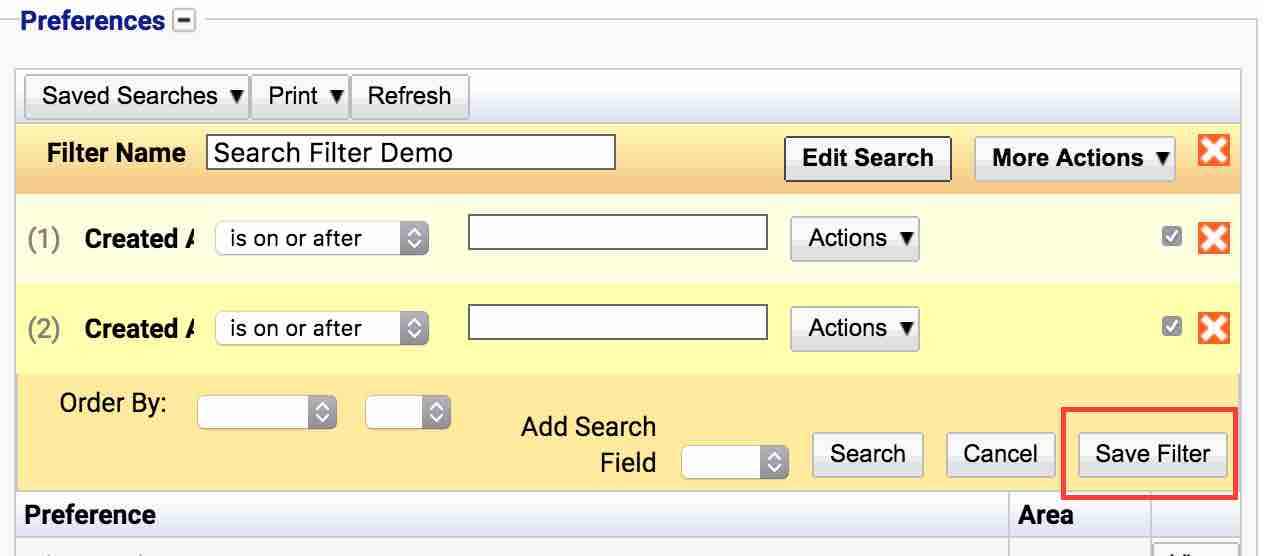
It is possible to search between date ranges within iGene. This is performed by adding 2 of the same type of search field. To begin with, a new search filter will be created.
For the purposes of this guide, the preference area is being used. In order to make the screenshots relevant, the ‘createdAt’ field has been added to the ‘Add Search Field’ drop down. To do this, see the adding additional fields to search options section.
- From a table with the option to create saved searches, click the ‘Saved Searches’ button.
- Select the ‘New Search’ option.
- A selection of fields is displayed to the user.
- Begin by entering a name for the search filter. For the purposes of this document, the filter is called ‘Search Filter Demo’.
- To Add items to search, click the ‘Add Search Field’ drop down
- From the options, an item which is a date field. Typically these have the word ‘date’ in the field name. (if the option required is not listed see adding additional fields to search options)
- In this case, selected ‘Created At’
- Repeat step 5 and 6
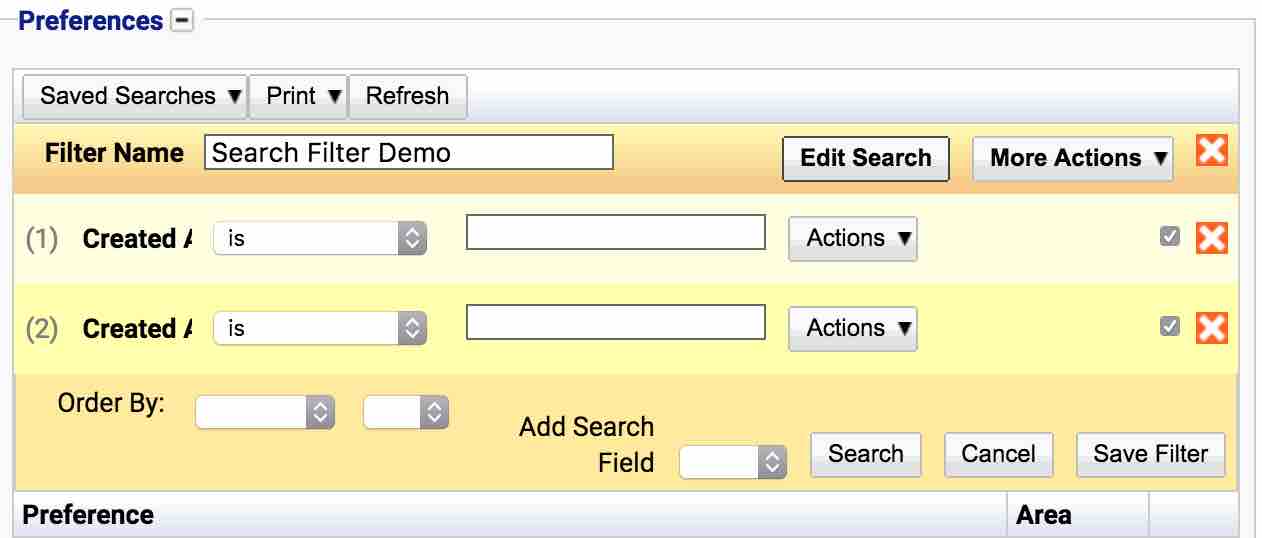
- The search screen should now look like this. Note the 2 options that were just added.
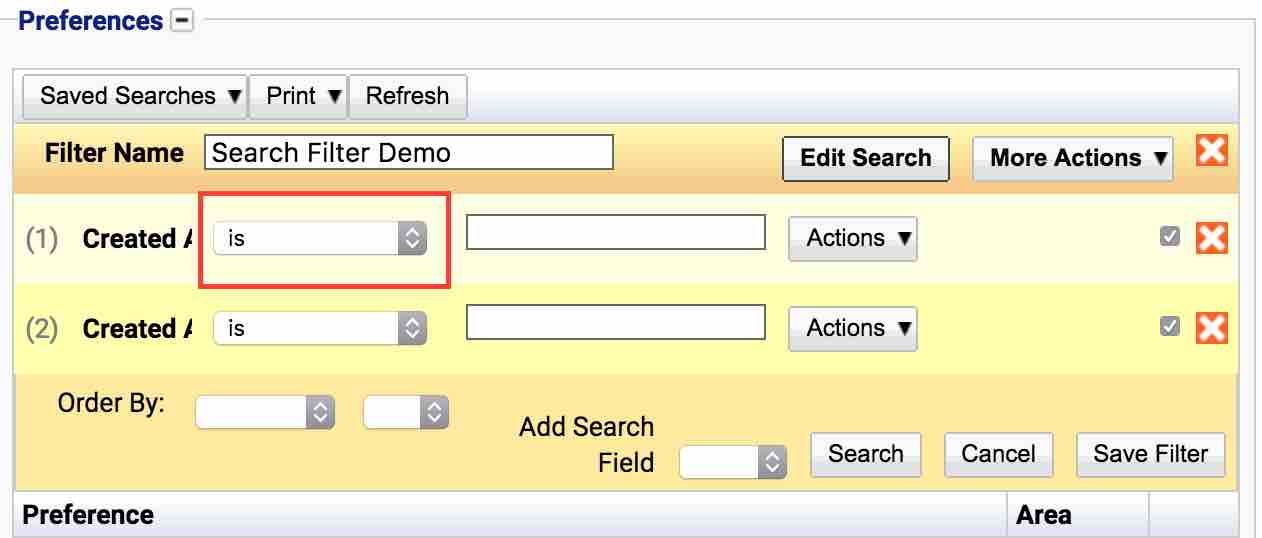
- Each of the fields has an dropdown box next to the field name. On the first one, click the dropdown box.
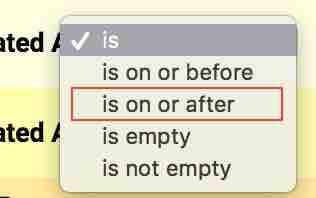
- For the first one. Select ‘Is On Or After’.
- Repeat step 10 but for the second dropdown list.
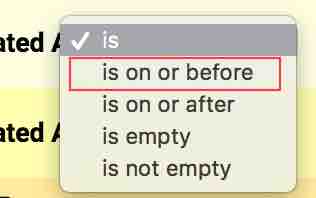
- For the second date item, click ‘Is On Or Before’
- Save the date range Filter
Changing the name displayed in the search filter makes this type of search much easier to understand. For example, changing the two names that say Created At, to one that says From and one that says To. See Renaming Fields for more information.
Other options are available for date filters. By Pressing the actions button next to the filter line in ‘Edit Filter’ view the user is presented with more options.
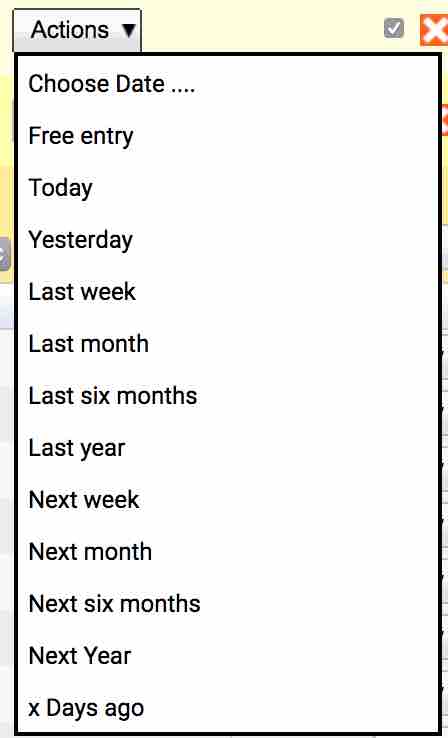
Details of these options are:
- Free Entry - Allows the user to enter any date string they require.
- Today - Will always be the current date.
- Yesterday - Will always the previous date.
- Last Week - Will be 7 days prior to the current date.
- Last Month - Will be the month before the current date.
- Last Six Months - Will be 6 months before the current date.
- Last Year - Will be the year previous to the current date.
- Next Week - Will be the current date 1 weeks into the future.
- Next Month - Will be the next month after the current date.
- Next Six Months - Will six months after the current date.
- Next Year - Will be 12 months after the current date.
- x Days ago - A custom value for x days before the current date. See the below note about minus numbers.
Confusing as it may be, setting x Days ago to a minus number changes it do be days in the future. This can be very useful. For example, show all the orderable (tests) which are due in three days time.
These values can be changed without going into the edit screen for the search filter.
Changing Search Type
A dropdown list displays next to each item added to a search filter. This allows the behaviour to be changed of the search. Options are:
- Contains - Where the text entered in a textbox is within the search field selected. For example searching for “stan” in “constantinople”.
- Does Not Contain - Where the text entered in a textbox is not within the search field selected.
- Sounds Like - Where the text entered in a textbox is similar to the value entered. This uses the Soundex function.
- Equal - Where the text entered exactly matches the value in the search field selected.
- Not Equal - Where the text entered does not match the value in the search field selected.
- Starts With (Recommended For Text Fields) - Where the search field selected starts with the value entered. This is the fastest search method and ideally, should be the default.
- Does Not Start With - Where the search field selected does not start with the value entered.
- Ends With - Where the search field selected ends with the value entered.
- Does Not End With - Where the search field selected does not end with the value entered.
- Is (datebox only) - This will take the exact field.
- Is On Or After (datebox only) - Takes the value in the field and searches for anything on that date or in the future.
- Is On Or Before (datebox only) - Takes the value in the field and searches for anything on or before that date.
- Is Empty - Searches for any items where the specified field is empty.
- Is Not Empty - Searches for any items where the specified field is NOT empty.
Date Box Shortcuts
The date boxes within iGene and the search area are able to use some short codes.
- T Key - Pressing the T key whilst in the date box will complete it with today’s date.
- Y Key - Pressing the Y key whilst in the date box will complete it with the previous day’s date.
- Arrow Up - Pressing arrow up will move one day forward.
- Arrow Down - Pressing arrow down will move one day back.
Advanced Search Options - AND/OR
It is possible for a user to require a search to look for x and y. This is the default behaviour for all search filters. However, sometimes it is beneficial to use an x OR y option. For example, where the test type is ‘Chromosome Analysis’ OR ‘FISH’.
To do this:
- Click the ‘Saved Searches’ drop down and select the search filter that needs to be changed.
- In the top right of the search which has appeared, select the ‘Edit Search’ button.
- Next, select the ‘More Actions’ button
- Select ‘Edit Query (Advanced)’
- More options then become available.
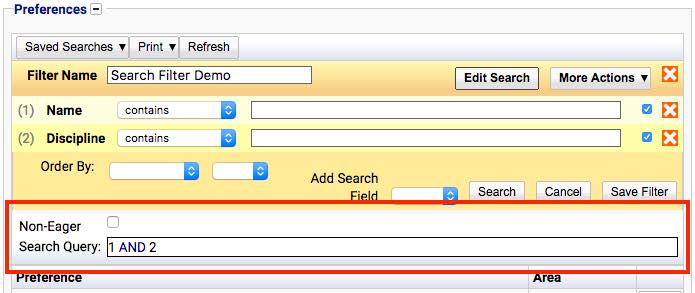
- In the ‘Search Query’ text box which is shown, it will say 1 AND 2

The 1 AND 2 refers to the (1) and (2) search fields
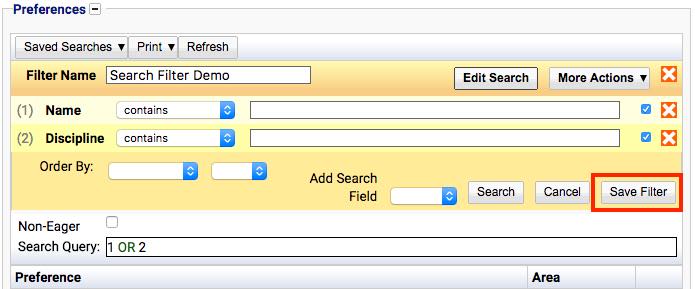
- Change the AND to be OR

- Save the search Filter
Using this, it is also possible to group items together, for example:
(1 OR 2) AND 3
(1 OR 2) AND (3 OR 4)
Renaming Fields
When using dates, it is advantageous to rename items. Such as ‘Created Date From’ and ‘Created Date To’. This can be performed on the search filters to give each field a meaningful name.
- From a table with the option to create saved searches, click the ‘Saved Searches’ button.
- Select the ‘New Search’ option.
- A selection of fields is displayed to the user.
- Begin by entering a name for the search filter. For the purposes of this document, the filter is called ‘Search Filter Demo’.
- To Add items to search, click the ‘Add Search Field’ drop down
- From the options, select one of them. If the option required is not listed see adding additional fields to search options.
- A new item will appear in the selected search area.
- Locate the area which is highlighted in red and click on it.
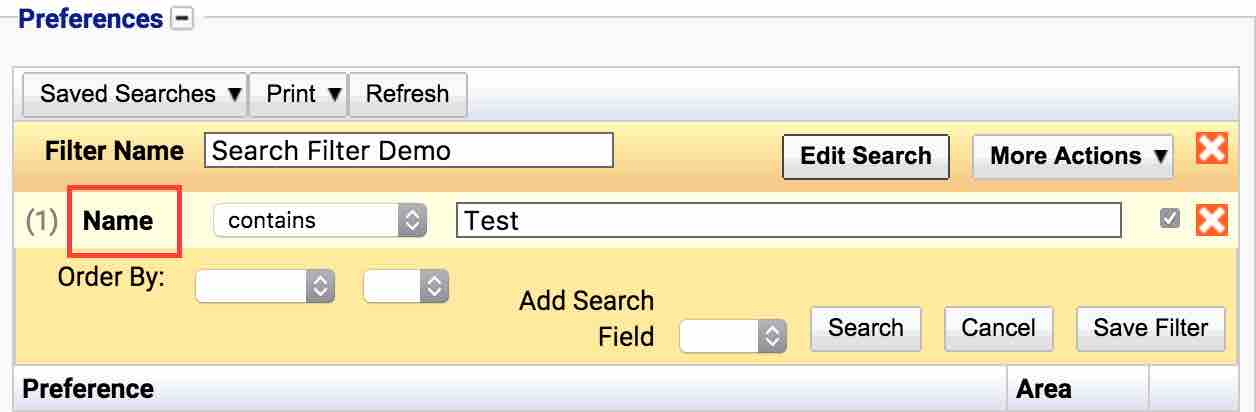
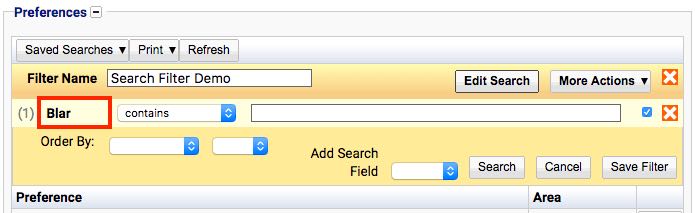
- Change the text within the box to the required value.
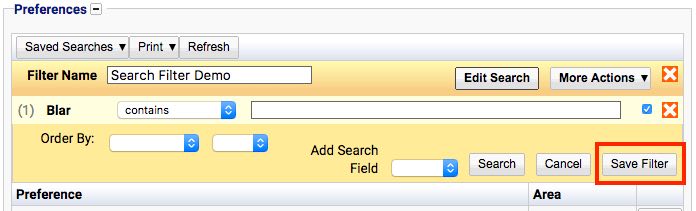
- Save the search filter by clicking the ‘Save Filter’ button.
Hiding Options
At times, it may help to assign search filters which cannot be changed or with fields which do not need to be changed per search. These types of filters are generally used for limiting items to specific tests or specific tasks.
- From a table with the option to create saved searches, click the ‘Saved Searches’ button.
- Select the ‘New Search’ option.
- A selection of fields is displayed to the user.
- Begin by entering a name for the search filter. For the purposes of this document, the filter is called ‘Search Filter Demo’.
- To Add items to search, click the ‘Add Search Field’ drop down
- From the options, select one of them (if the option required is not listed see adding additional fields to search options)
- A new item will appear in the selected search area.
- Complete the text box or drop down with the required value the user wishes to always use.
- To the right of the new item, which has been added, there is a check box.
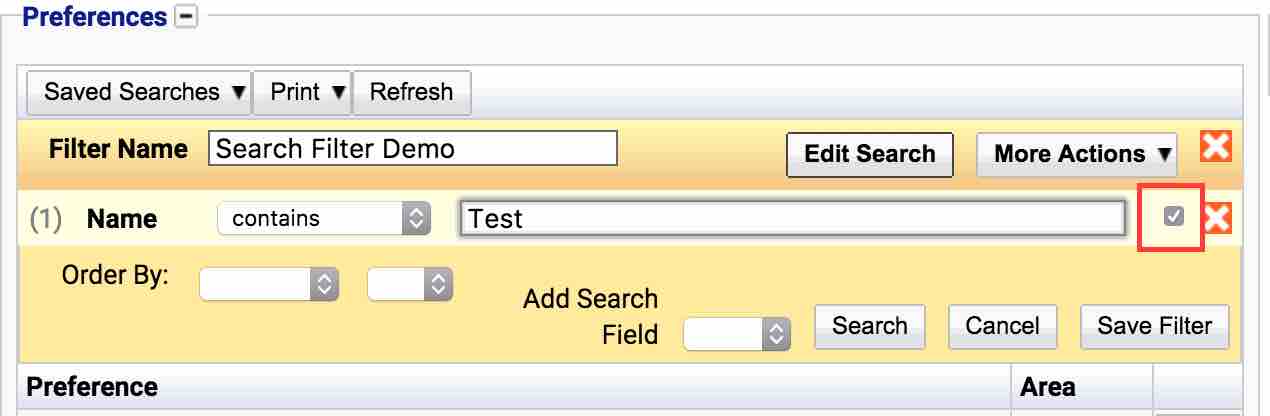
- Save the search filter by clicking the ‘Save Filter’ button
Adding Additional Fields To Search Options
iGene has over 14,000 fields. It is not possible to display them all on the front end as the lists would become unusable. Instead, there is a System Search Filter preference area where additional items can be added.
To begin with, a note of the model which the search filter needs to apply has to be found. A quick way to do this is to navigate to the location you want the search filter field to be added and next to the ‘Search Filters’ button is the ‘Print’ button. Press the print button and a list will appear. The area of interest is highlighted in red.
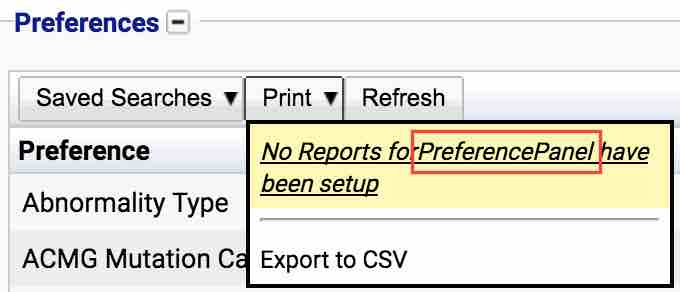
In the above example, we have the model ‘PreferencePanel’. To add a new item:
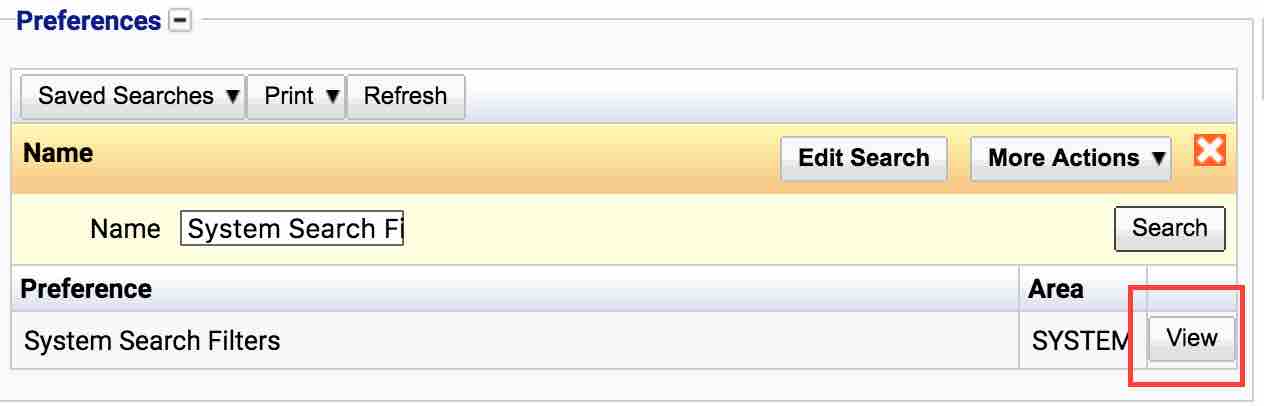
- Navigate to Administration > Preferences
- Find the preference called System Search Filters (either navigate through the table using the arrows to select a preference or create a search filter to search based on the name).
- Click the ‘View’ button highlighted in red.
- In the table which appears to the right, click the plus button or press the ‘Actions’ button and select ‘New Search Filter Entry’.
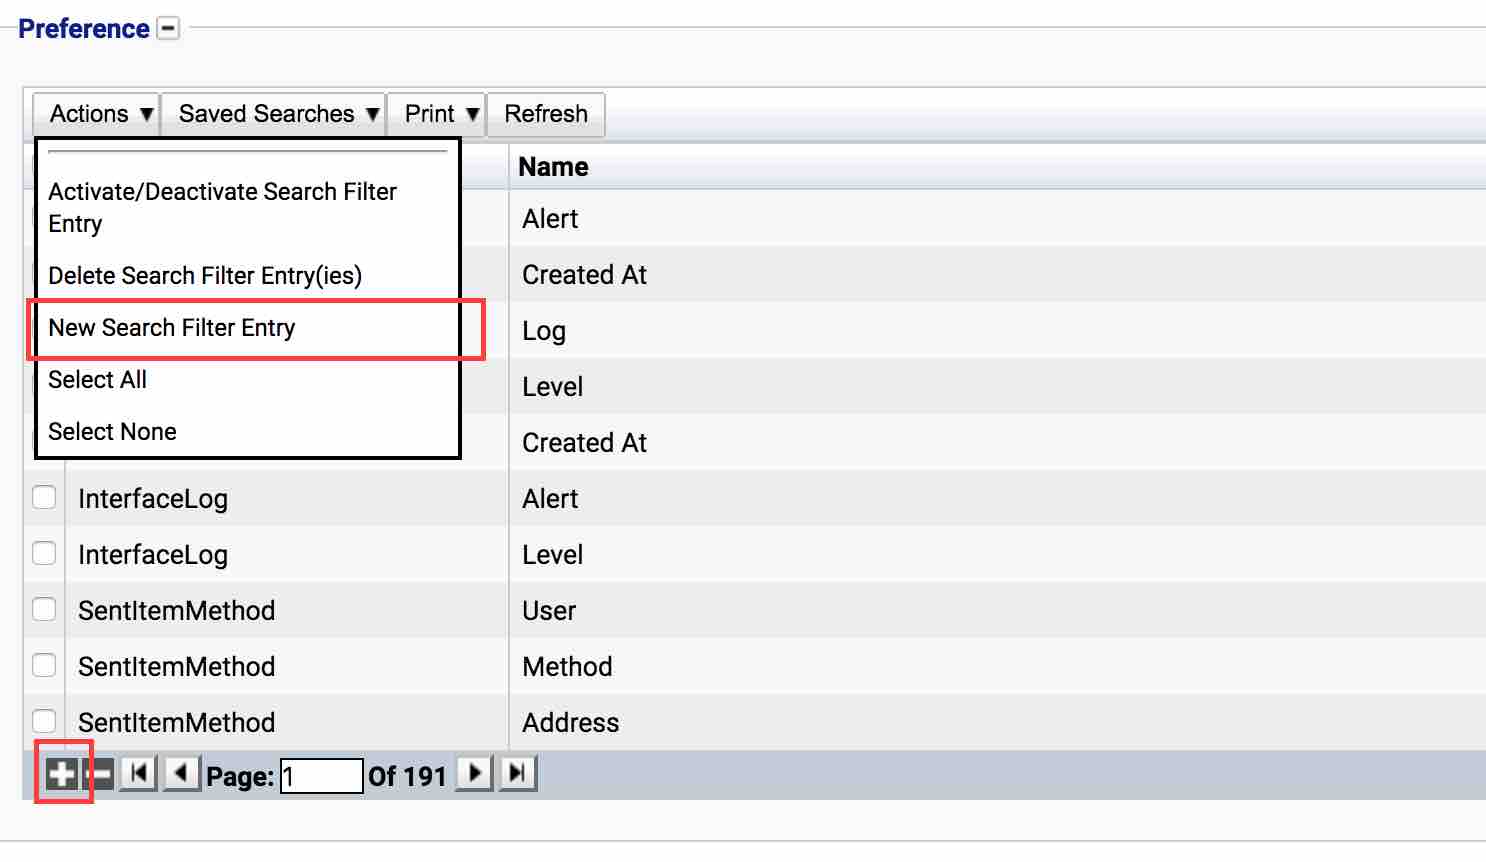
- Using the model drop down, select the model that was identified using the ‘Print’ button above.
Click on the drop down arrows and start typing, this will filter this list to go to the correct location.
- Enter a Name for the filter field.
- Leave the type field as ‘Filter’
- Select the ‘Filter Class’ from the drop down list.
Typically, the following items are used:
- Text Search - Use the default, Text Search - Ignoring Empty
- Date Search - Date Search (StandardDateSearch)
- List of Items e.g. Orderables - Autocomplete Type search (GenericAutoCompleteSearch)
- Yes or No - Boolean Search
- The screen should look as follows.

- Click on Select Path

- A popup window will appear in the middle of the screen. This is a representation of the fields within iGene. Please refer to the guide on how iGene is structured should more information on where a field is located be needed.
- Double click the desired field
- Click ‘Select Field’
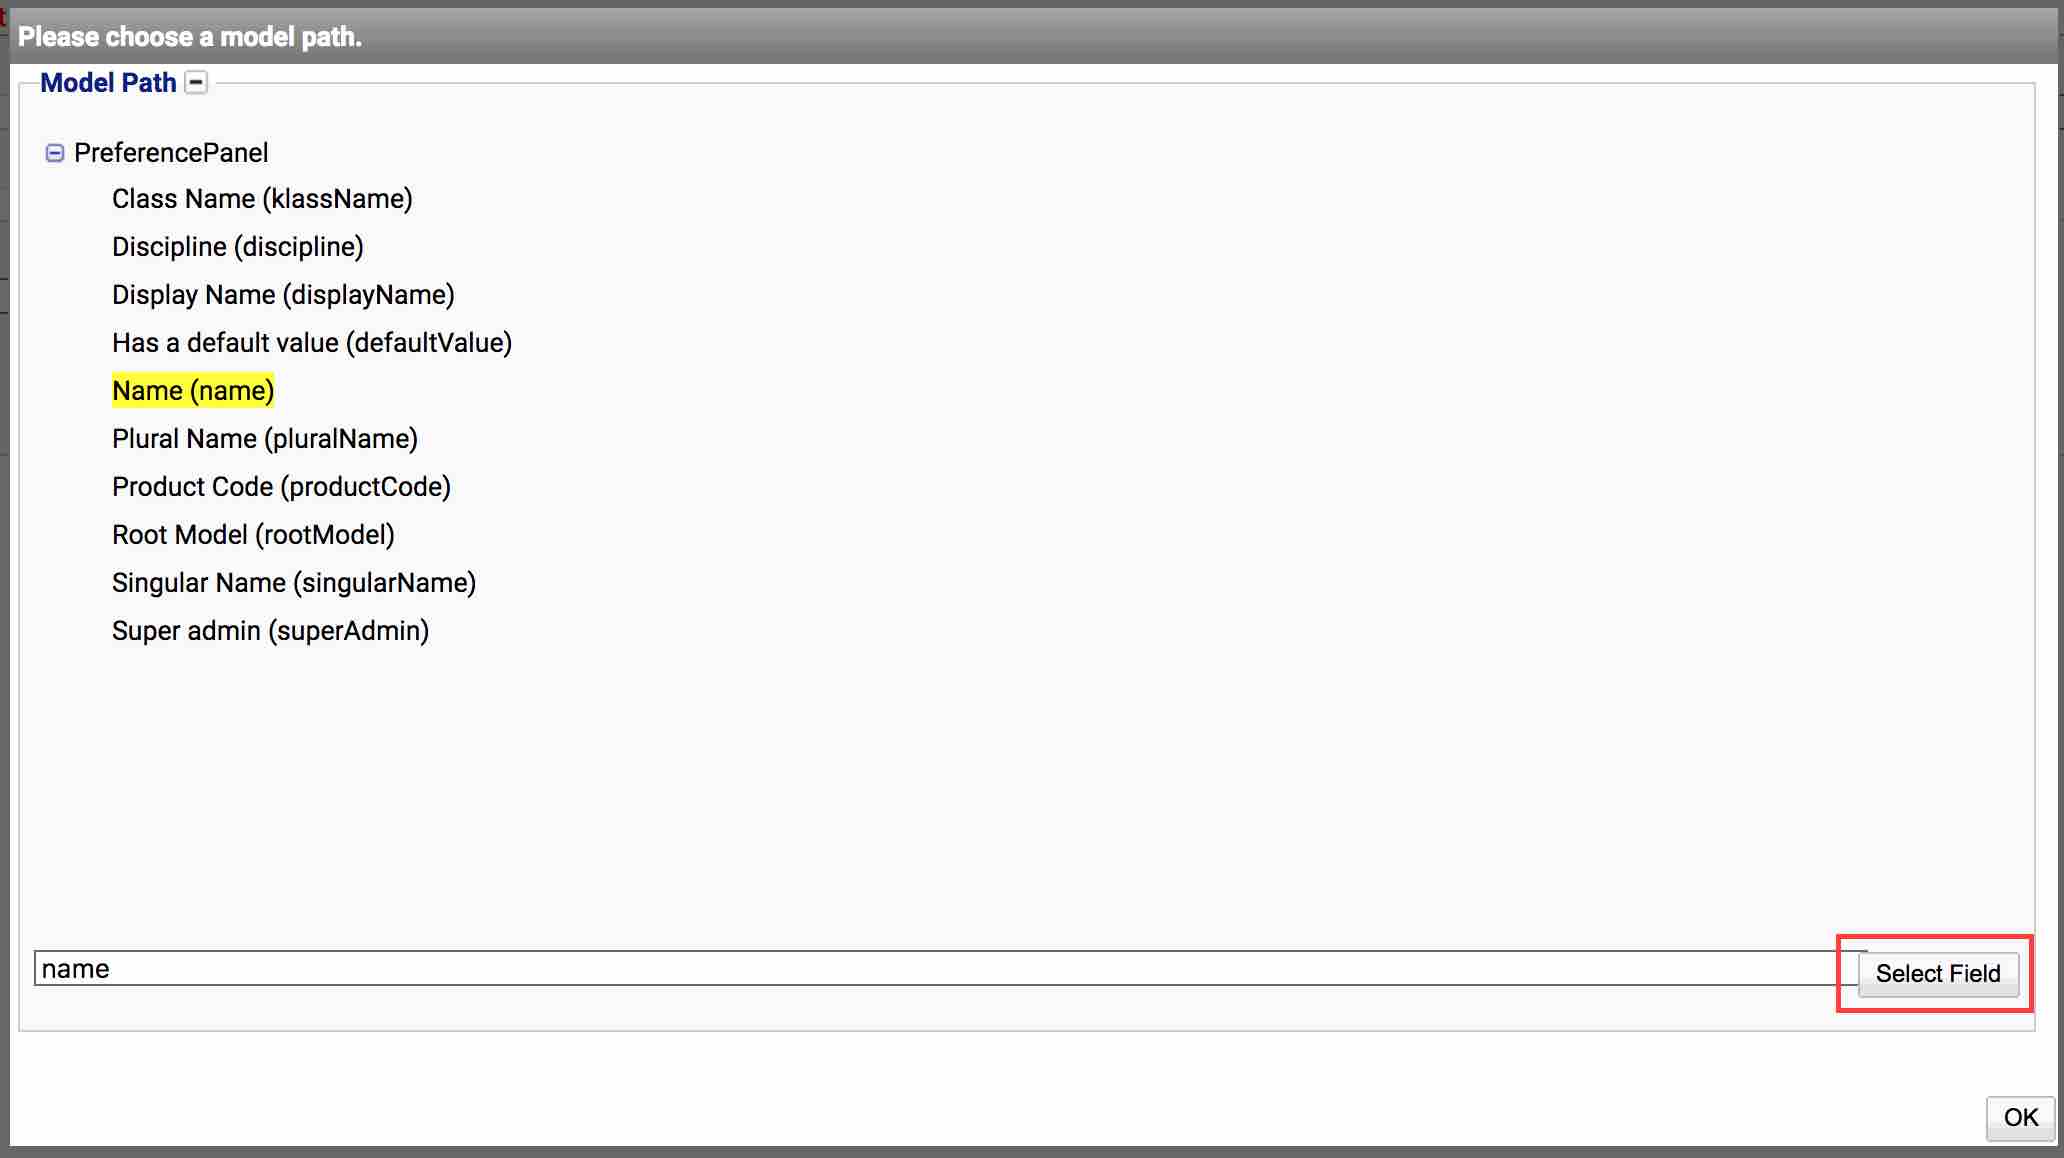
- Press OK.
- Make sure that the ‘Active’ checkbox is checked
- Press ‘Save’ in the bottom right of the screen
Ordering Lists
It is possible in iGene to use a search filter to order a list. It does not need to have any search options and can just be used to order a list. This can also be set as a default and is particularly useful for ordering lists by the date they were created with the latest ones at the start.
- From a table with the option to create saved searches, click the ‘Saved Searches’ button.
- Select the ‘New Search’ option.
- A selection of fields is displayed to the user.
- Begin by entering a name for the search filter. For the purposes of this document, the filter is called ‘Search Filter Demo’.
- Locate the ‘Order By’ drop down

- Click on the ‘Order By’ drop down and select an option from the list.

- The drop down next to it will populate with options. Select ASC for ascending items (in the case of an alphabet, A-Z, in dates, it would be the current date forward). Select DESC for descending items (in the case of an alphabet, Z-A, in dates, it would be the oldest date going towards the current date).
- Save the filter using the Save Filter button
The ordering list filter which has just been setup can be made as a default. Follow the making a search default instructions.