Test Status Template
The Test Status Templates preference is used to setup how statuses change when tests are ordered within iGene. This preference is used in conjunction with the Test Workflow document.
Test Status Template requires statuses to be set within the Test Statuses preference and is selected and used in the Test/Order preference.
Location
The Test Status Template preference is located under the Administration > Preferences area of iGene.
In order to access the preference area, a user must be a member of a role that has the Administration: Preferences and Administration: Menu permissions assigned.
- Navigate to Administration > Preferences.
Find Test Status Templates in the table and click View by either:
- The user can navigate through the table using the scroll arrows.
- Perform a search using an existing saved search for Name = Test Status Templates.
- Perform a search using a new search. See the searching guide for information on how to create searches.

To create a new test status template, click the + button at the bottom of the table, or select New Item from the Actions menu.
To edit an existing Test Status Template, click the Edit button.

The table of test status templates will display the code, name and status for the templates.
The Status field indicates two pieces of information:
User / System: User records have been added by users manually and are fully editable. System records are generally added via a data import or provided by default. Only the name can be edited on a system record.
Active / Inactive: Shows whether the record is currently active or inactive. Inactive items will not show up for selection for new records but will continue to show on entries that are using them.
Configuration
When adding or editing a Test Status Template, the following form opens to complete.
Always press Save in the bottom right corner of the browser after adding or editing a Test Status Template.
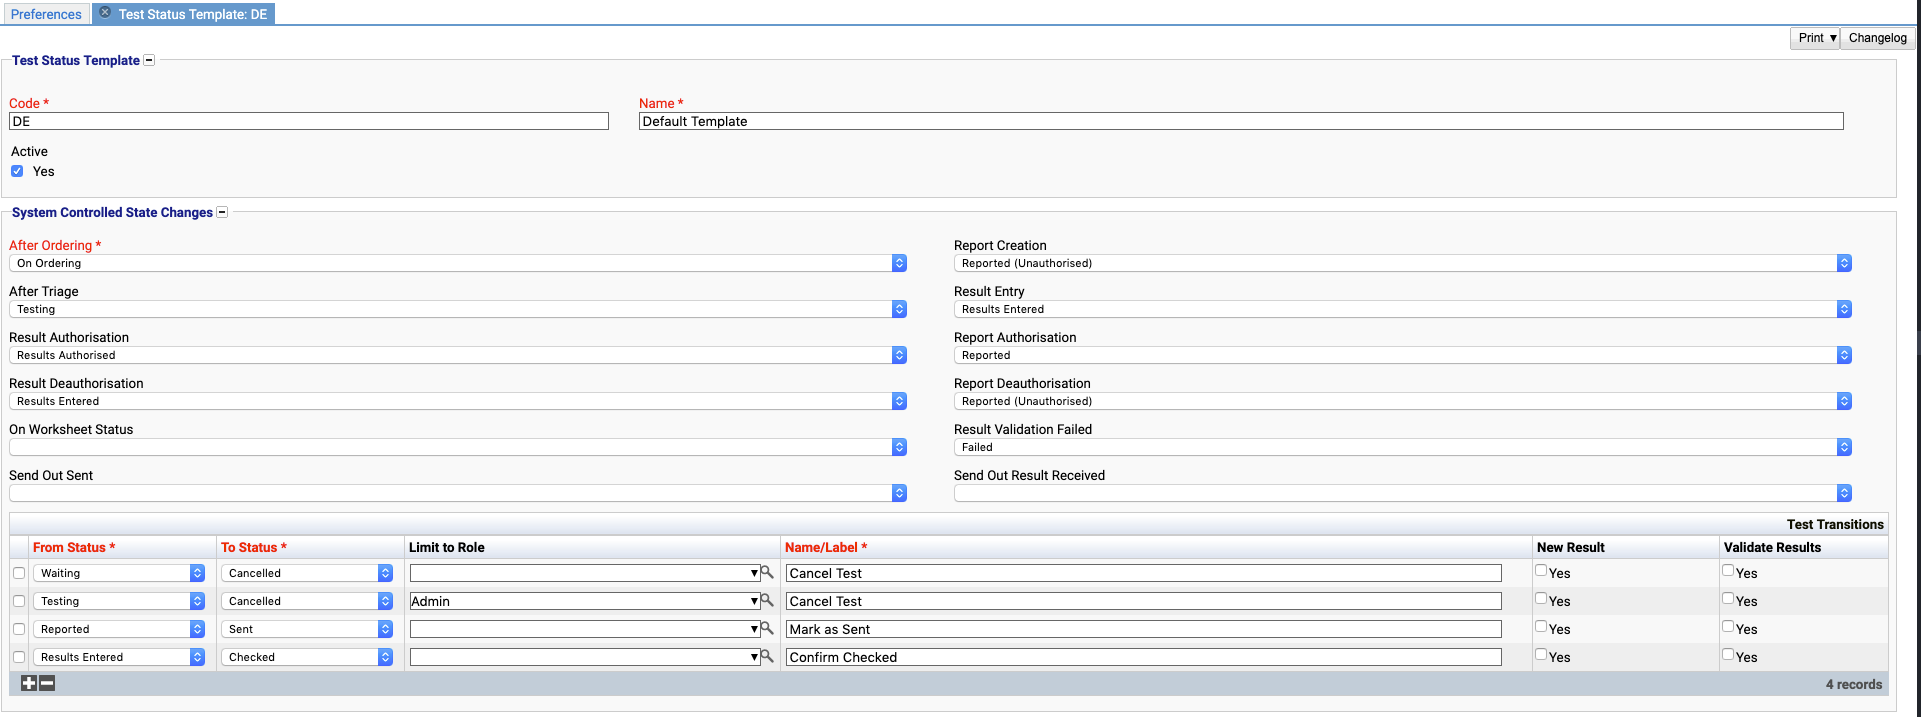
Code
(Required, Unique)
A unique code for the Test Status Template. This can be the same as the name but must be unique throughout the entire system.
Name
(Required)
A name for the preference. It is advisable to keep this unique.
Active
A checkbox to activate / deactivate an entry. If the preference is not active, it will not be selectable in any drop down lists.
Automated System Controlled State Changes
Once set up, when a test goes through a transition matching any of the described state changes, then that test will be labelled with the appropriate test status. In the above example, once a test has results entered the status will change to ‘Results Entered’ and once a test has been reported and then authorised the status will change to ‘Reported’.
- After Ordering: The status to assign after the test has been initially ordered/created.
- After Triage: The status to assign after the test has been triaged.
- Result Authorisation: The status to assign after a test has been authorised.
- Result Deauthorisation: The status to assign when a test is deauthorised. The status can also be reverted to the previous status.
- On Worksheet Status: The status to assign when the test is placed onto a worksheet.
- Send Out Sent: The status to assign when an external send-out test has been sent.
- Report Creation: The status to set when the report has been created (but not yet authorised).
- Results Entered: The status to set when the result code on a result has been entered.
- Report Authorisation: The status to assign after a report has been authorised.
- Report Deauthorisation: The status to set when a report is deauthorised. The status can also be reverted to the previous status.
- Result Validation Failed: The status to set when a result is invalid. This status is used when two or more results are entered per test and the results don’t match.
- Send Out Results Received: The status to set when the results are added to an external send-out test.
The statuses available in the dropdown lists are set in another preference: Test Statuses. The colours for the test statuses are also set here.
Test Transitions table
A test status template can also define a list of transitions that indicate specific user actions for changing from one status to the other. Transitions provide additional actions (via buttons and the actions menu) when viewing results to trigger a state change. A transition has the following values:
- From Status: The status the test must be at for this transition to apply.
- To Status: The status the test will have after the transition has been triggered.
- Limit to Role: A user role [TO DO] to limit the transition to. If blank, anyone can perform this transition.
- Name/Label: The name of the transition. This name will appear in the button and action menu item for triggering the transition.
- New Result: When enabled, a new blank result will be created when the transition is triggered. This is useful for cases where double-entry is required on a result and the first user has finished entering their results.
- Validate Results: When enabled and there are multiple results, the transition will trigger a validation step that will check the current result against the previous result. If both results match (are valid) then the transition will proceed, otherwise the Result Validation Failed status change will be applied. This is useful for cases where double-entry is required for a result and provides a way to track results that may have an issue.
Example
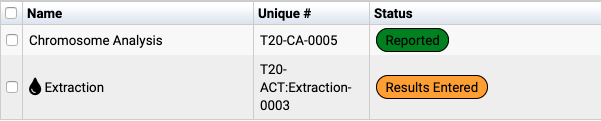
Here is an extra button found at the bottom of a results entry screen as a result of the 4th row in the transitions table on the example above.
 Initially the test status is ‘Waiting’. Once triaged it changes to ‘Testing’. After the results have been entered for the first time (automatic) it changes to ‘Results Entered’ and an extra button appears ‘Confirm Checked’. When this is pressed the test status will change to ‘Checked’.
Deactivating / Activating
Each Test Status Template has an active status that specifies whether the Test Status Template is available for selection. When deactivating a Test Status Template, it will no longer appear in dropdown lists for selection on the tests, but will still be displayed on any records that continue to use it.
To deactivate (or reactivate) a Test Status Template, either:
- Untick the Active checkbox inside the preference and Save.
Or
- Right-click on the required entry in the table and select Toggle Active Status. Click Yes when prompted.
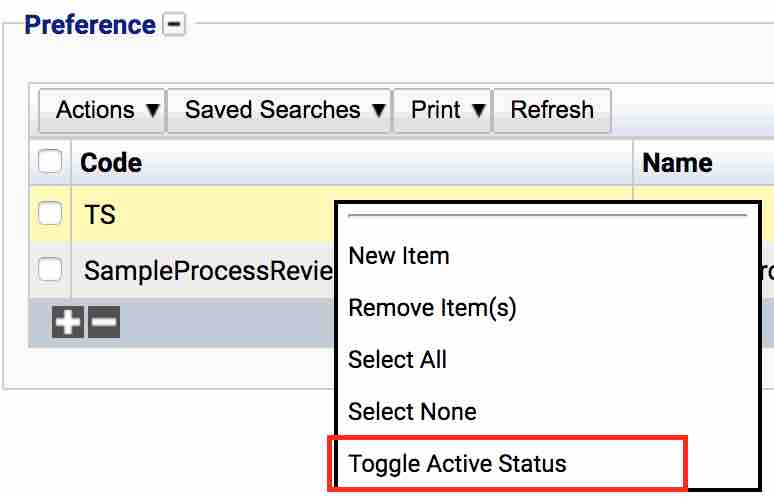
The state of the Test Status Template will then be changed to either Active or Inactive.

Usage
This preference relies on the statuses set in the Test Statuses preference.
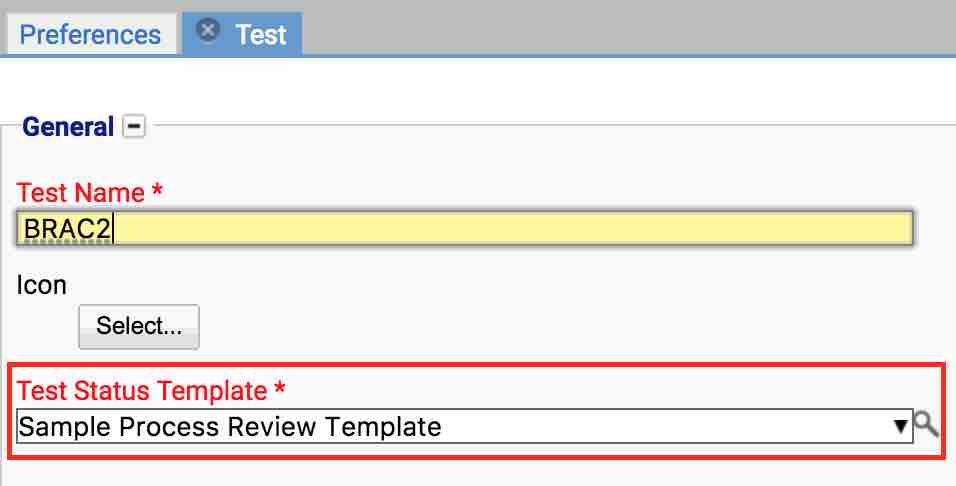
Test Status Templates are selected in the Test/Order preference.
Altogether these preferences make up the Test Workflow and details about this can be found in the Test Workflow document.