Email Queue
The Email Queue is a record of all emails sent out from iGene. It includes emails about tasks, password resets and emailed reports and will show whether an email has been sent, if it failed to send, or if it is still queued (waiting to be sent).
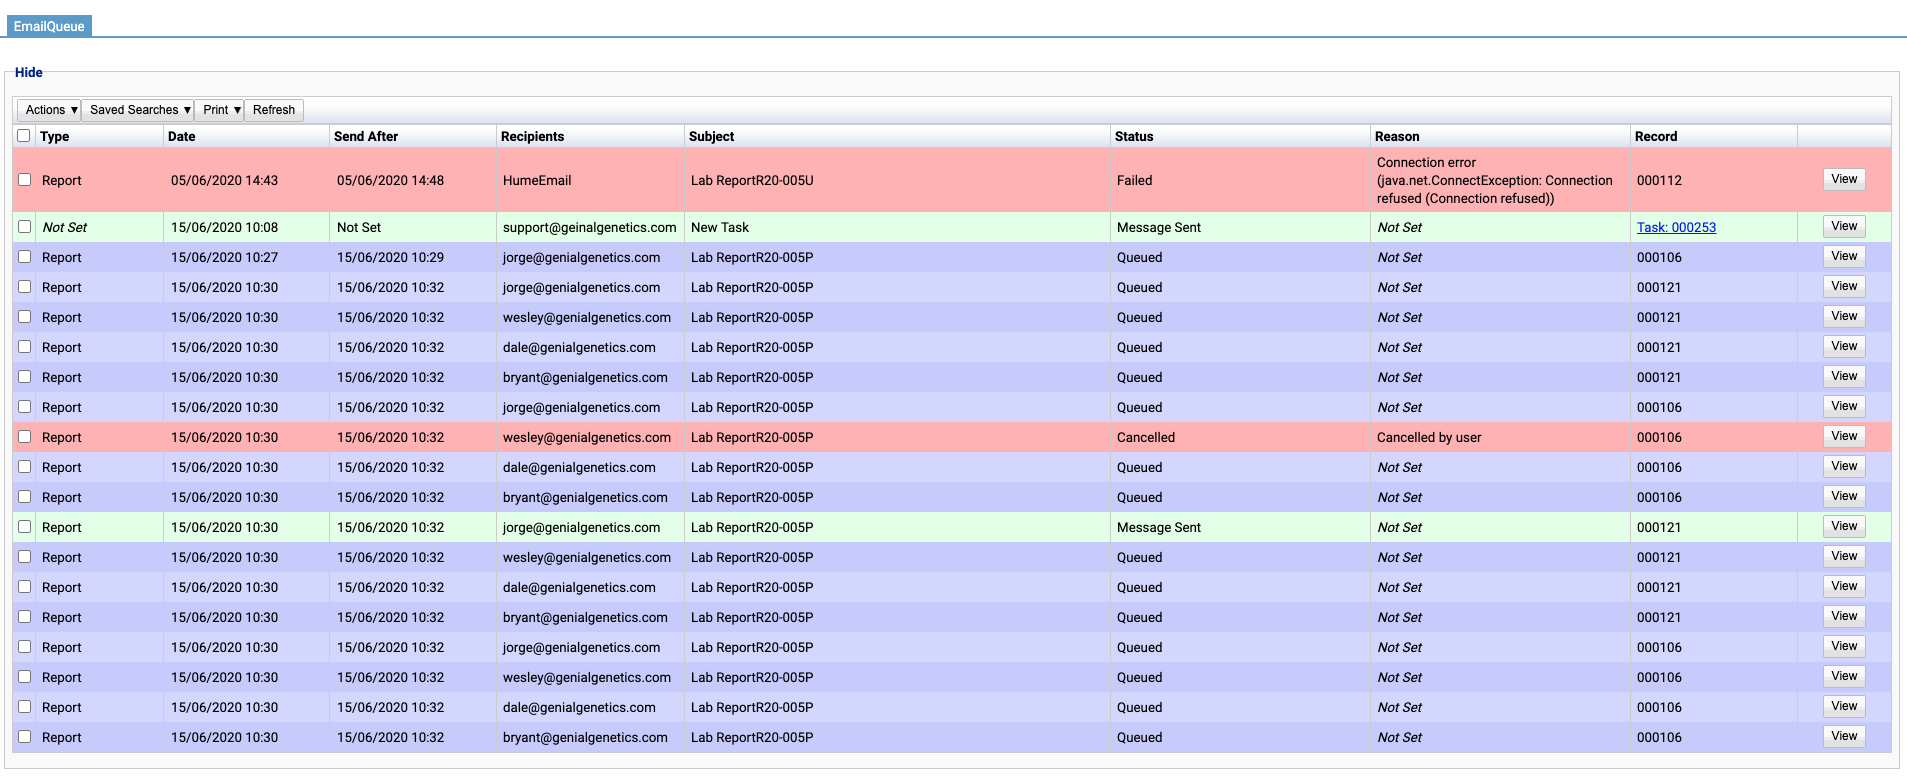
In this example of an Email Queue table, all three rows are queued so are highlighted blue. Any failed would be red, and completed would be green.
Permissions
There are seven permissions that relate to the emailing reports function.
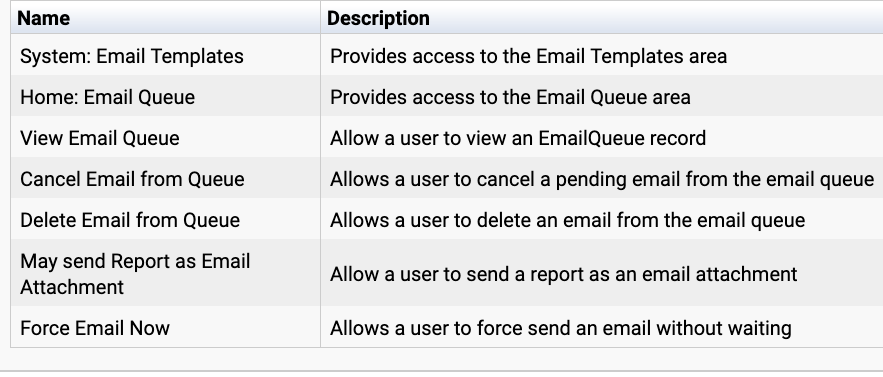
Five of them relate to the Email Queue:
Home: Email Queue is needed to actually view the Email Queue page.
View Email Queue is need to view an email.
Cancel Email from Queue, Delete Email from Queue and Force Email Now are all permissions that allow options in the Email Queue Actions menu to be used.
Columns
- Type - Advises whether an email is a report or other. Currently, tasks show as ‘Not Set’.
- Date - The date the email was sent to the email queue.
- Send After - The time after which the email can be sent. For reports, this will be the time at which the email was queued plus the grace time (see Email Report Preferences). Once the Send After time has been reached it will be sent the next time the cron schedule is set to send emails.
- Recipients - This field describes where the email is being sent to.
- Subject - The subject line of the email.
- Status - Shows the status of the email - it could be queued, sent, or failed.
- Reason - Displays the reason for the Status. When an email is queued the reason is ‘Not Set’, but if an email fails to send then the error will be here.
- Record - The item the email is linked to. For reports, it will show the report number. For tasks, it gives the task number and a hyperlink to the task.
View
Pressing this button will open the email.
It requires a user to have the permission View Email Queue or access will be denied.
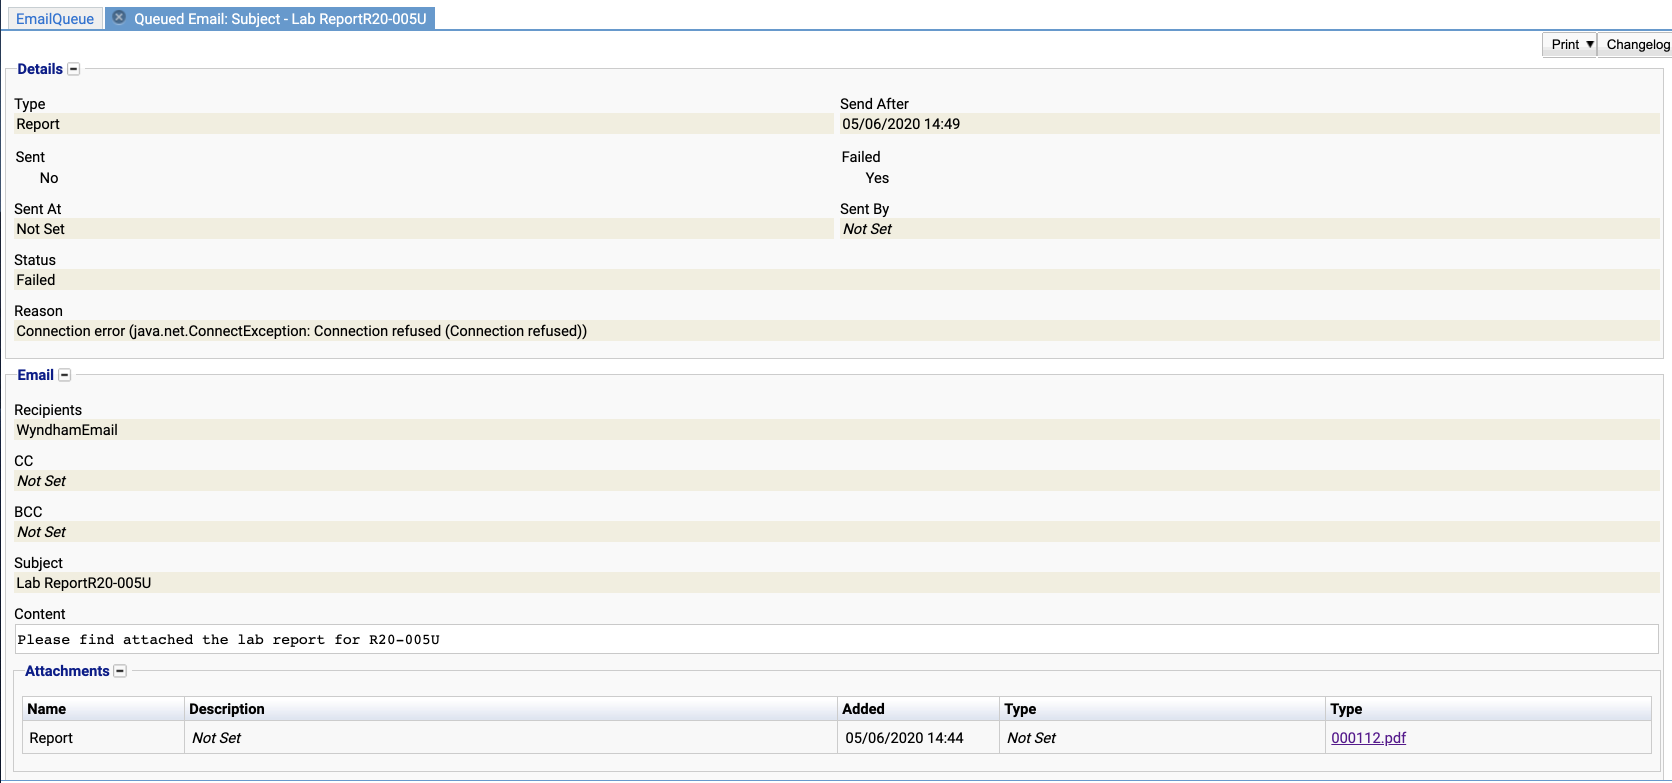
The email cannot be edited but the contents may be viewed.
Details
In this section, it contains:
- the type of email that has been sent
- the time the email could be sent after
- whether the email has been sent
- whether the email failed to send
- the time email was sent at
- whom the email was sent by
- the status of the email
- the reason for the email status
- The recipients of the email
- Any contacts the email has been CC’d to or BCC’d
- The subject of the email
- The email content
Attachments
The attachments table contains any attachments in the email.
In this example, a pdf sample report has been attached. Clicking on this link from the email view will open the pdf.
Email Queue functions
At the top of the Email Queue table are 4 buttons: Actions, Saved Searches, Print and Refresh. These act in the same manner as they do in other screens within iGene.
- The Actions menu has a list of actions that can be applied to the table.
- The Saved Searches function can be used to search for email in the table.
- The Print button will allow the user to run a report if any have been set up for this page.
- The Refresh button will reload and update the table.
Email Queue Actions
The Action Menu contains six options. The first three options have specific user permissions, that when enabled allow a user to use each option.
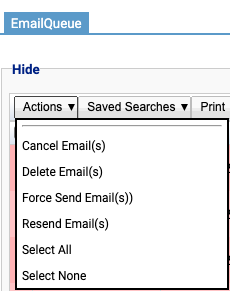
- Cancel Email(s) - Marks an unsent email as cancelled in the status column but does not remove it from the table. This action requires the permission Cancel Email from Queue.
- Delete Email(s) - Removes the selected email(s) from the table. This action requires the permission Delete Email from Queue.
- Force Send Email(s) - Attempts to send an email straight away ignoring the grace period and Cron schedule. A green success message is displayed when the email has been successfully sent to the server. This action requires the permission Force Email Now.
- Resend Email(s) - Attempts to resend the selected email(s). IGene will attempt to send tasks and account emails straight away. Reports however, will be requeued until the next time the Cron schedule is run. In both cases, a new record will be added to the email queue table and a green notification message is given.
- Select All - Selects all items viewable in the page so they will have a blue tick next to them.
- Select None - Unselects all items viewable in the page.