System Search Filters
There are over 14,000 fields within iGene and the majority of them are available to perform searches on, but they are not all selectable at first. It is not possible to display them all on the front end as the lists would become unusable. Instead, the System Search Filters preference area contains preset search filters and additional search and sort filters can be added here.
System Search Filters are required for searching and ordering lists and tables. Adding a search filter here means it can be used to filter or sort data on another page.
Location
The System Search Filters preference is located under the Administration > Preferences area of iGene.
In order to access the preference area, a user must be a member of a role that has the Administration: Preferences and Administration Menu permissions assigned.
- Navigate to Administration > Preferences.
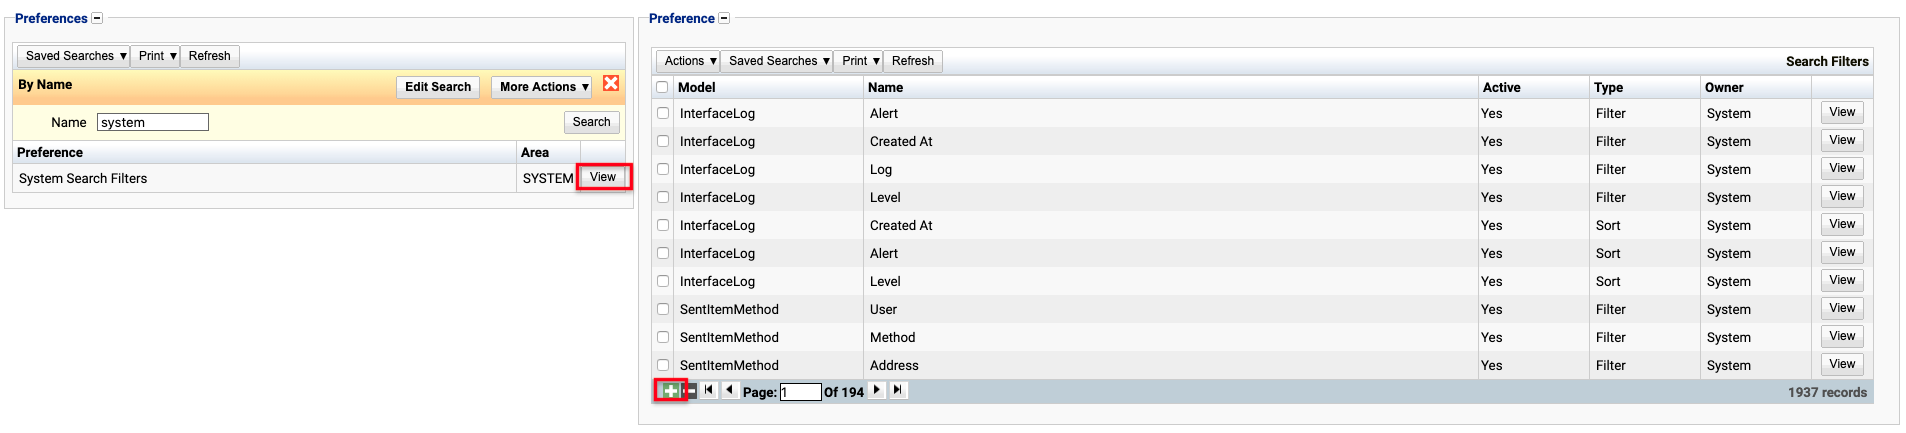
- Find System Search Filters in the table and click View by either:
- Navigating through the Preferences table until the System Search Filters preference is found.
- Performing a search using an existing saved search for Name = System Search Filters
- Performing a search using a newly created search. See the searching guide for information on how to create searches.
- To create a new System Search Filter click the + button at the bottom of the table or select New Search Filter Entry from the Actions menu.
- To edit an existing System Search Filter, click the Edit button.
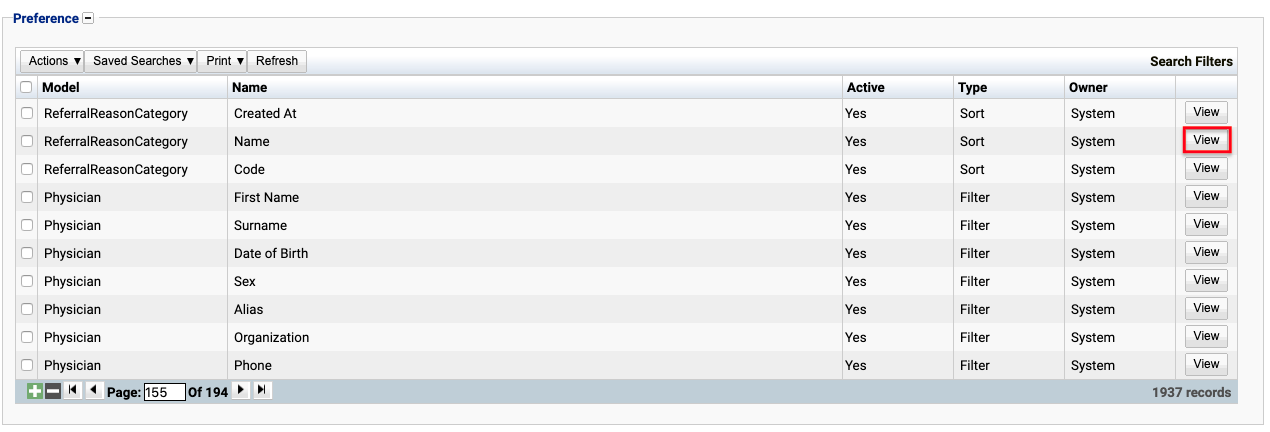 The table for System Search Filters will display the model, name, active status, type and the owner.
The Owner field indicates whether the field was added directly by a user or if it was preset.
User / System: User records have been added by users manually and are fully editable. System records are generally added via a data import or provided by default.
Configuration
When editing or creating a System Search Filter, the below form opens to complete.
Always press Save in the bottom right hand corner of the browser after adding or editing a System Search Filter.

Model
(Required)
This describes which page the search filter will be used on.
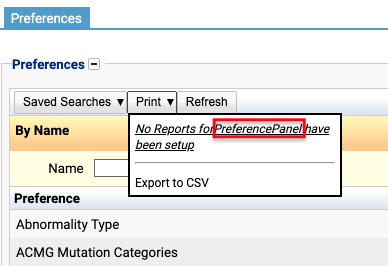
An easy way to find the model, is to navigate to the location / page you want the search filter field to be added to and next to the ‘Search Filters’ button is the ‘Print’ button. Press the Print button and a small box will pop-up containing a heading and a list of any available reports. The heading will contain the Model you require.
In the image below, The print box shown on the Preferences table describes reports for ‘PreferencePanel’ and this is the model that would be selected from the dropdown for the model field.
Name
(Required)
A name for the search filter. It is advisable to keep this unique.
Type
(Required)
There are two types available, filter or sort:
- Filter: Actively searches the data and presents any entries that match the criteria set.
- Sort: takes the current data and arranges it in order. For example, this could be alphabetically or date of birth.
Filter Class
(Required)
Typically, the following items are used:
- Text Search - ignoring empty (StandardTextSearch): This is the default option. When searching there is a text box to type into.
- Date Search (StandardDateSearch): Enter date in dd/mm/yyyy format or use the date box.
- Dropdown List/Type search (GenericListSearch): Displays a list of items e.g. gender or blood type.
- Autocomplete Type search (GenericAutoCompleteSearch): When searching there is a text box to type into AND it then offers options from a list that match what you have typed. It is possible to search for different tests this way.
- Boolean Search (BooleanSearch): Displays a checkbox on the search screen. Results change depend on whether checkbox is ticked (value is true) or unticked.
- Order: Use this when Sort has been selected for Type.

Model Path
(Required)
Displays the path selected by using the Select Path button.
Select Path
Pressing this button brings up a pop-up window starting at the root selected in the Model field.
The pop-up is a representation of the fields within iGene. Please refer to the guide on how iGene is structured [TO DO] should more information on where a field is located if needed.
See Example below for instructions on how to use the pop-up.
Active
A checkbox to activate / deactivate an entry. If the preference is not active, it will not be selectable in any drop down lists.
Example
This example will create a filter that appears on the Patient List page and enables a search for a patient’s first name.
- Navigate to the page where the filter needs to be added. Patient > Patient Search/Add
- Press Print and see that the heading is Reports for Patient. Patient is the model.

- Navigate to Administration > Preferences and find System Search Filters in the list and press View.
- Press the + button at the bottom of the table.
- In the new search filter form, find Patient in the Model dropdown.
- Enter a name for the filter: First name
- Select Filter for the Type.
- Select Text Search - ignoring empty (StandardTextSearch) from the Filter Class dropdown.
- Tick the Active checkbox.
- Select the Model Path.
- Press Select Path. The pop-up window for this model path starts at Patient.
- Find and click the desired model path to highlight it.
For this example scroll down the list and press the + next to Current Details. Then click to select First Name - it should be highlighted in yellow. - Press Select Field once desired field is highlighted.
- Press OK - this will fill in the Model field.

- Press Select Path. The pop-up window for this model path starts at Patient.
- When the completed form looks like this, press Save (bottom right hand corner).
To use:
- Go back to the Patient List page. Patient > Patient Search/Add
- Press Saved Searches and select New Search.
- Using the Add Search Field dropdown find the newly created search filter.
It can now be used to search for patients and can be added to the Saved Searches list. For more details see searching and ordering.
Deactivating / Activating
Each item has an active status that specifies whether the item is available for selection. When deactivating an item, it will no longer appear in autocomplete lists for selection, but will still be displayed on any records that continue to use it.
To deactivate (or reactivate) a System Search Filter, either:
- Untick the Active checkbox inside the preference and press Save.
Or
- Right-click on the required entry in the table and select Activate/Deactivate Search Filter Entry. Click Yes when prompted.
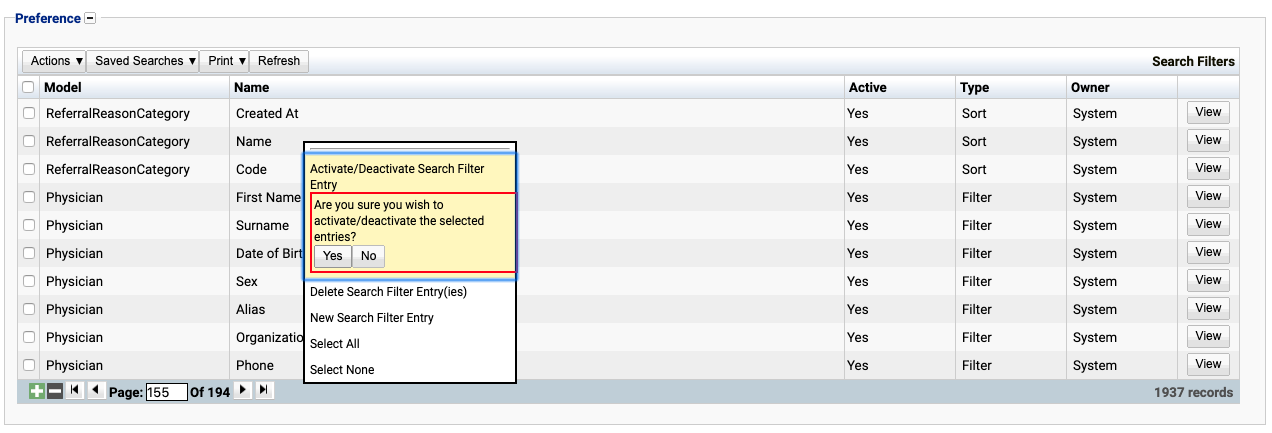
The active state of the System Search Filter will then be changed to either Yes or No. Inactive records are also highlighted in red.

Usage
Adding a a filter or sort function here means they can be selecting when searching and ordering on different pages in iGene.