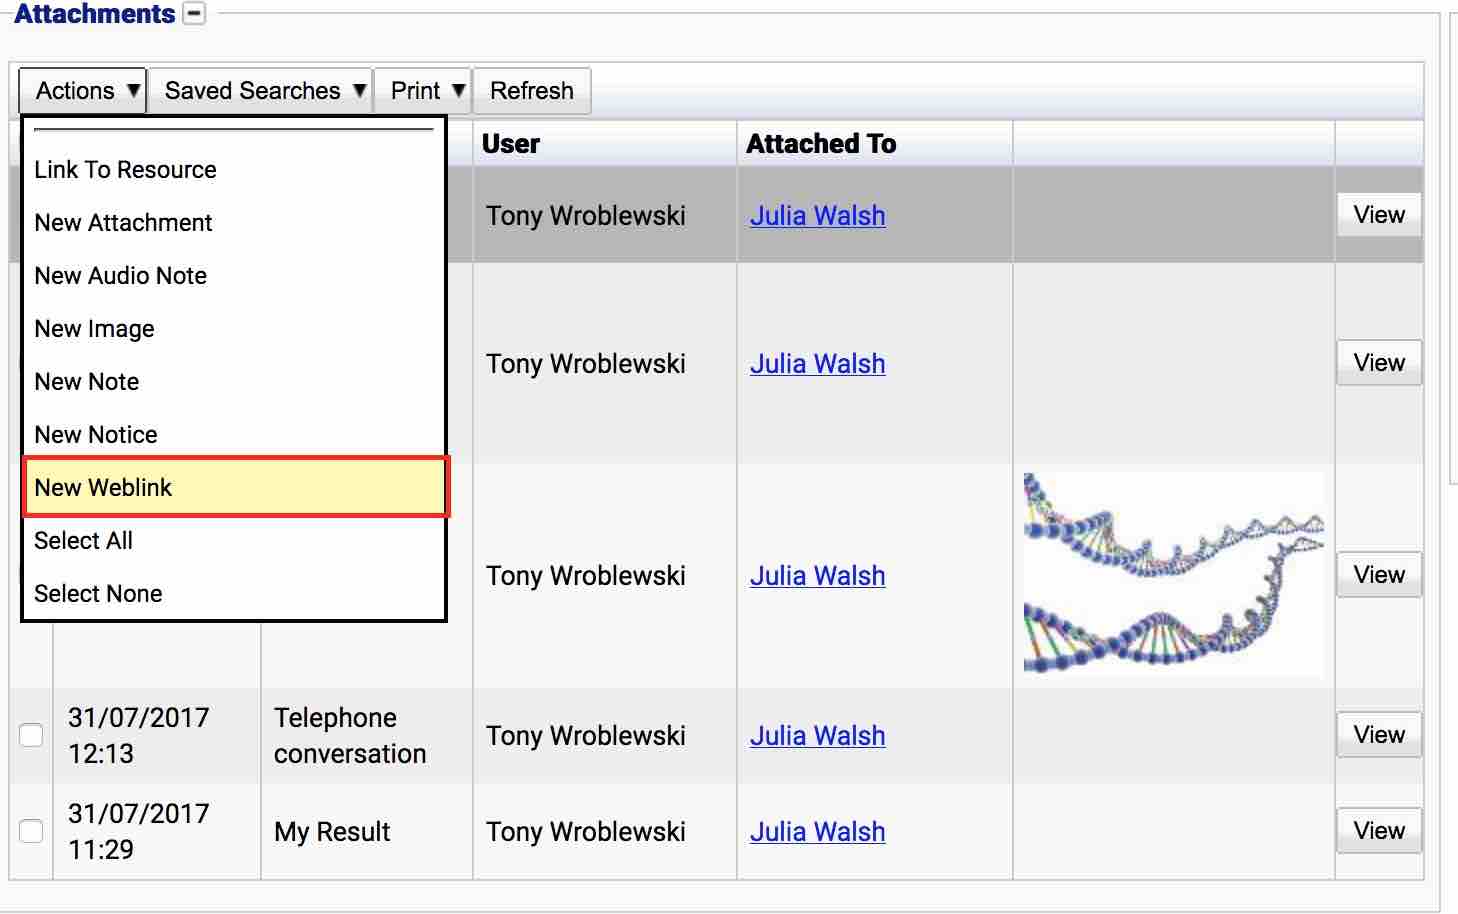
Attachments
Many records (Patients, Referrals, etc) inside iGene allow various resources to be attached to them. These resources are called attachments. Attachments can be any of the following types:
- Attachment: A file, e.g. a PDF or Word document
- Audio Note: An audio file
- Image: An image or photograph
- Note: A textual note
- Notice: A notice which will appear on the noticeboard area (TODO Link)
- Weblink: A website address
- Link: A link to another record on the system, e.g. An equipment to a reagent
At present, the following types of records in iGene can have attachments:
- Patients
- Laboratory and Clinical Referrals
- Samples
- Results
- Lab Reports
- User accounts
- Staff profiles
- Worksheets
- Facilities
- Organisations
- Locations
Depending upon your system configuration, attachments may be referred to as resources or vice versa.
Viewing Attachments
Attachments can be viewed by opening up a specific record that supports attachments and looking for the Attachments tab, as shown below:
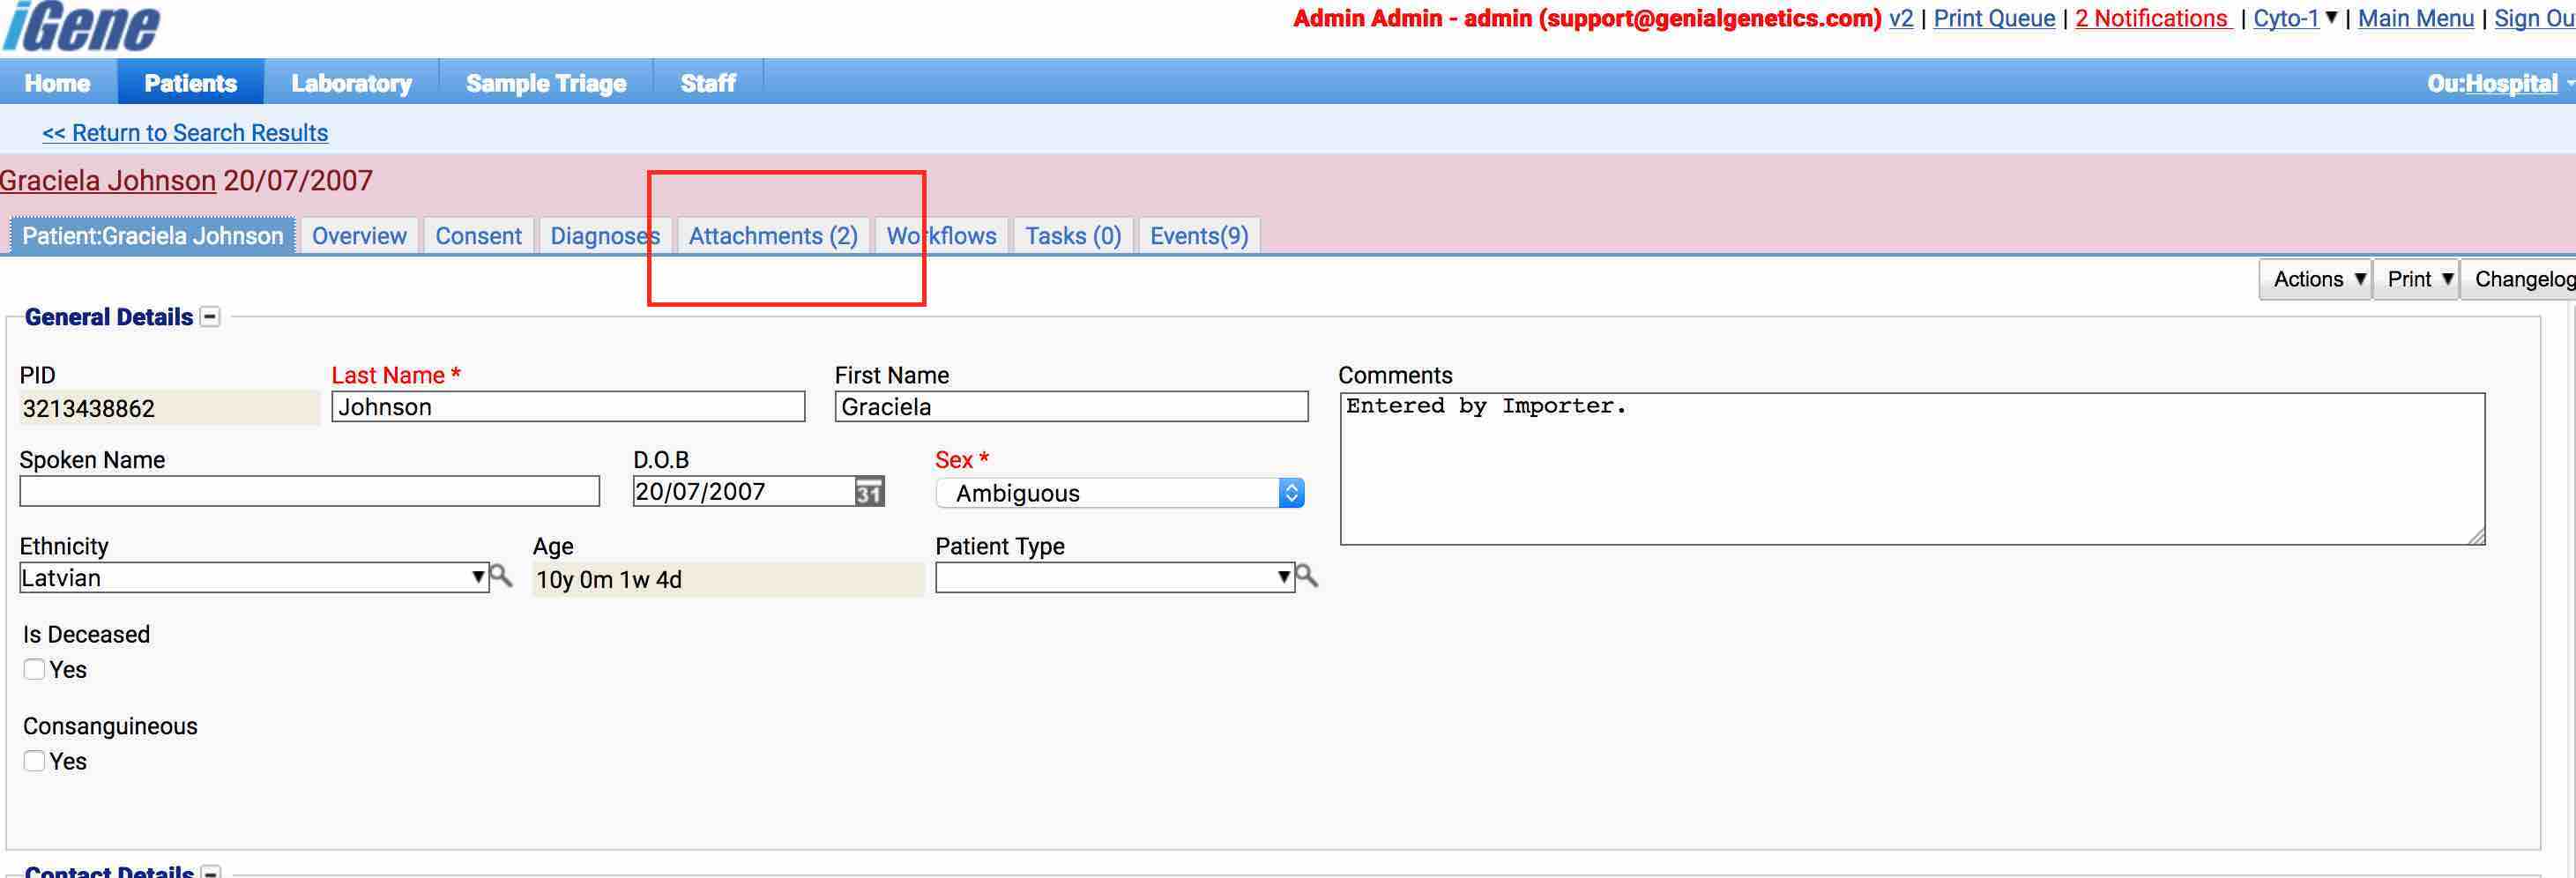
The attachments tab has a number next to the name indicating how many attachments there are, e.g. Attachments (2) indicates this record has 2 related attachments.
Select the attachments tab to navigate to that area:
Before navigating to the attachments tab, ensure any unsaved changes are saved.
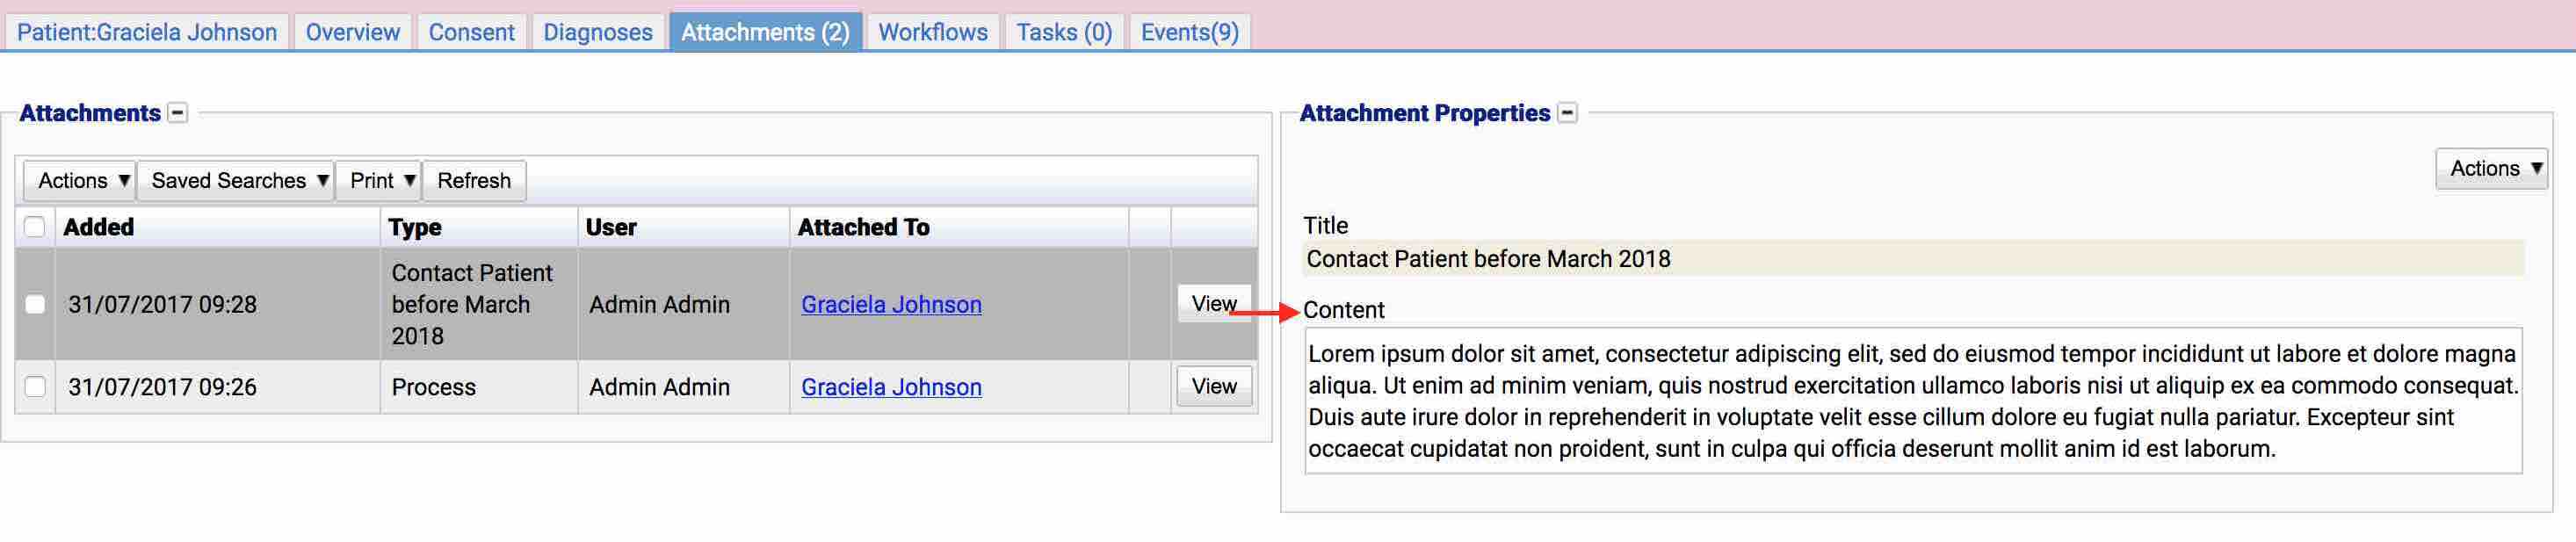
The attachments tab is split into two sections. The left side contains a list of the attachments, and the right contains the details of the selected attachment.

The attachments table contains the following fields:
- Added: The date and time the attachment was created.
- Type: The type of attachment. The value here will vary based on the type of attachment
- User: The user who created the attachment
- Attached To: The record this attachment is related to. For some areas, e.g. Lab Reports, attachments will be shown for any referrals and results. The Attached To field will show where the attachment was originally added.
Depending on how the system has been setup, some attachments may have been added automatically via a plugin or dropbox (TODO link to dropbox). e.g. An external send out test’s result that has been scanned in may appear here automatically.
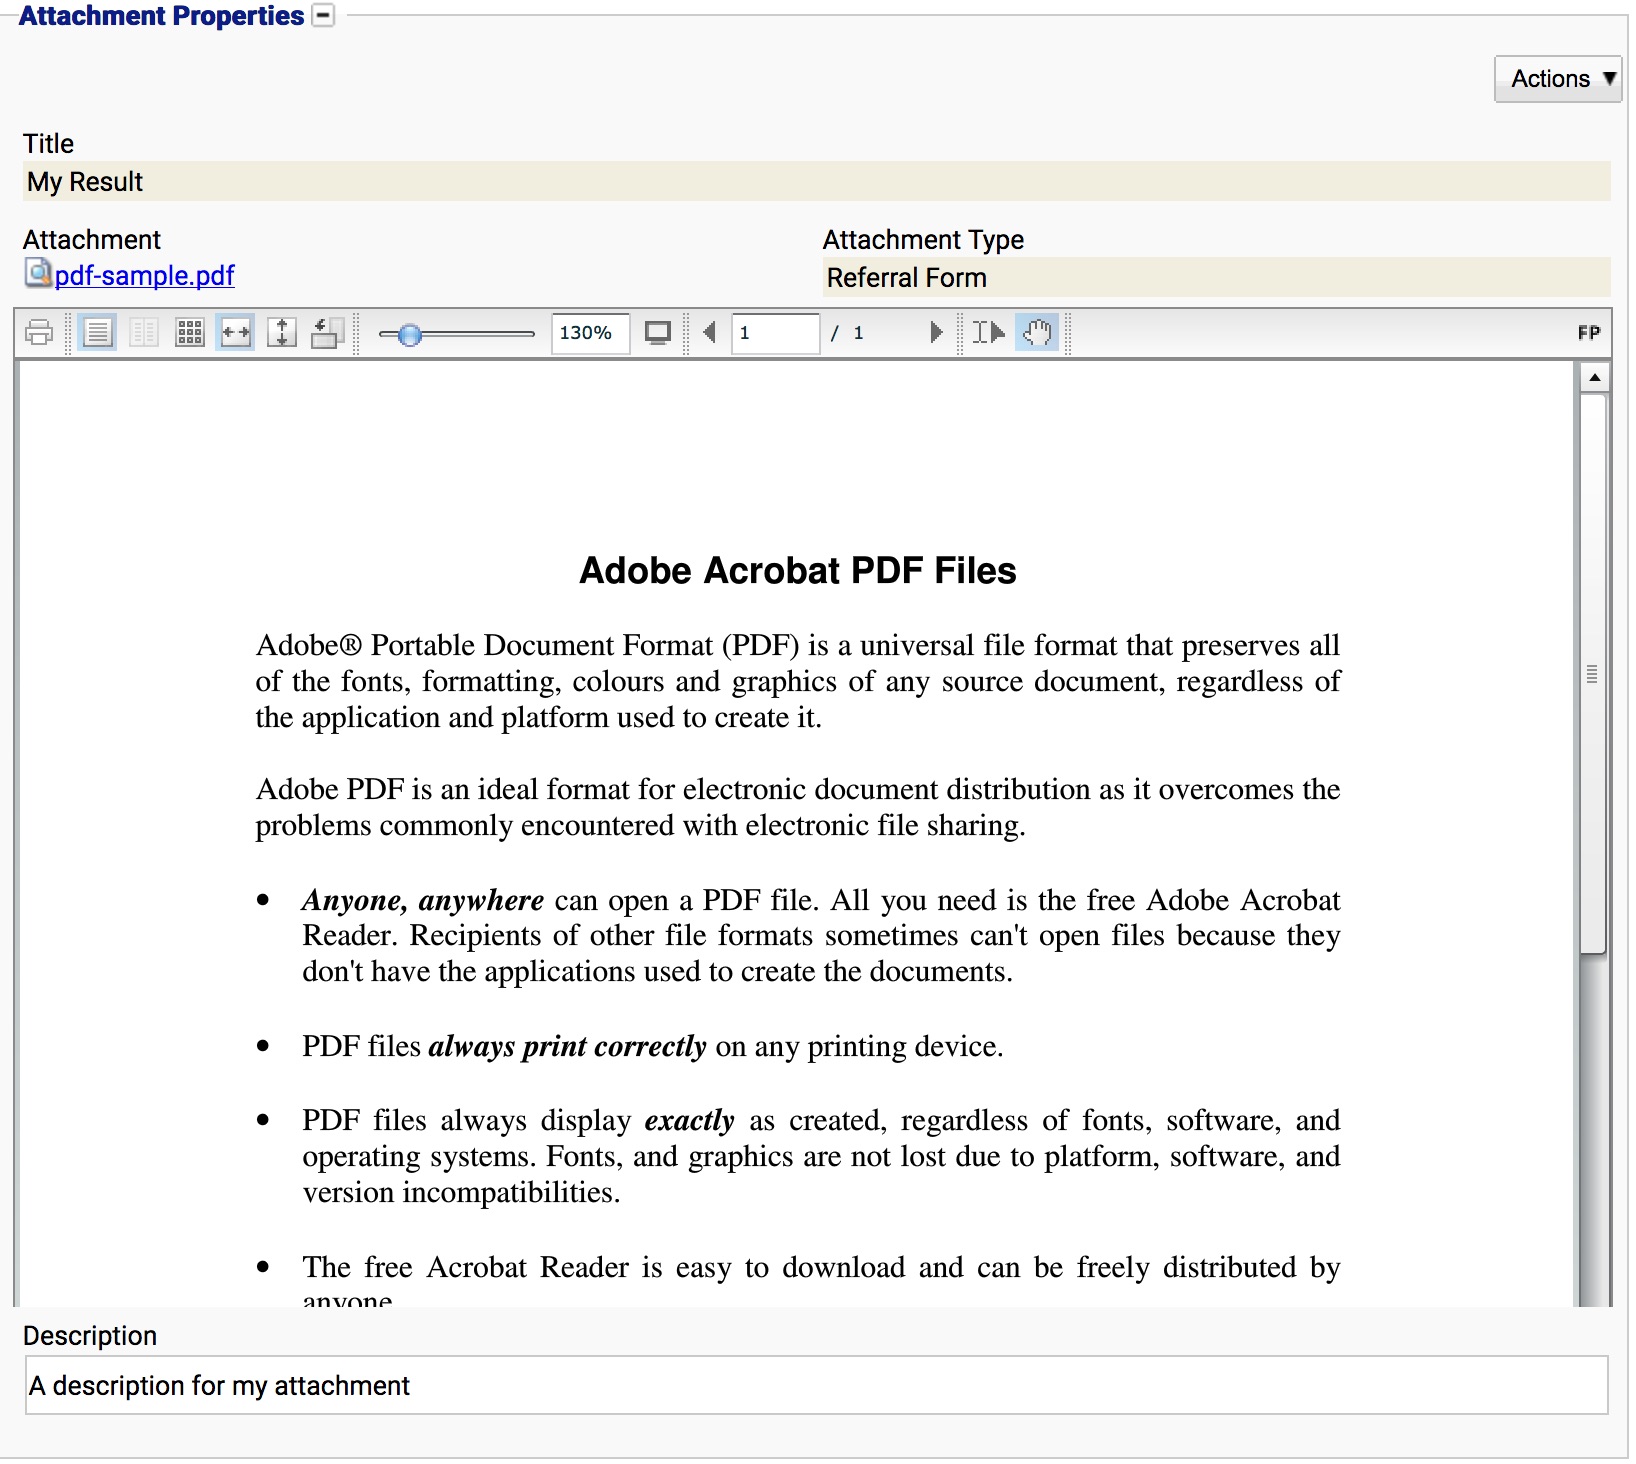
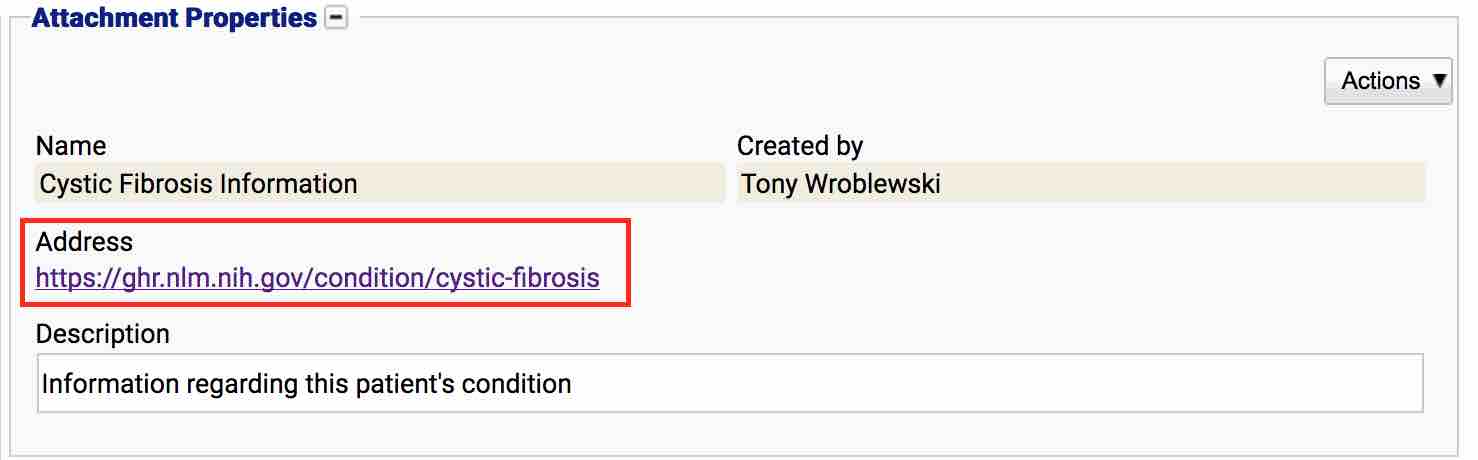
Select the View button to view details of a particular attachment.

Live PDF viewing inside the application requires the Adobe Flash plugin to be enabled. Without Flash installed, the user will be required to download the PDF before they can view it.
Managing Attachments
To manage a specific attachment, select the Actions button at the top-right of the screen once the attachment has been opened:
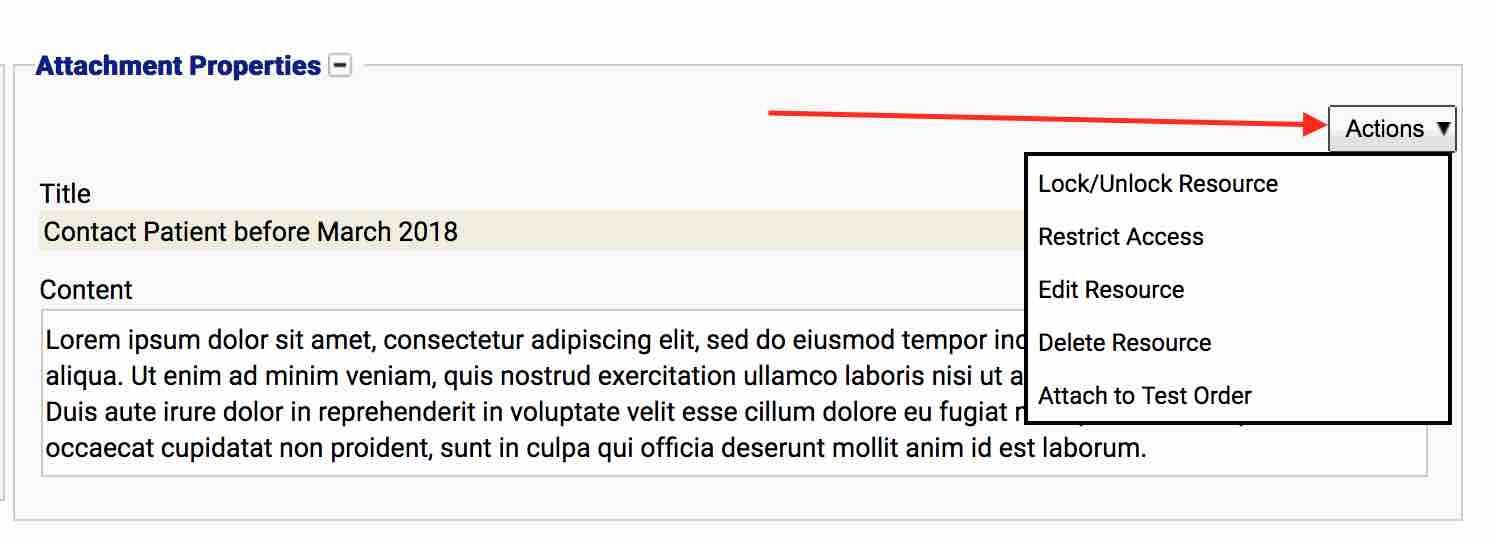
The available options are discussed below:
Restrict Access
Restrict access is similar to locking records. However, Restrict access provides more flexibility, as it allows the record to be locked to specific user accounts. Restricted records are not displayed at all, either in the table or in the count of attachments and are more suited for adding private notes or attachments to various records without other users knowing they exist.
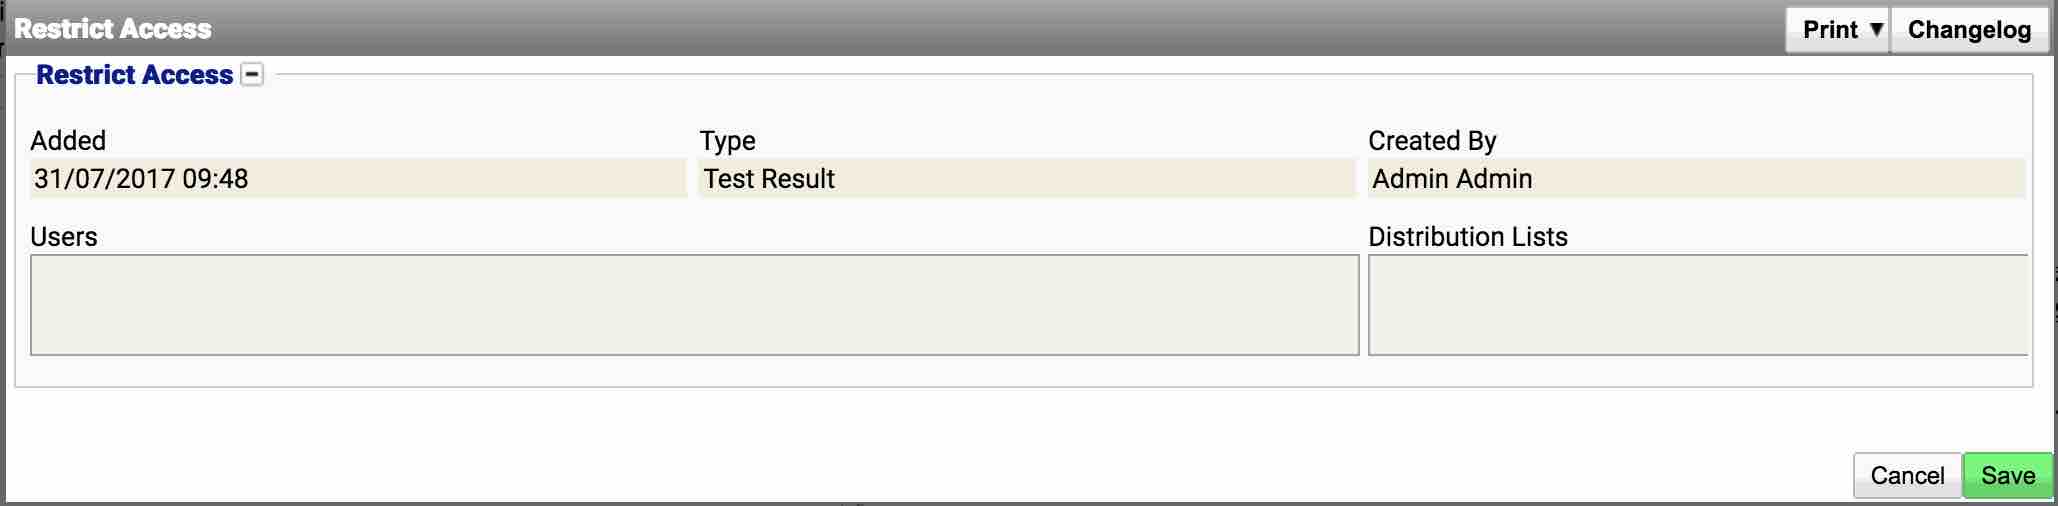
The restricting dialog shows a list of users and distribution lists that the record can be locked to. The selection works similar to writing an email and adding multiple recipients. e.g. Typing in David will show all users who have David in their names and allow them to be selected as shown below:
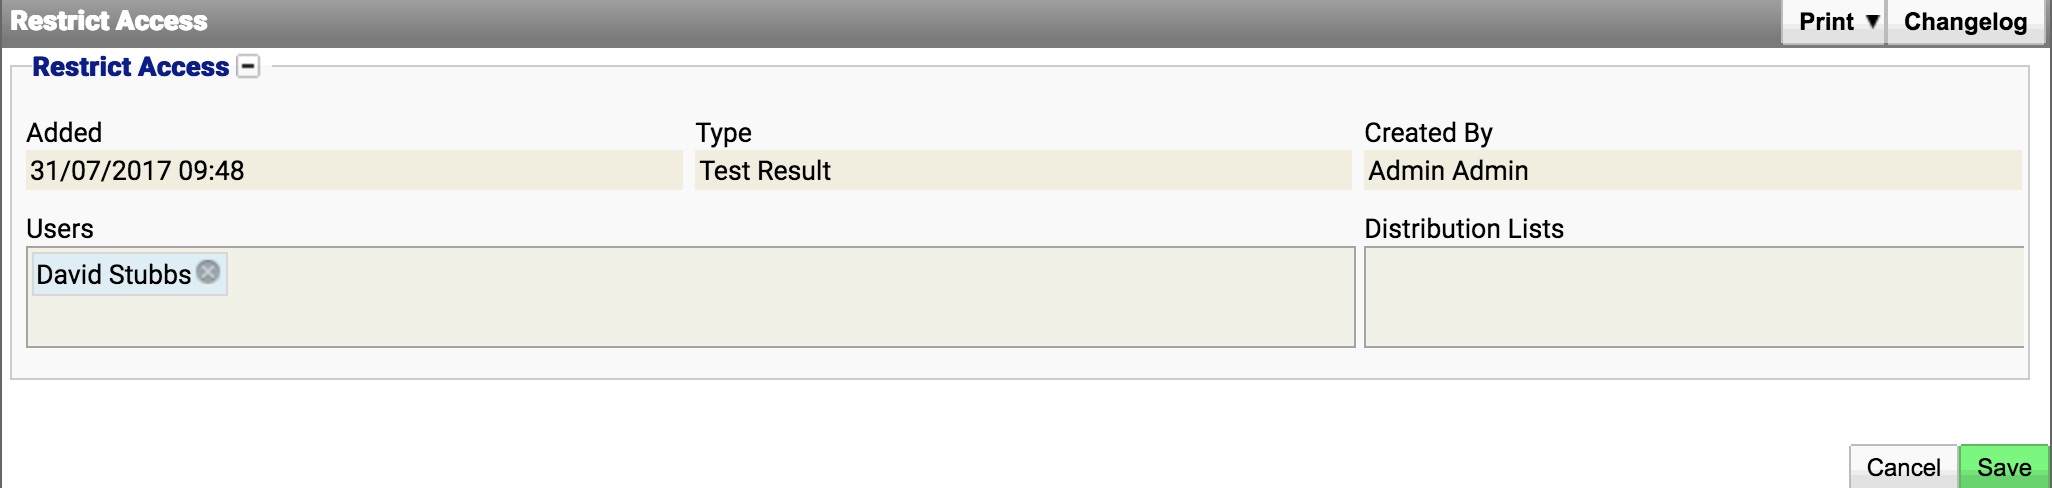
To remove a user select the x symbol next to the name. Additional users can be added in the same way if required. Distribution lists (TODO link to distribution lists) can also be added in cases where a group of users is required. When finished, select Save to save the changes and close the dialog.
Once restricted, the record will only be displayed in the table and tab count for users who were given access. As in locking records, it is possible for a user to lock themselves out of a record.
Lock/Unlock Resource
Lock/Unlock resources is depreciated, please use the more flexible system of Restrict Access above.
Locking an attachment/resource will restrict access to specific groups of users, e.g. A PDF attachment may be deemed confidential and can be hidden from users who should not be looking at them. Locking uses Roles (TODO Link to Roles) which are groups of users arranged into similar groups based on permissions they have in the system. Selecting Lock/Unlock Resource will show the below dialog box:
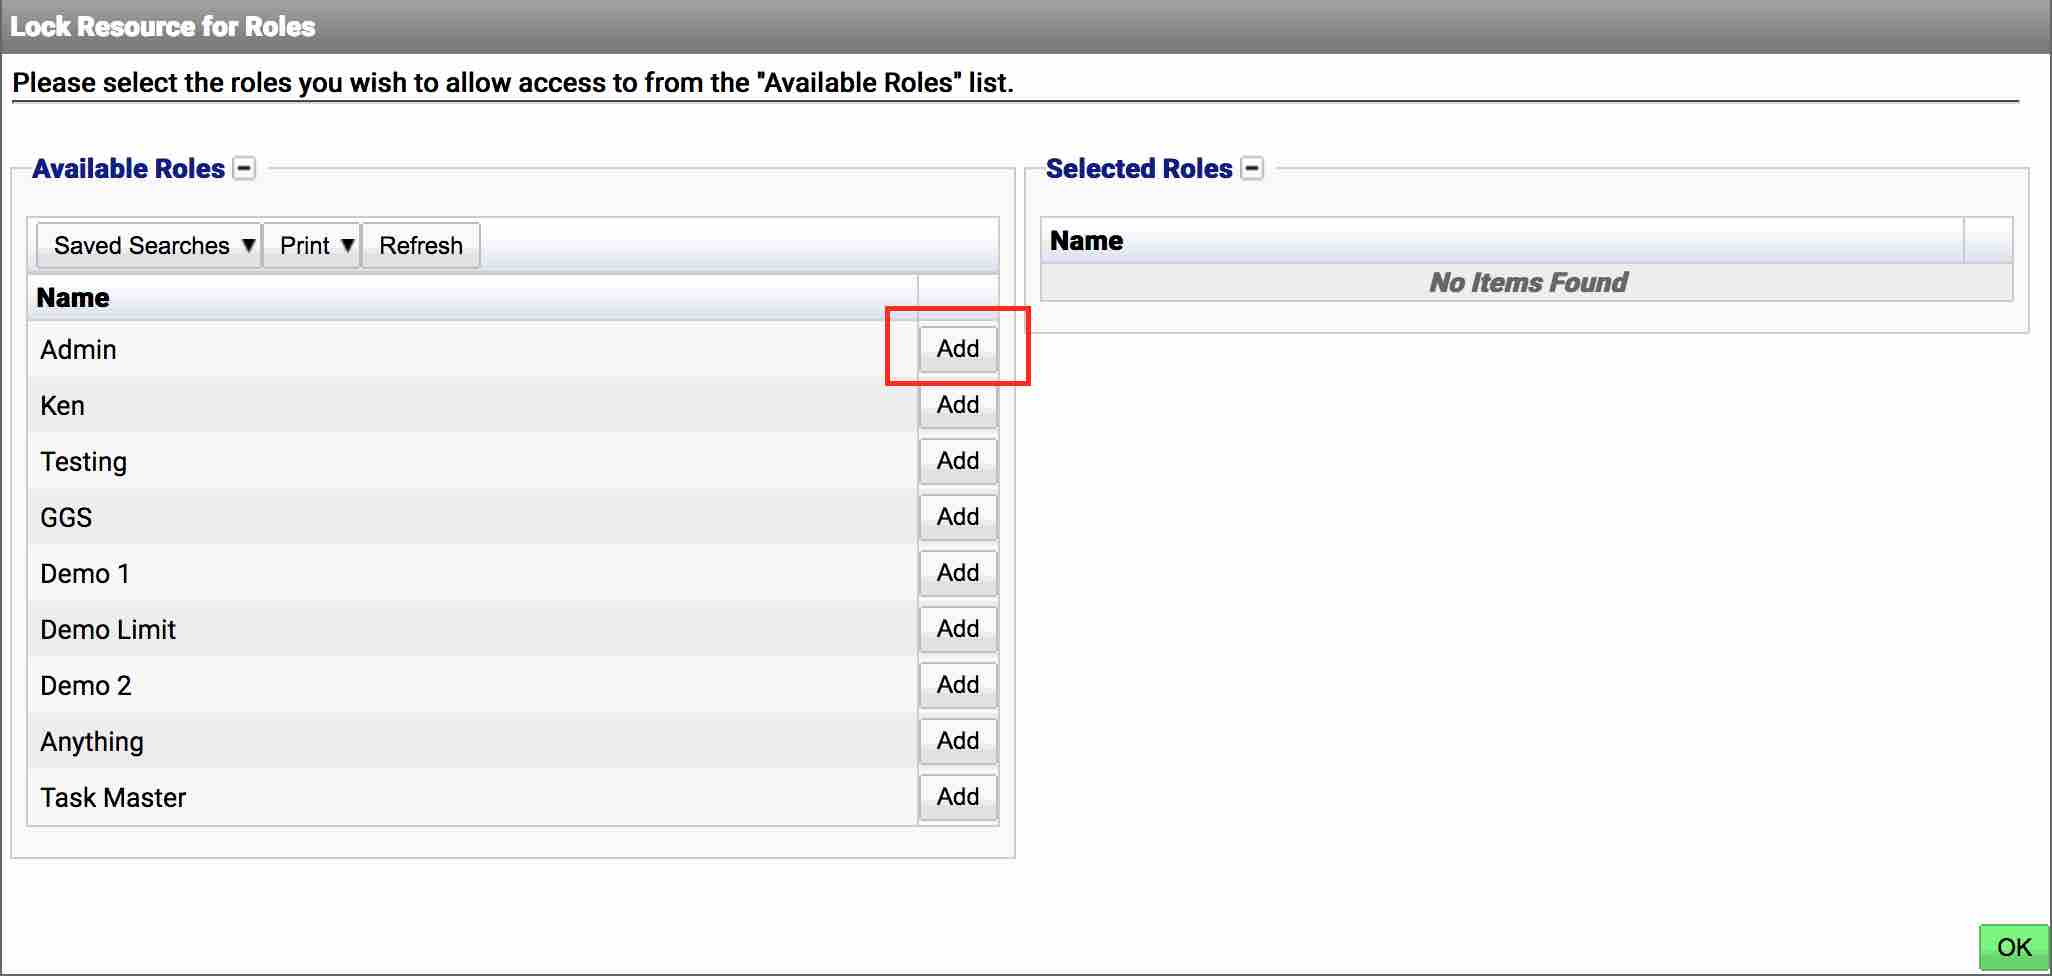
The locking area shows two tables, a list of available roles to restrict access to and the list of roles who have access. When no roles are listed in the right-hand table, the record is visible to everyone. To lock the record to a particular role, select the Add button next to the relevant role. N.B. Multiple roles can be added if required.
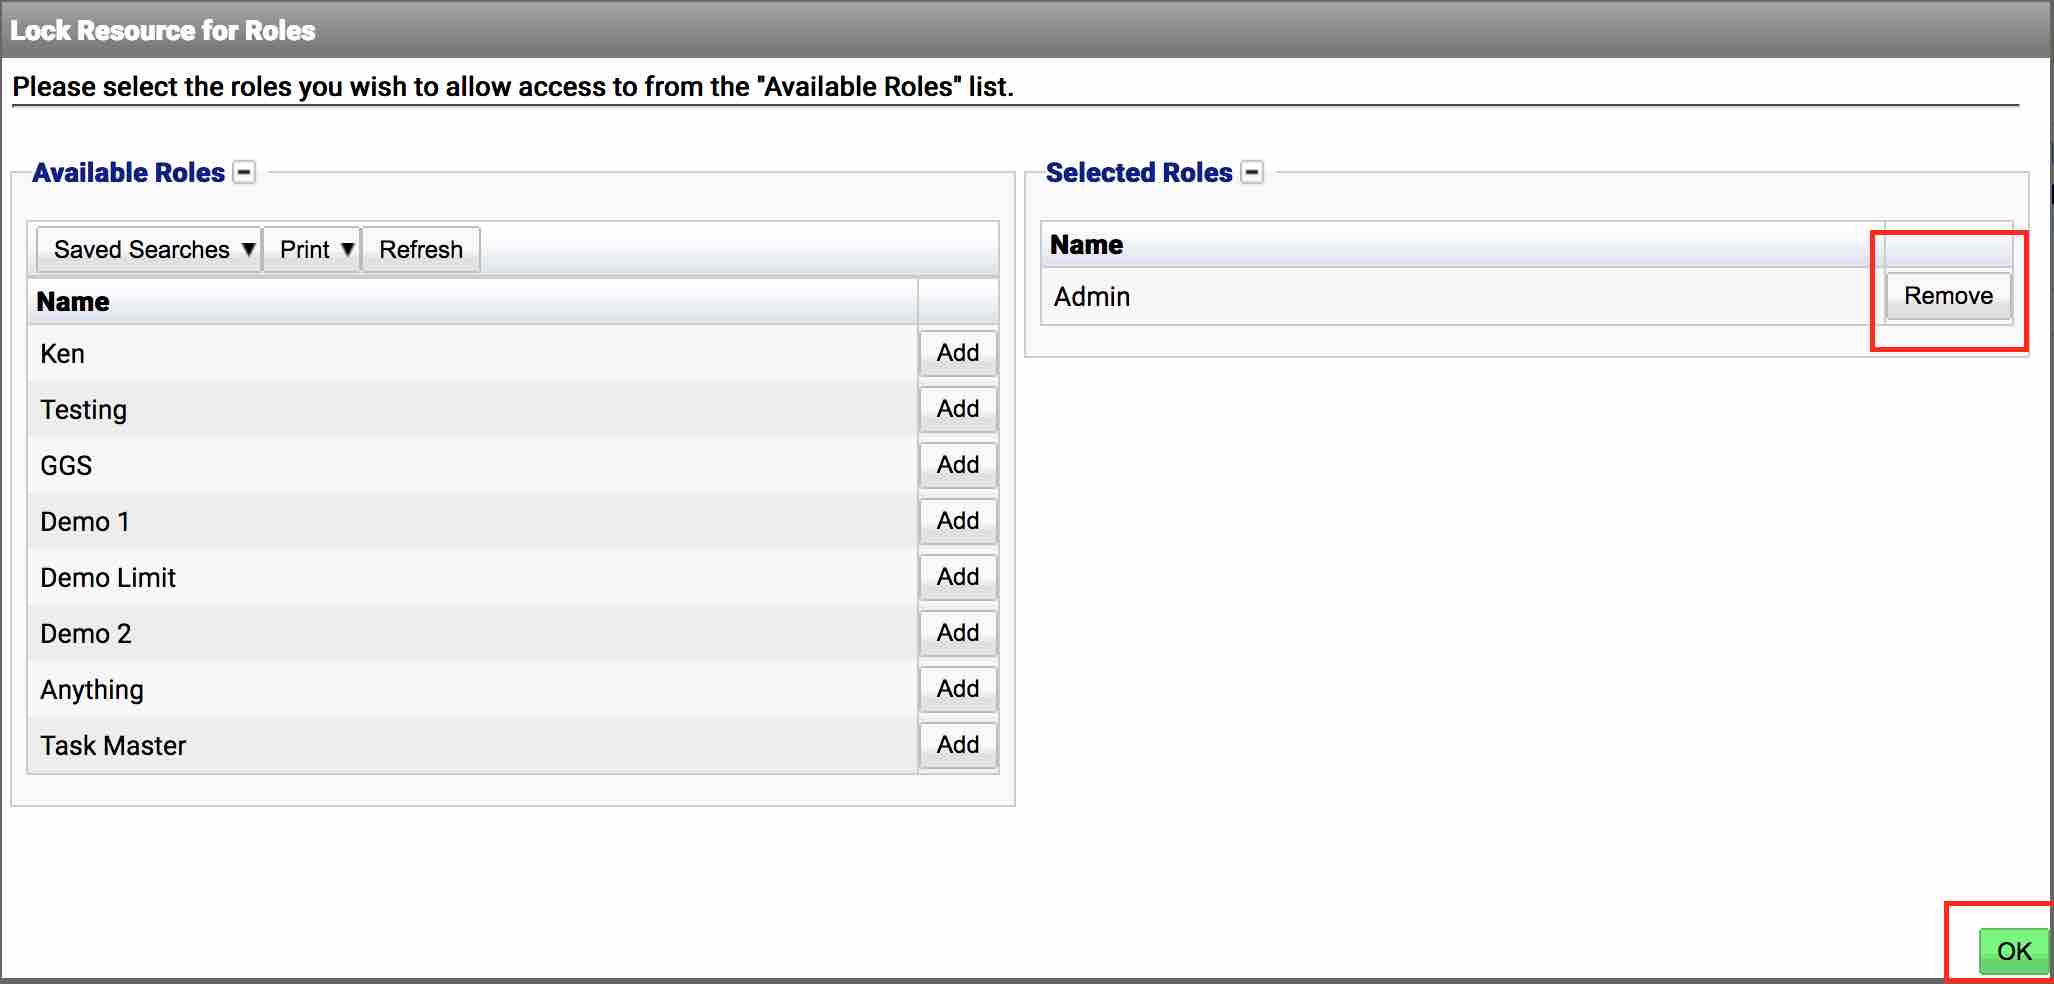
Once a role has been added, it will be visible in the Selected Roles area. It can be removed if required by selecting the Remove button which will move it back to the Available Roles column. Select OK to close the dialog box and apply the changes.
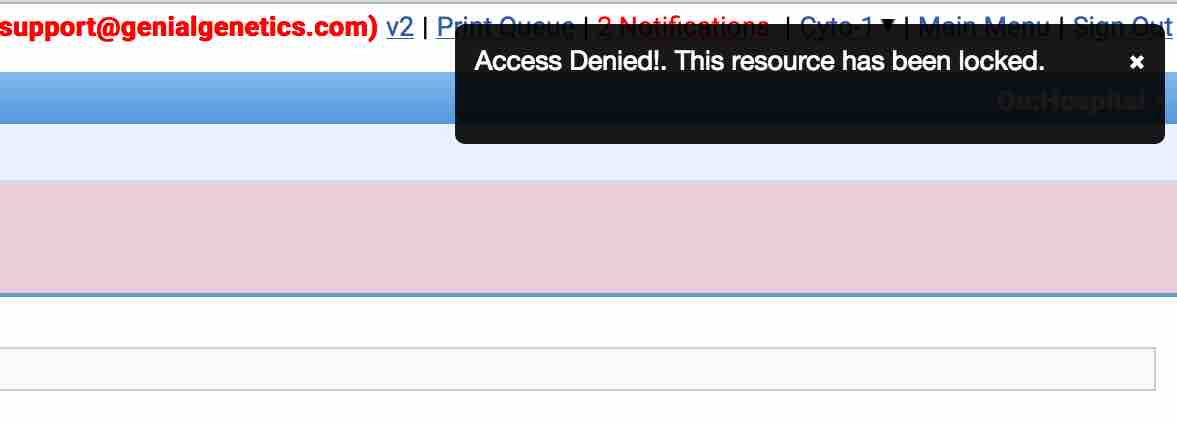
It is possible for a user to accidentally lock themselves out of a record if they are not in one of the selected roles. If this happens, only a member of the selected role can unlock the record again.
Users who are not in one of the selected roles will see a warning similar to below when attempting to view the record:
Edit Resource
Editing a resource will show a popup dialog for modifying the record. This dialog will be similar to the dialog used for creating a new record and are discussed later in this document.
Delete Resource
Deleting a resource will remove the resource from display.
Attach to Test Order
The Attach to Test Order option allows an attachment to be placed as a result on an external/send-out test. e.g. The result may have been scanned into the system and added as an attachment, and from this screen it can be attached to the correct test.

The dialog box will show a list of test orders related to the currently open patient record. To attach the attachment to a particular test, select the Select option on the table next to the required item. Once the test has been selected, the dialog box will close and a popup message will appear indicating whether the operation was successful.
The attachment will then be linked to the test as show below in the Sample Management -> Send Outs screen:

Creating Resources/Attachments
Attachments
An attachment is a file (e.g. PDF, Word Document, Spreadsheet) that can be attached to a record in the system. Attachments are generally used for PDFs or documents and the system supports inline viewing of PDFs. For images or audio, it is better to use the Image and Audio Note options instead.
To create a new attachment, select Actions -> New Attachment
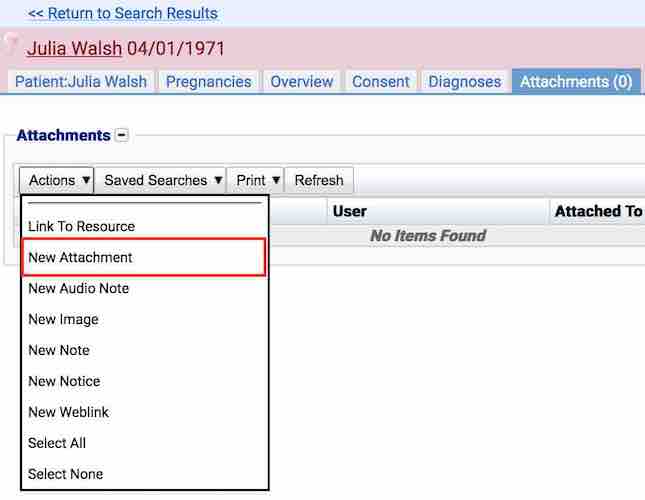
The new attachment dialog will appear:
An attachment has the following information:
- Title. An identifying title for the attachment, e.g. Lab Result. This field is required.
- Attachment Type. A dropdown list containing attachment types. This list is defined in the Attachment Type preferences (Attachment Types). This list is useful for grouping the different types of attachments available on the system, and is useful for performing searches. Some examples of attachment types are “Consent Letter”, “Lab Referral”, etc.
- Attachment. This field contains the file being attached. To choose the file, select the Browse button and locate the file on your computer.
The attachment Button Text may vary based on the browser used.
- Description. The description field should contain a small description of the attachment.
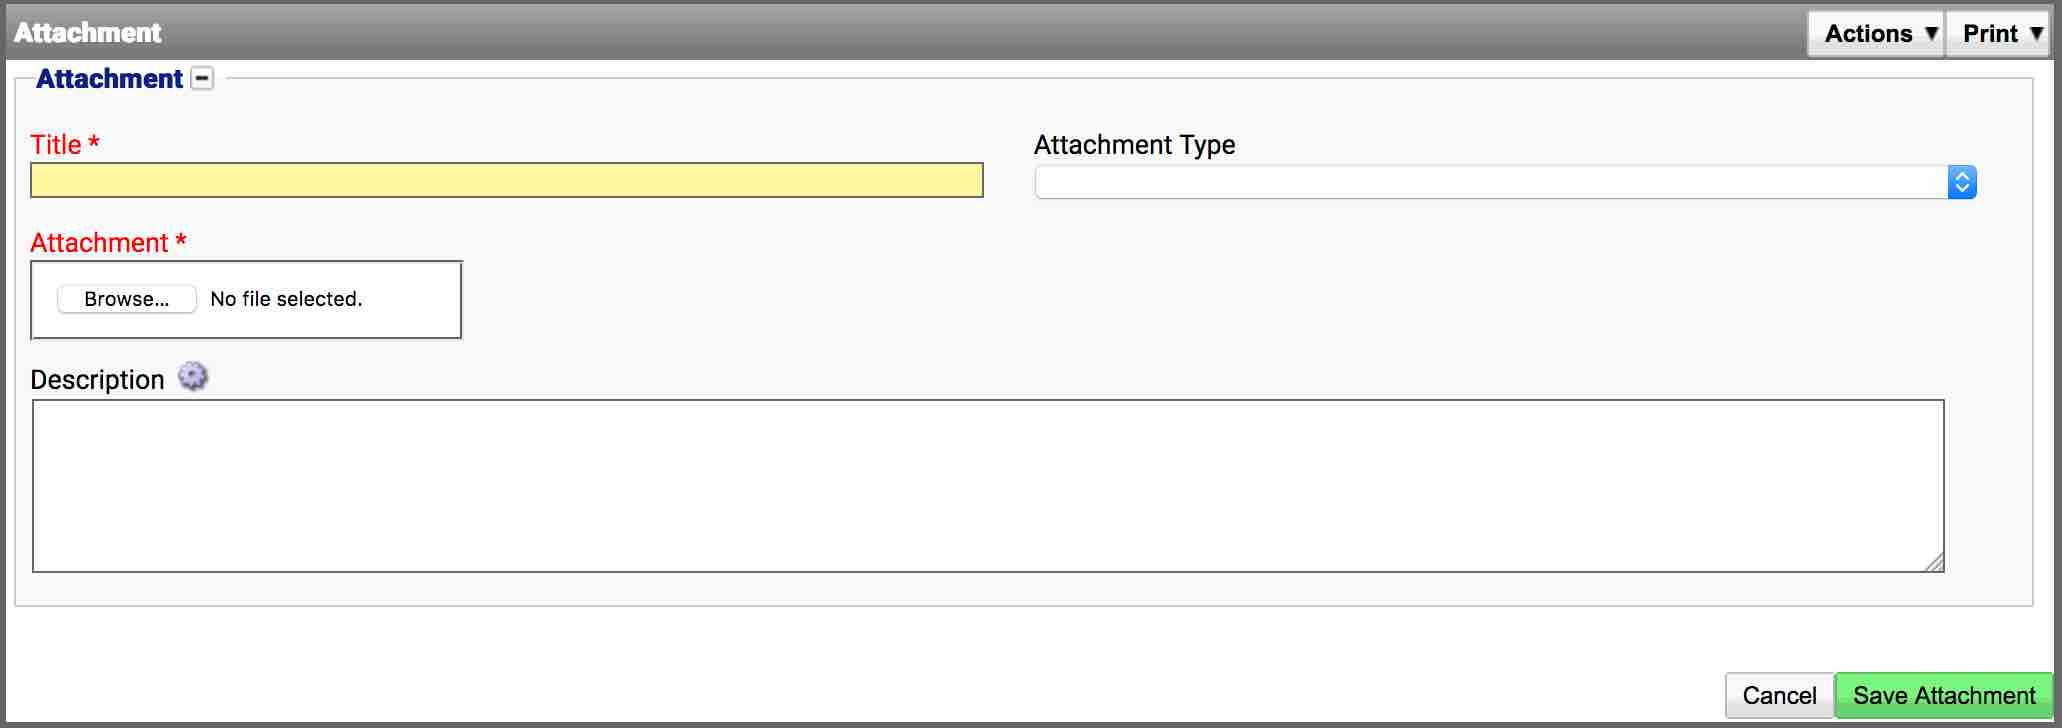
Fill out the details as required and upload the file using the Attachment field:
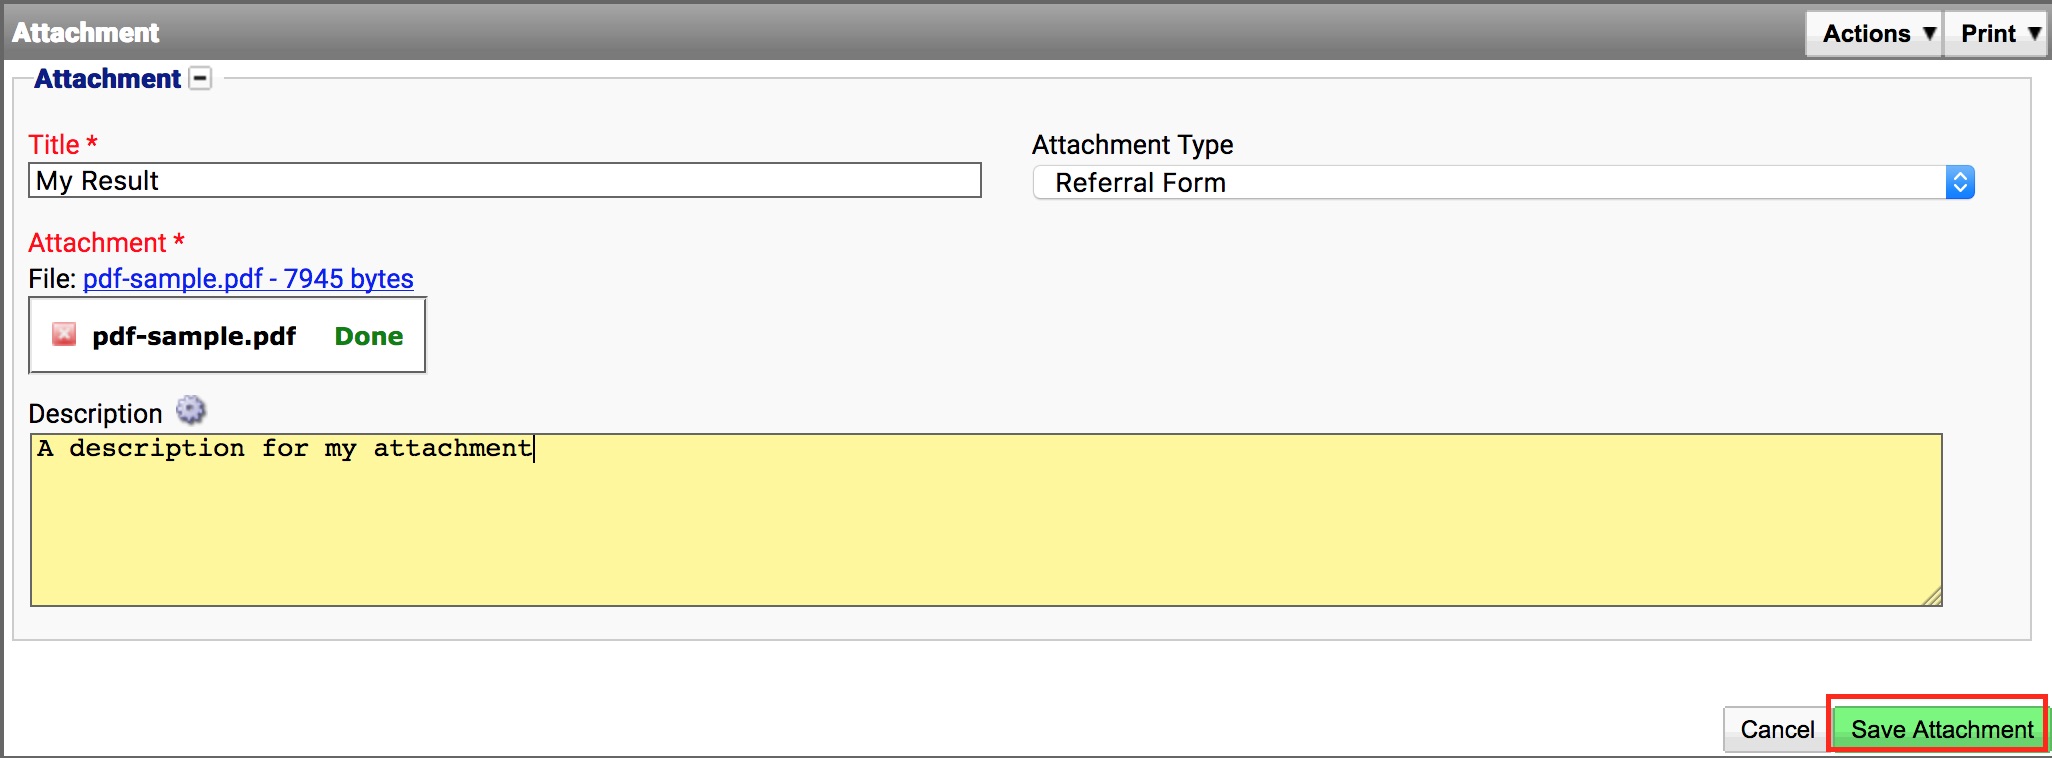
Once all details have been entered, select the Save Attachment button. The attachment will then be added to the system and associated with the record currently being viewed, e.g. A patient
Audio Notes
An audio note is useful for attaching recordings to a record, e.g. A recording of a telephone conversation or notes from a dictaphone. Depending on the browser and operating system used, the audio can be played back directly from the browser without first downloading the file.
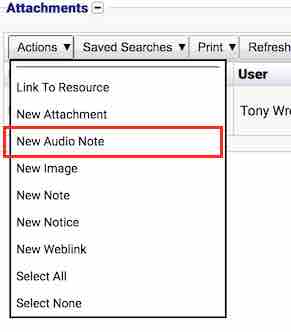
To create a new audio note, select Actions -> New Audio Note
The “New Audio Note” dialog will appear:
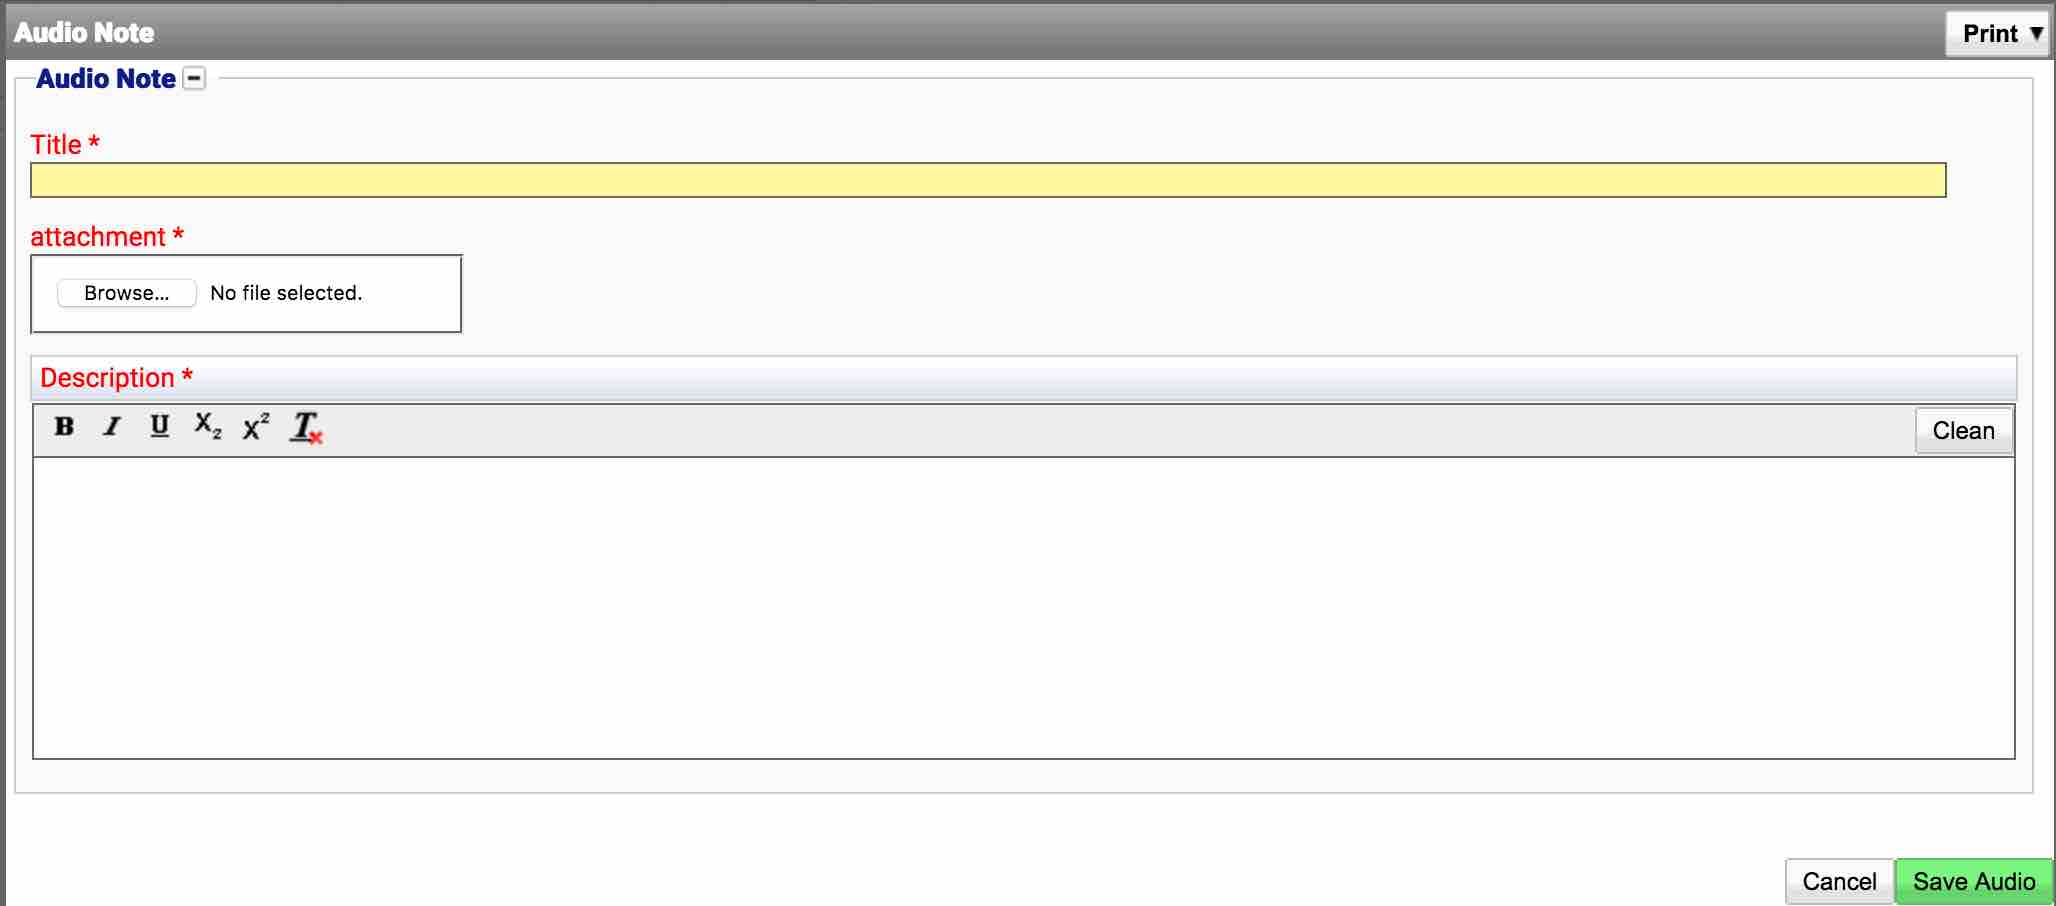
An audio note has the following information:
- Title. An identifying title for the audio note, e.g. Telephone conversation. This field is required.
- Attachment. This field contains the audio file being attached. To choose the file, select the Browse button and locate the file on your computer.
- Description. A description of the audio file. Adding a description is a good idea as it allows the file to be identified without the need to play it back.
Fill out the details as required and upload the audio file using the Attachment field:
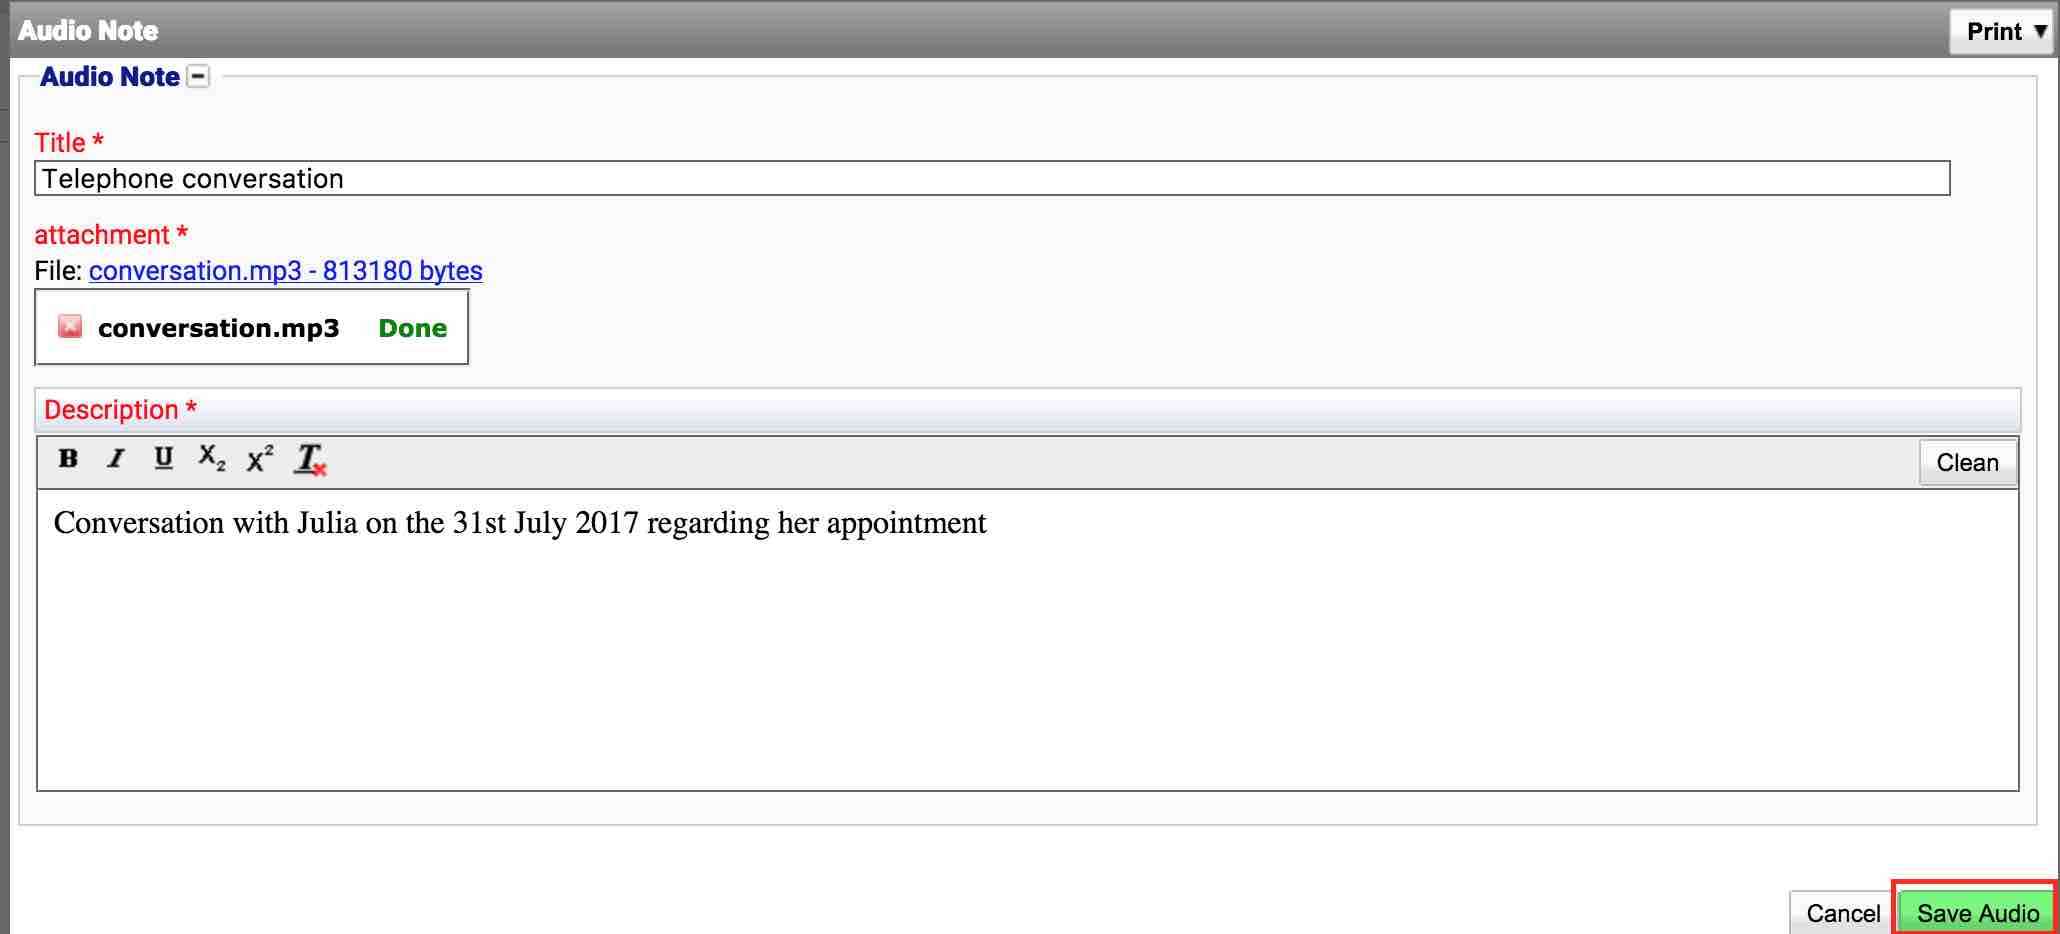
Once all details have been entered, select the Save Audio button. The audio note will then be added to the system and associated with the record currently being viewed, e.g. A referral.

Images
An image is a picture file (e.g. a photograph or scan) that can be attached to a record in the system. Supported image types are displayed inline inside iGene without the need for the user to download the image.
Supported image formats are jpeg, bmp, gif, tiff and png. It’s advisable to use either jpeg or png for images as these are compressed and will load and display faster for the user whilst putting less load on the system. Unsupported image types will not be displayed inline and will require the user to download them.
To create a new image, select Actions -> New Image
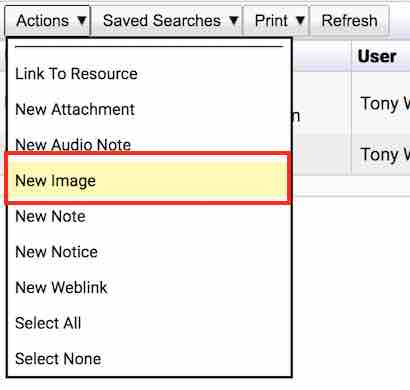
The new image dialog will appear:
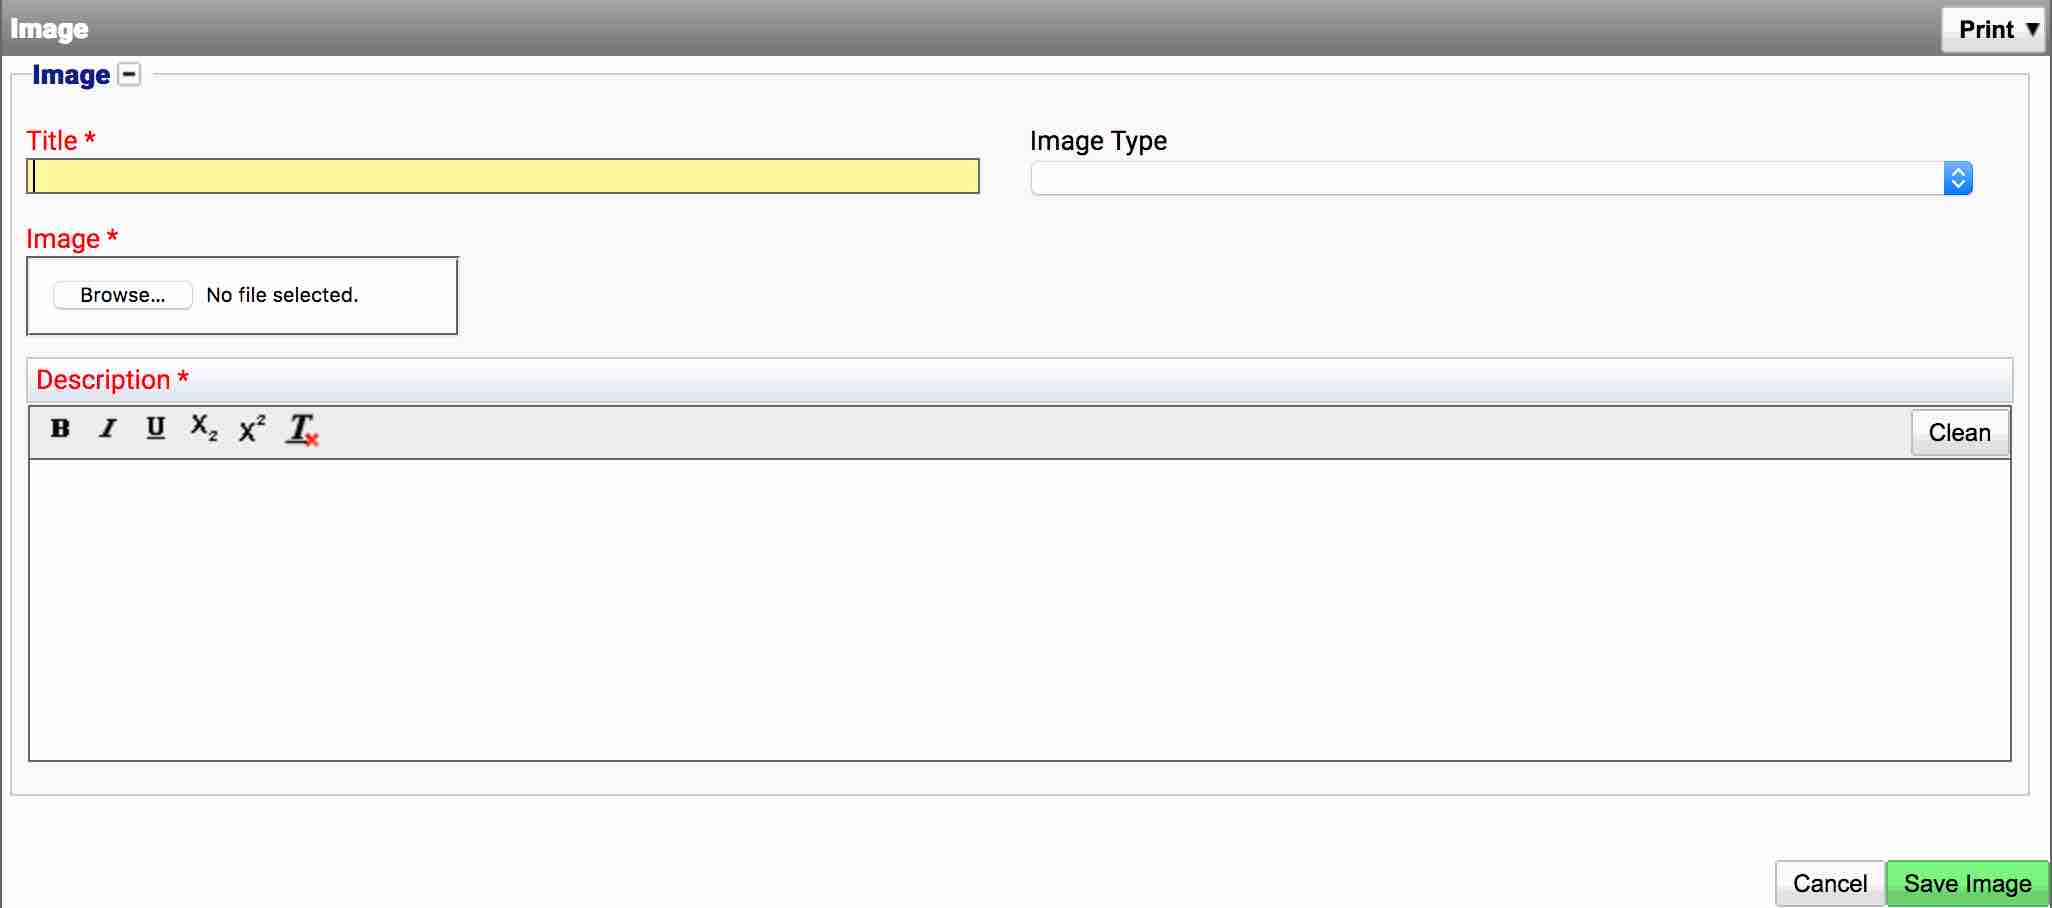
An image has the following information:
- Title. An identifying title for the image, e.g. Analysis Result. This field is required.
- Image Type. A dropdown list containing image types. This list is defined in the Image Type preferences (Image Types). This list is useful for grouping the different types of images available on the system, and is useful for performing searches. Some examples of image types are “Array Image”, “Patient Photograph”, etc.
- Image. This field contains the file being attached. To choose the file, select the Browse button and locate the file on your computer.
- Description. The description field should contain a small description of the image.
Fill out the details as required and upload the file using the Image field:
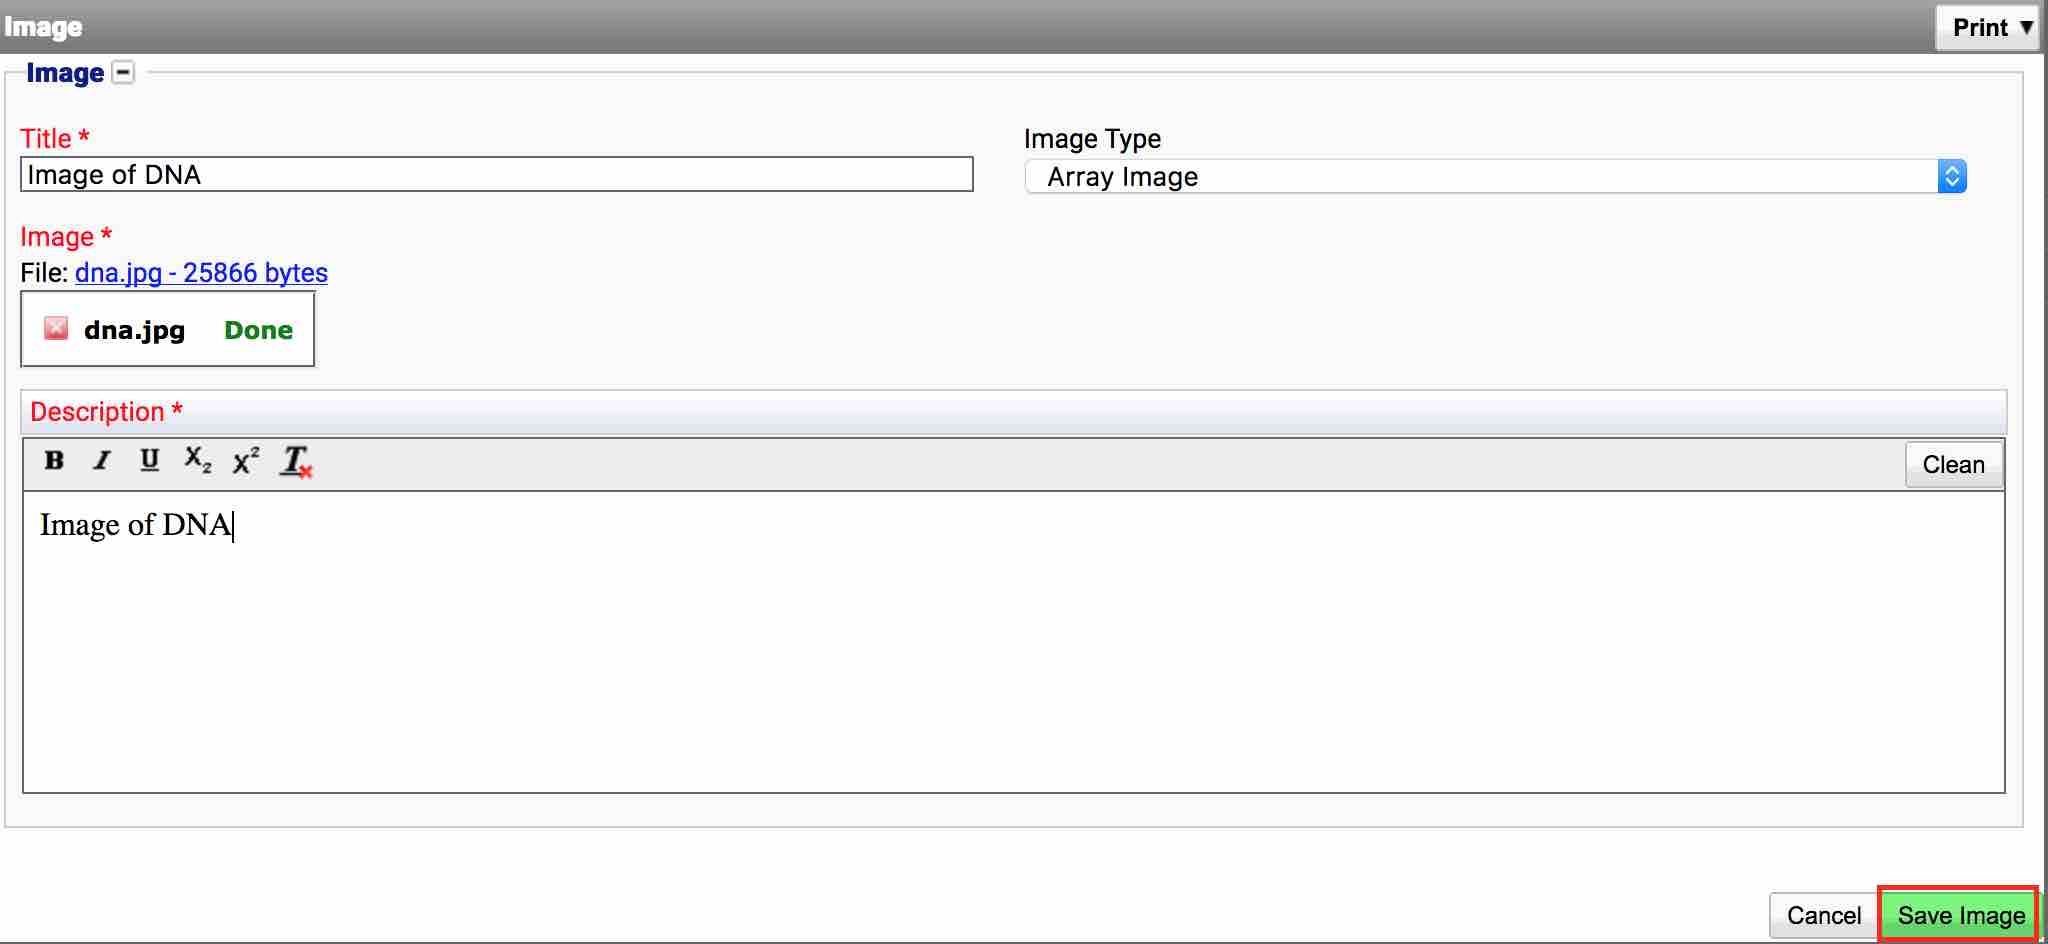
Once all details have been entered, select the Save Image button. The image will then be added to the system and associated with the record currently being viewed, e.g. A patient
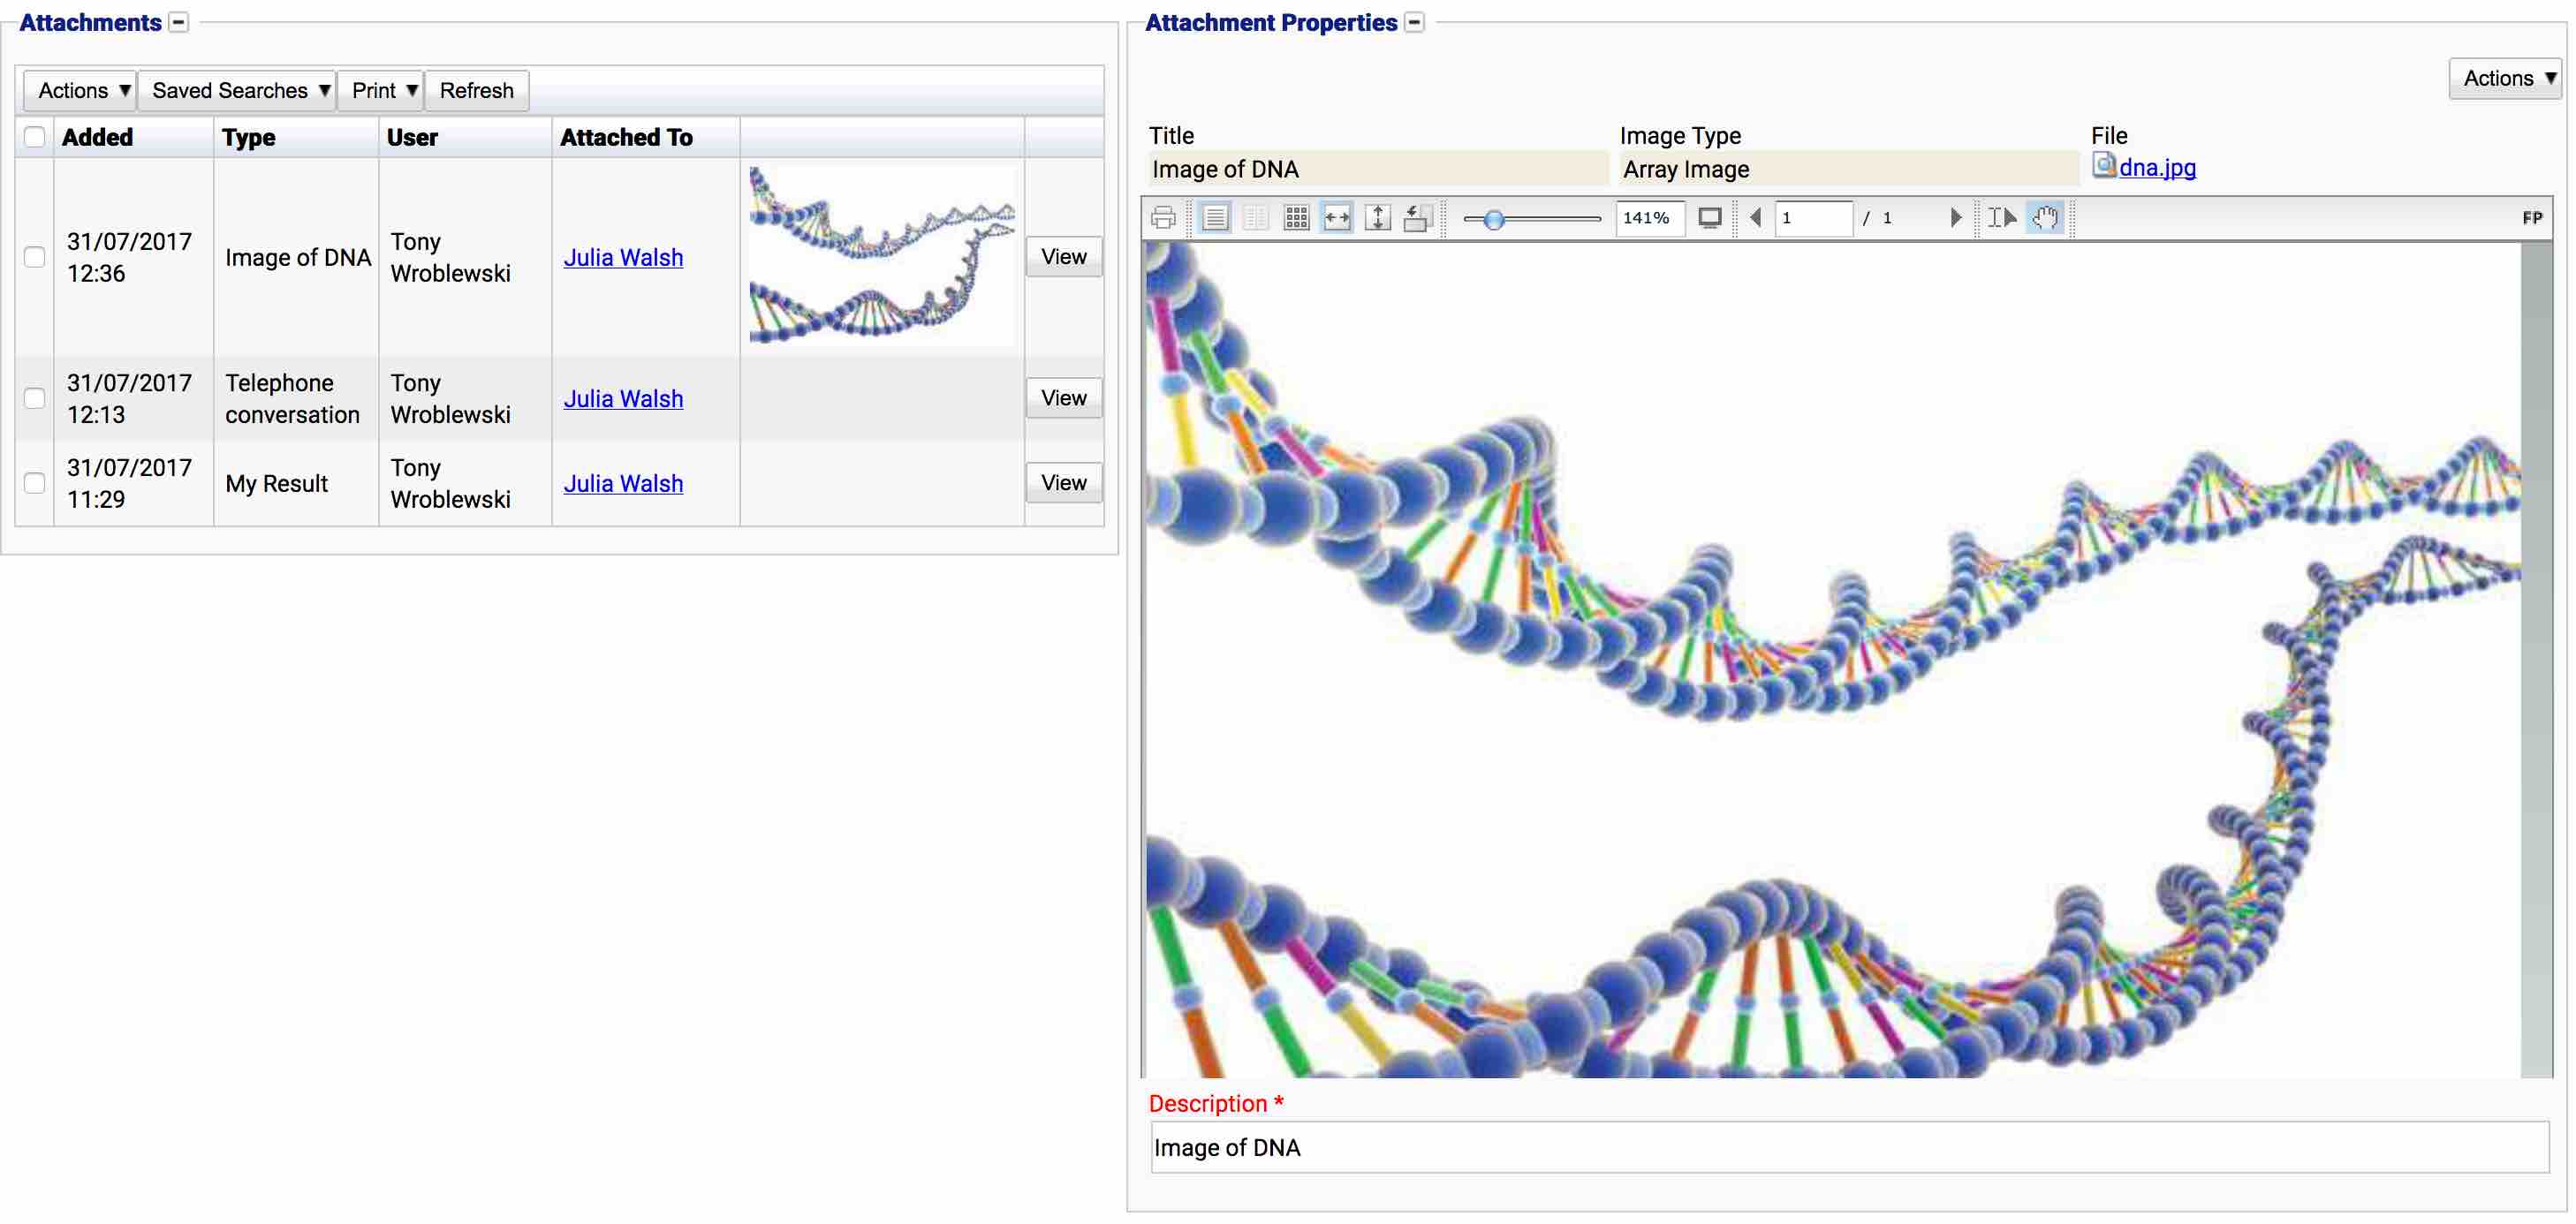
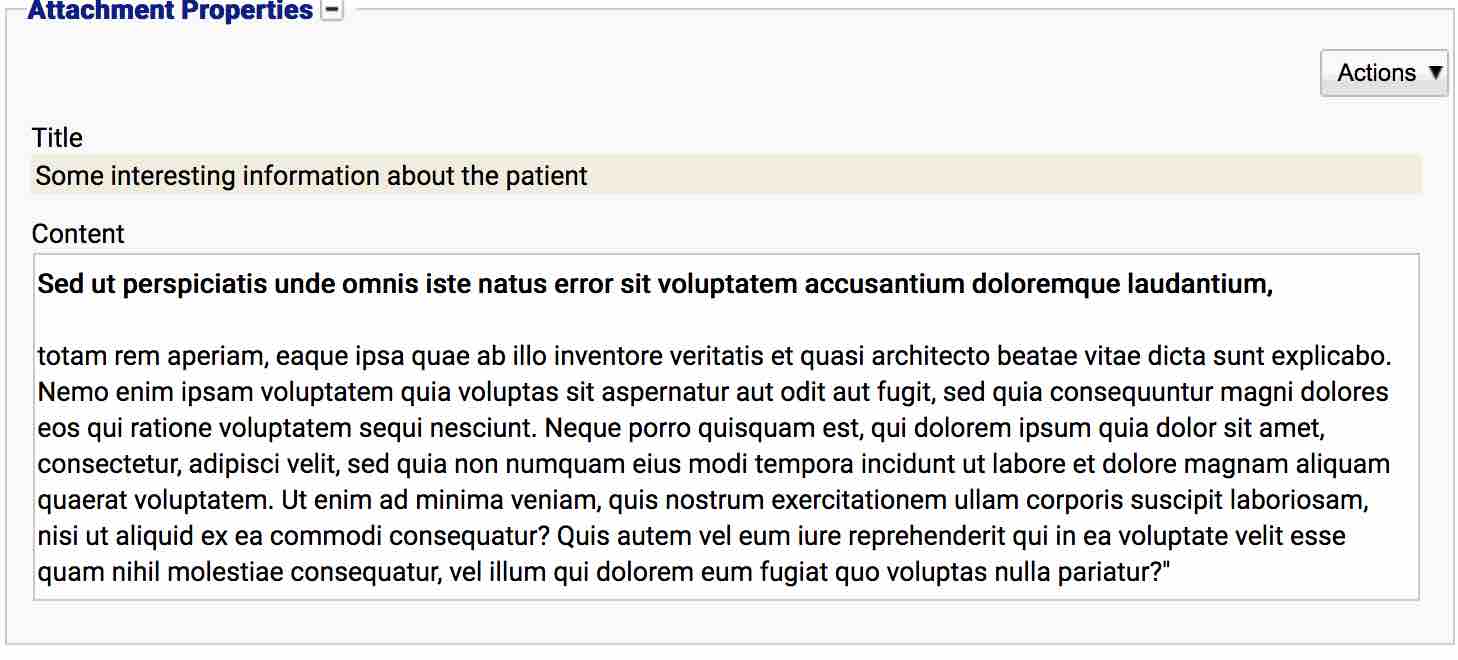
Images will be displayed inline if the file format is supported.
Notes
A note is used to add some textual information to a record that doesn’t fit anywhere else. e.g. It could contain some general notes about a patient or case, or it could contain some information from a data migration.
To create a new note, select Actions -> New Note
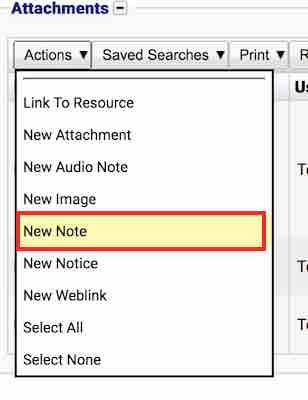
The “New Note” dialog will appear:

A note has the following information:
- Title. An identifying title for the note, e.g. Discussions or Case Notes. This field is required
- Content. The content field contains the note contents. Depending upon system configuration, some basic formatting is available, i.e. bold, italic, underlining.
Fill out the details as required:
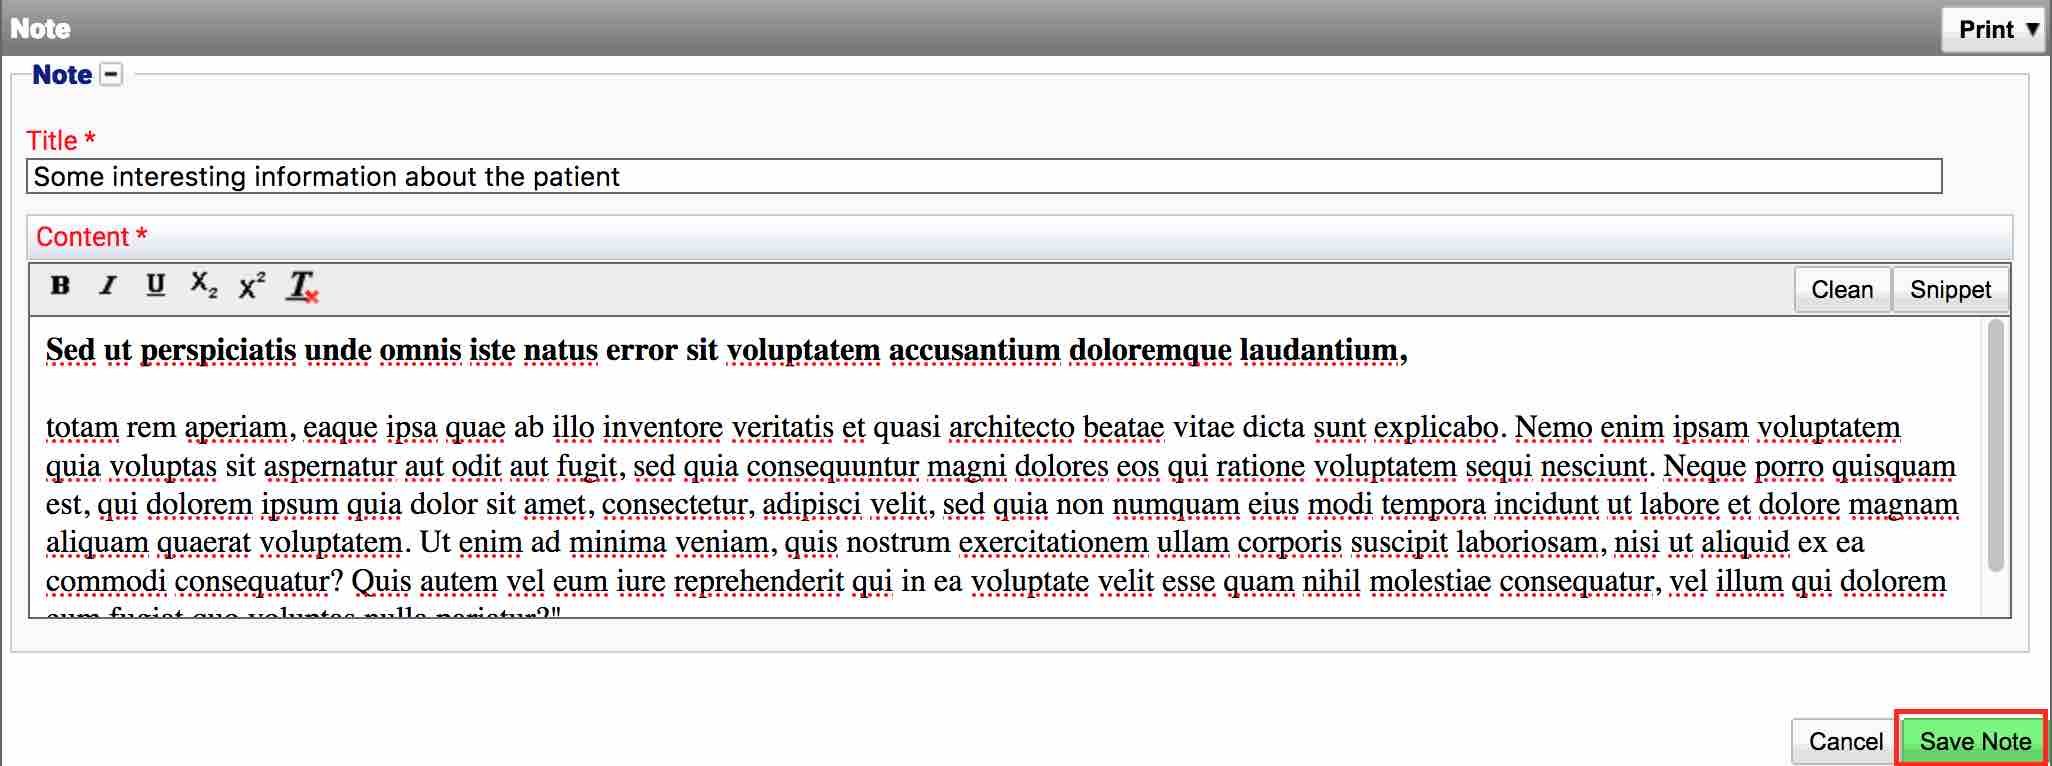
Once all details have been entered, select the Save Note button. The note will then be added to the system and associated with the record currently being viewed, e.g. A referral.
Notices
A notice is used to notify a user (or group of users) of some event or information in iGene. Depending on the type of notice, the user will either receive an email or a popup message upon logging in. In addition, the notice will appear in their noticeboard area (TODO link to noticeboard).
As well as notices, iGene also supports tasks.[TO DO] A notice is generally used to notify a user of some event in the system, e.g. Some case details have been updated or to inform them of system downtime. Tasks are used to assign specific tasks to a user, e.g. Please review this patient or result. Tasks are more powerful as they allow custom workflows and have a history related to them. Tasks can not be created via the attachments area and instead have their own special area.
To create a new notice, select Actions -> New Notice
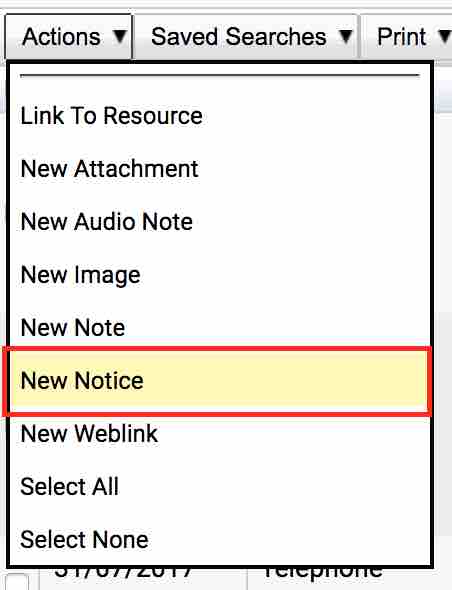
The “New Notice” dialog will appear:

A notice has the following information
- Visibilty: This option can either be System or User:
- System: The notice is visible to everyone in the system. It is not specific for any user.
- User: The notice is only visible to specific users. Selecting this option will reveal an extra field for choosing the recipients.
- Subject: A short subject regarding the notice, e.g. Patient details updated. This is a required field.
- Activation Date: The activation date chooses when the notice will be valid from. e.g. A notice can be made that is not valid until next week. The user will not be informed about the notice until the activation date is reached.
- Type. A dropdown list containing notice types. This list is defined in the Notice Type preferences (Notice Types). This list is useful for grouping the different types of notices available on the system for easier searching and organising. Some examples of notice types are “System Notice”,“Case Updated”, etc.
- Blocking Message. A blocking message will black out the screen until the recipient/recipients have read the notice. This option should be used if the user must read the notice immediately upon logging into iGene (if they are not already logged in). A blocked message will not let the recipient continue using the system until they have seen the notice.
- Show to New Users. This option will only show the notice if the user account has been recently created and it’s the first time the user has signed into the system. This could be a welcome message, or perhaps a link to a document containing some rules and regulations.
- Notice. The notice area contains the actual notice content. This is a required field.
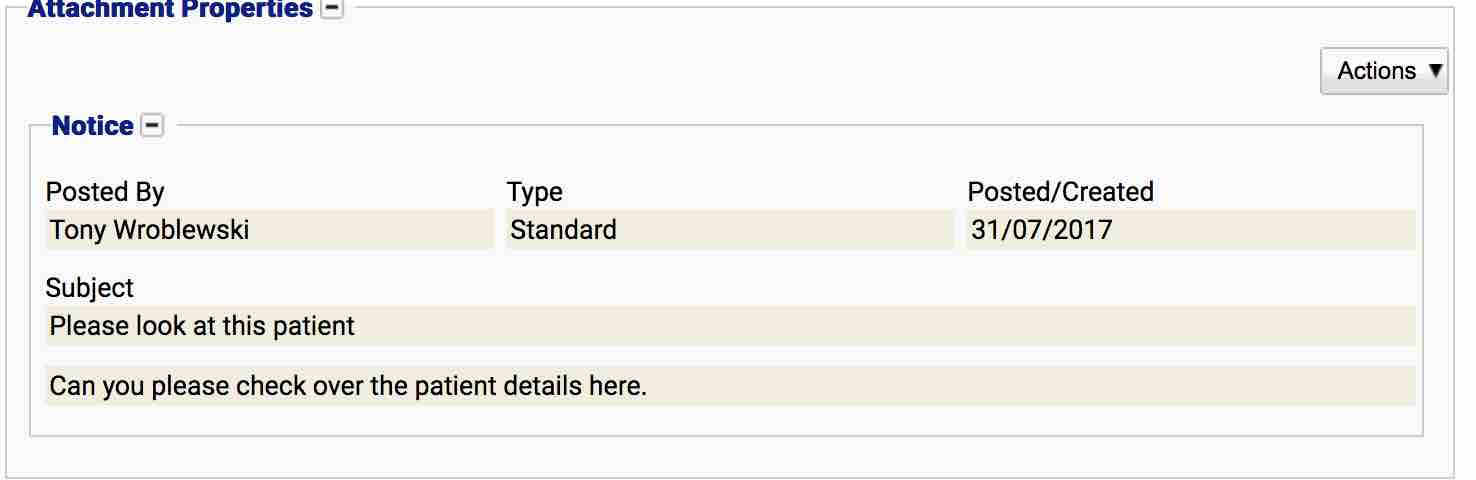
If the notice is created via the resources/attachments area, it will be attached to the current record. When viewing the notice, the recipients will be able to click on a link that will take them to the relevant record in the system, e.g. To a specific referral.
For more information about notices and the noticeboard, please see (TODO add link to noticeboard)
Fill out the details as required:
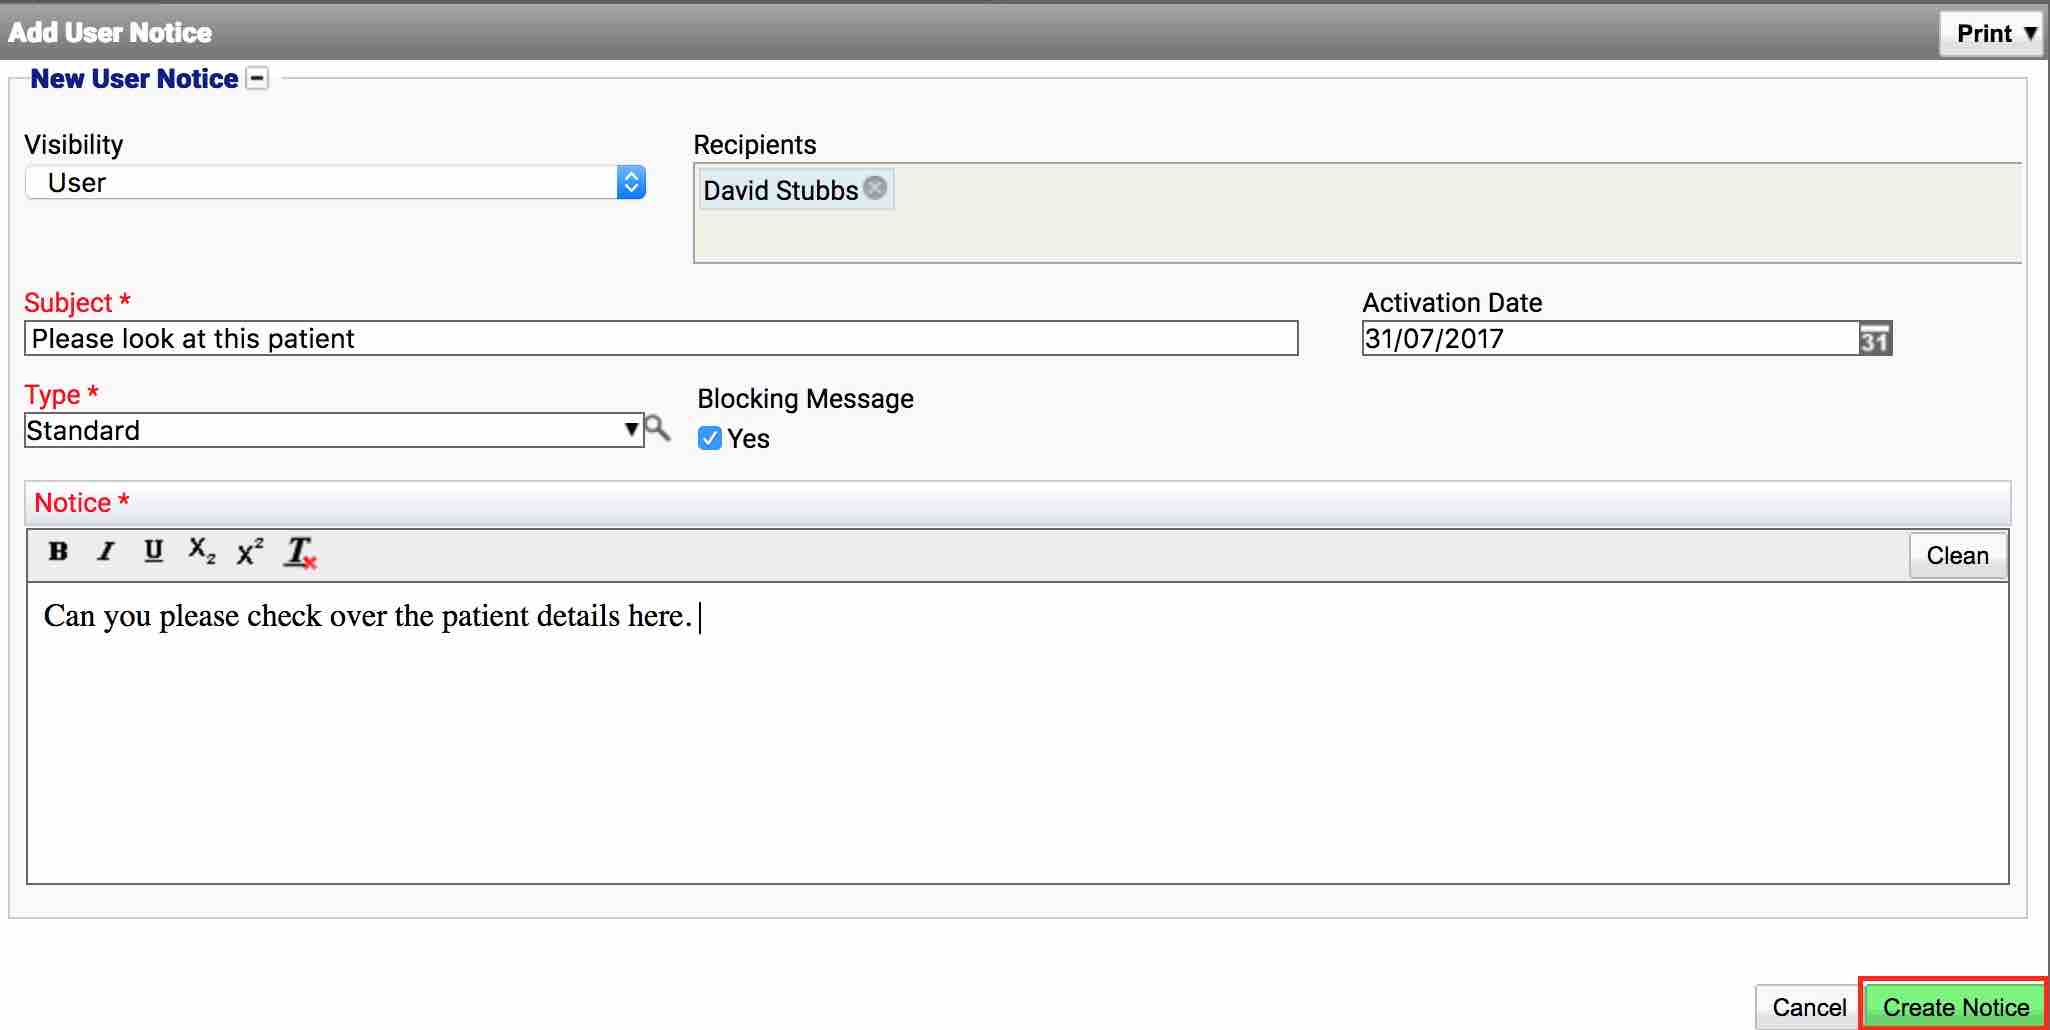
Once all details have been entered, select the Create Notice button. The notice will then be added to the system and associated with the record currently being viewed, e.g. A referral. The recipients, if they have been entered will receive the notice along with a link to the record. (They may also receive an email based upon their settings).
Weblinks
A weblink is used to add a website link to a record, e.g. It could be used to attach additional articles about a patient or perhaps internal Intranet links regarding specific cases.
To create a new weblink, select Actions -> New Weblink
The “New Weblink” dialog will appear:
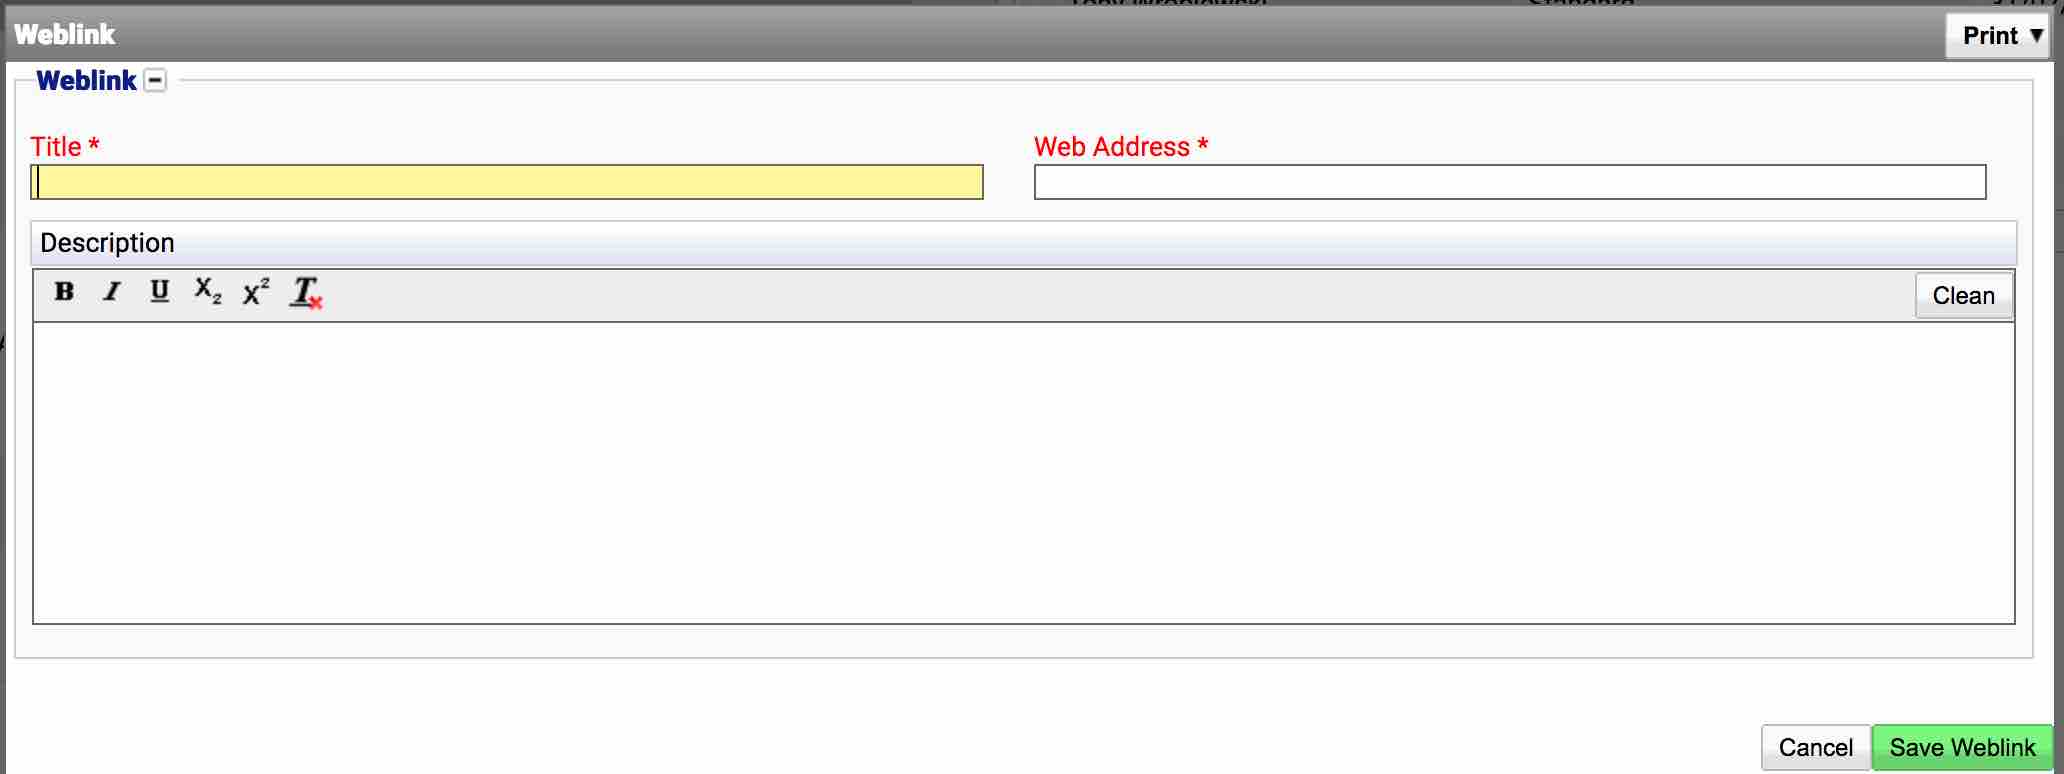
A weblink has the following information:
- Title. An identifying title for the weblink, e.g. Cystic Fibrosis Details. This field is required.
- Web Address. The full web address as seen in the web browser, e.g. http://www.google.com. This field is required.
- Description. The description field contains some added information about the link. If it is not clear where the link goes to then a short description would be useful.
Fill out the details as required:
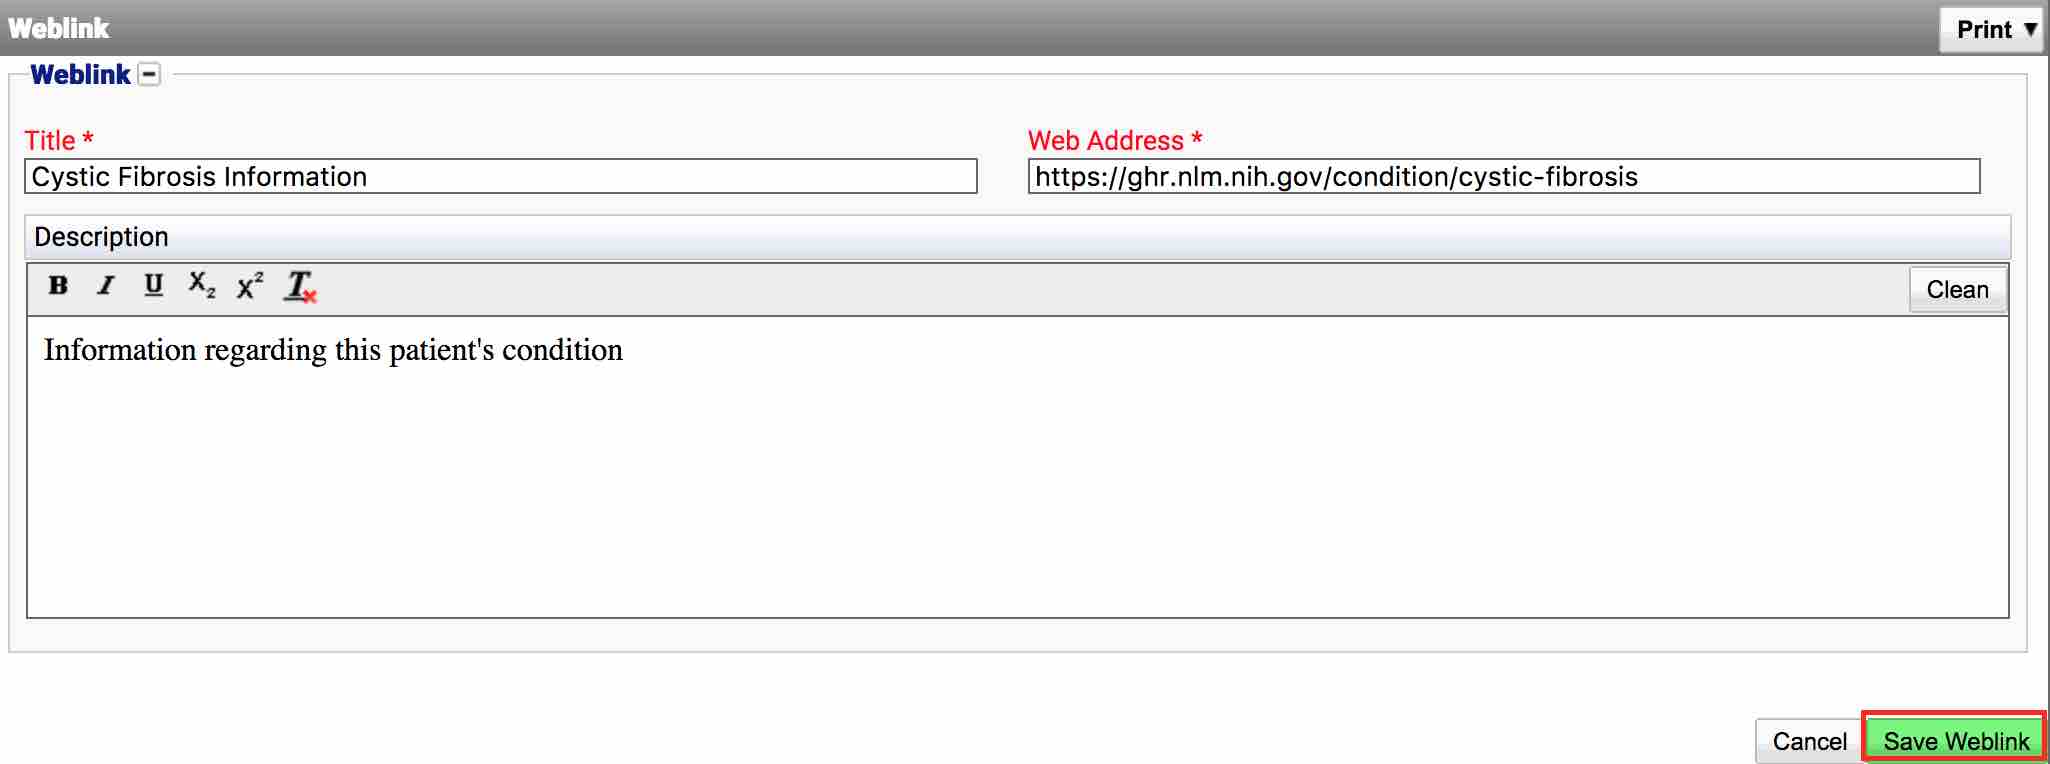
Once all details have been entered, select the Save Weblink button. The weblink will then be added to the system and associated with the record currently being viewed, e.g. A patient. Clicking on the link will open the relevant website.
Linking to Other Resources
Records in iGene can be directly linked to other records by creating a link between them. For example, a piece of equipment could be linked to the specific reagents it uses, or a worksheet could be linked to the equipment used to run the tests. Records that support linking are shown below:
- Users
- Organisations
- Invoices
- Staff
- Worksheets
- Patients
- Stock (Reagents)
- Equipment
- Notice
- Referral
- Facility
- Location
- Distribution Lists
To link two items together, open either of the records and from the attachments tab select Actions -> Link To Resource. For example, linking a Stock and an Equipment together. The user could perform the linking from either the Stock area, or the Equipment area.
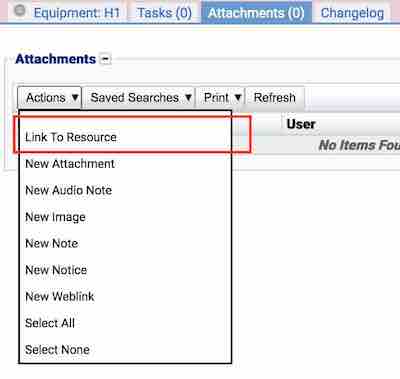
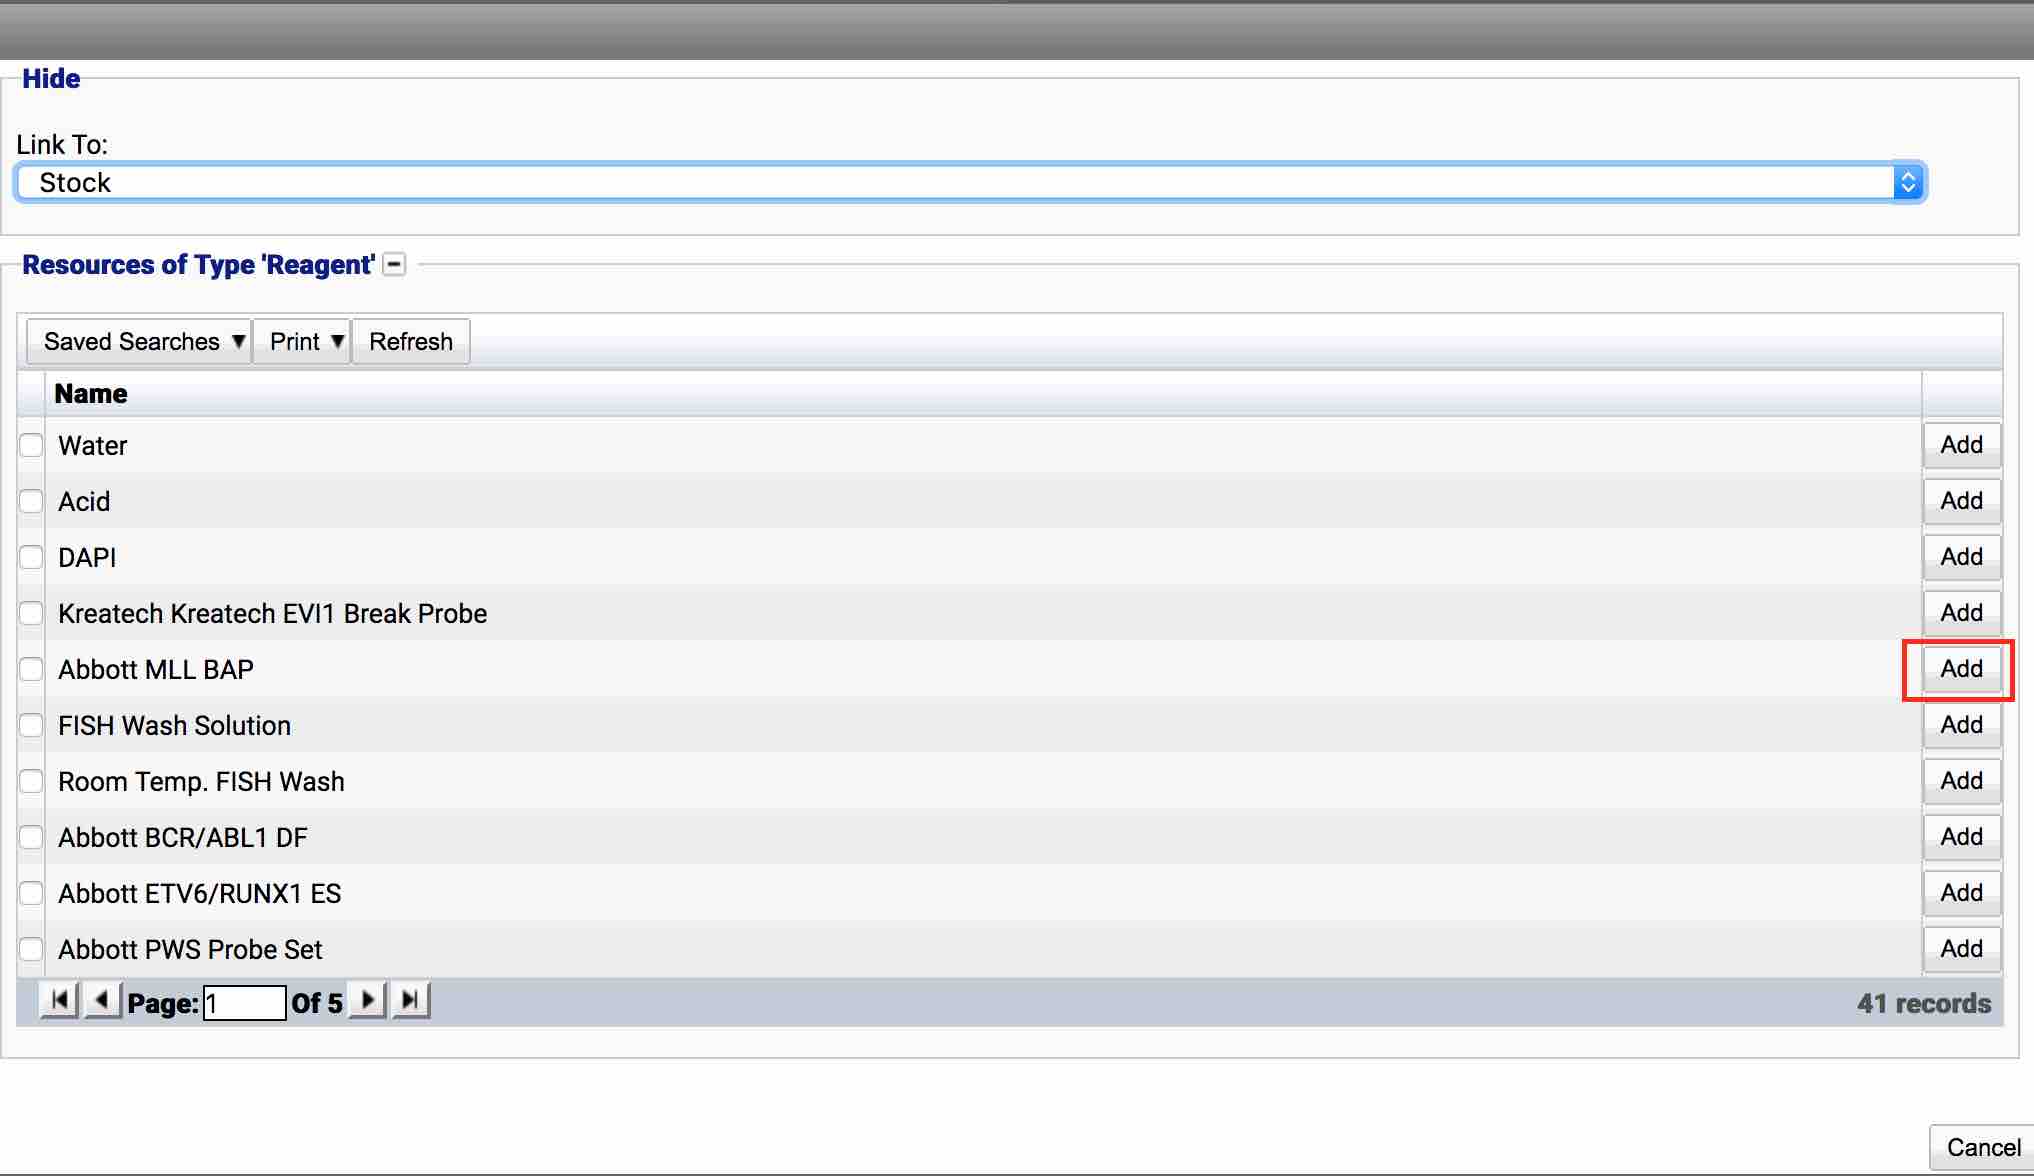
In the popup dialog, choose the type of record to link to, e.g. Stock (Reagent).
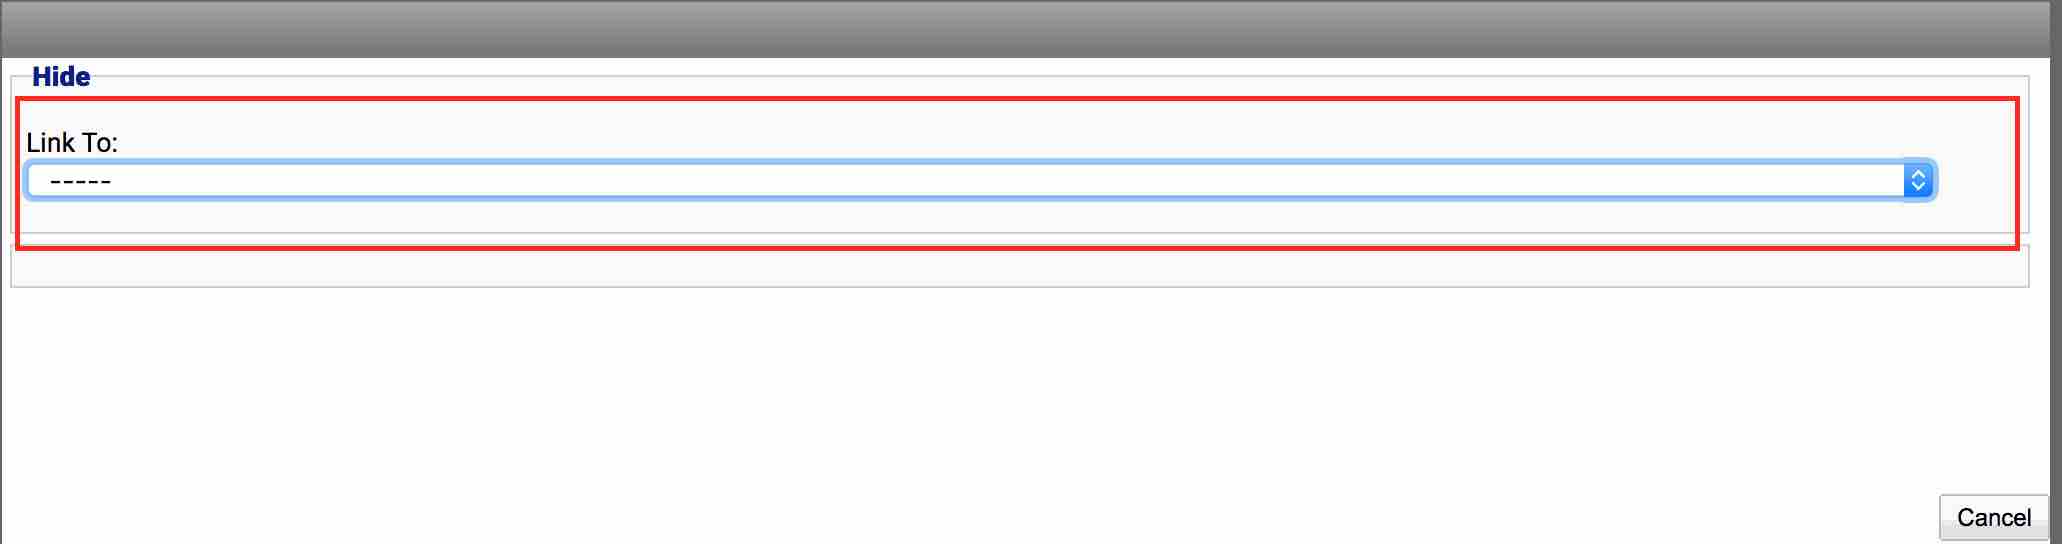
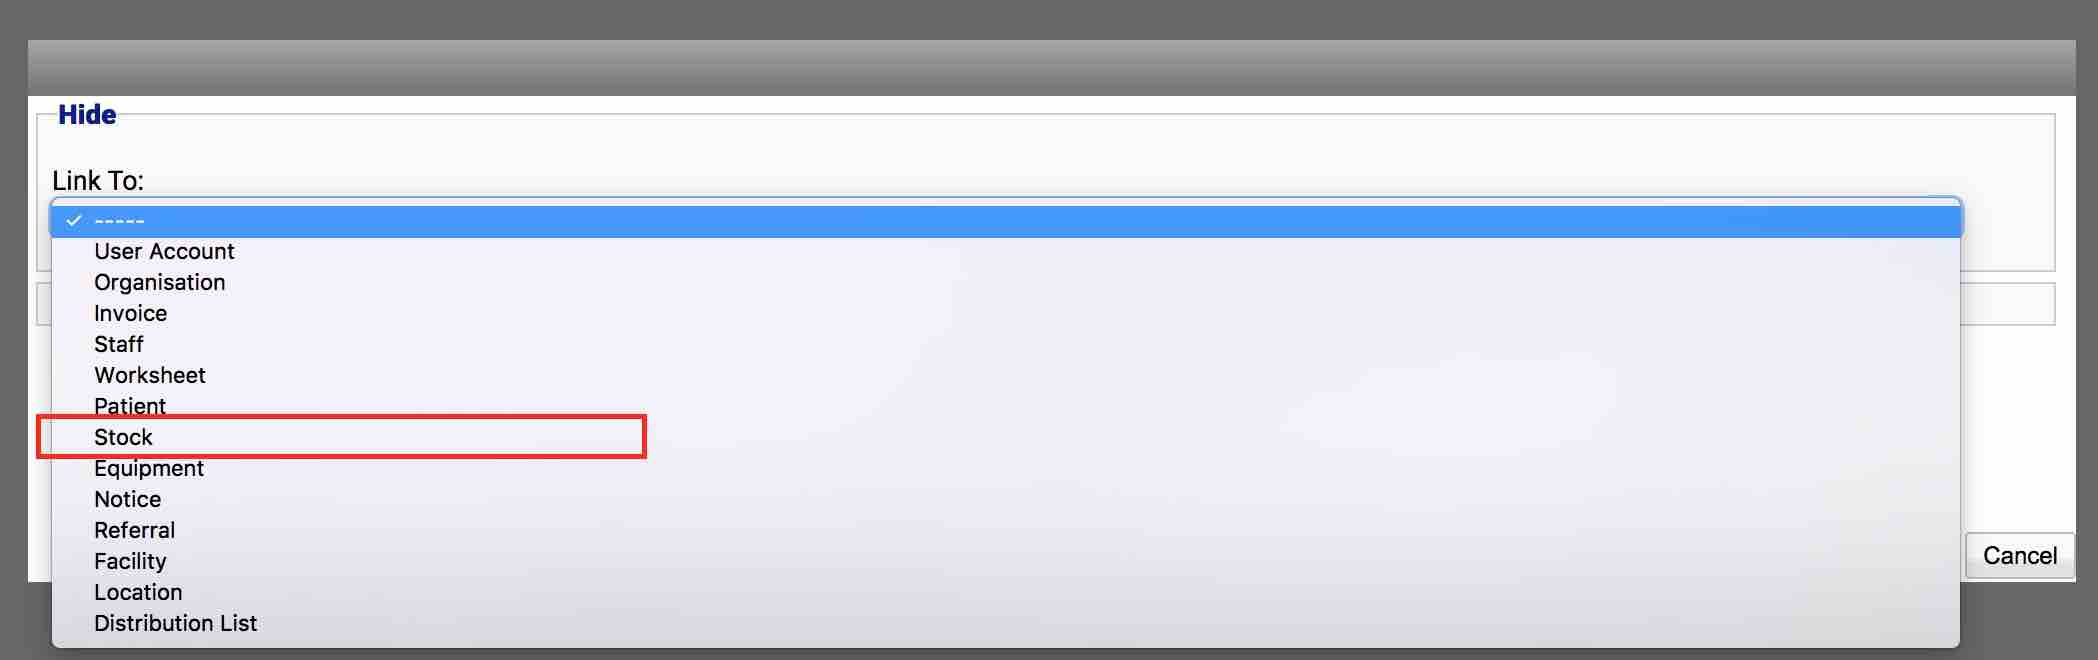
Once a type has been chosen, a search table will be displayed. The record can then be located by navigating the table or creating a search filter (Using Search Filters) (TODO). Once located, select the Add button to create the link:
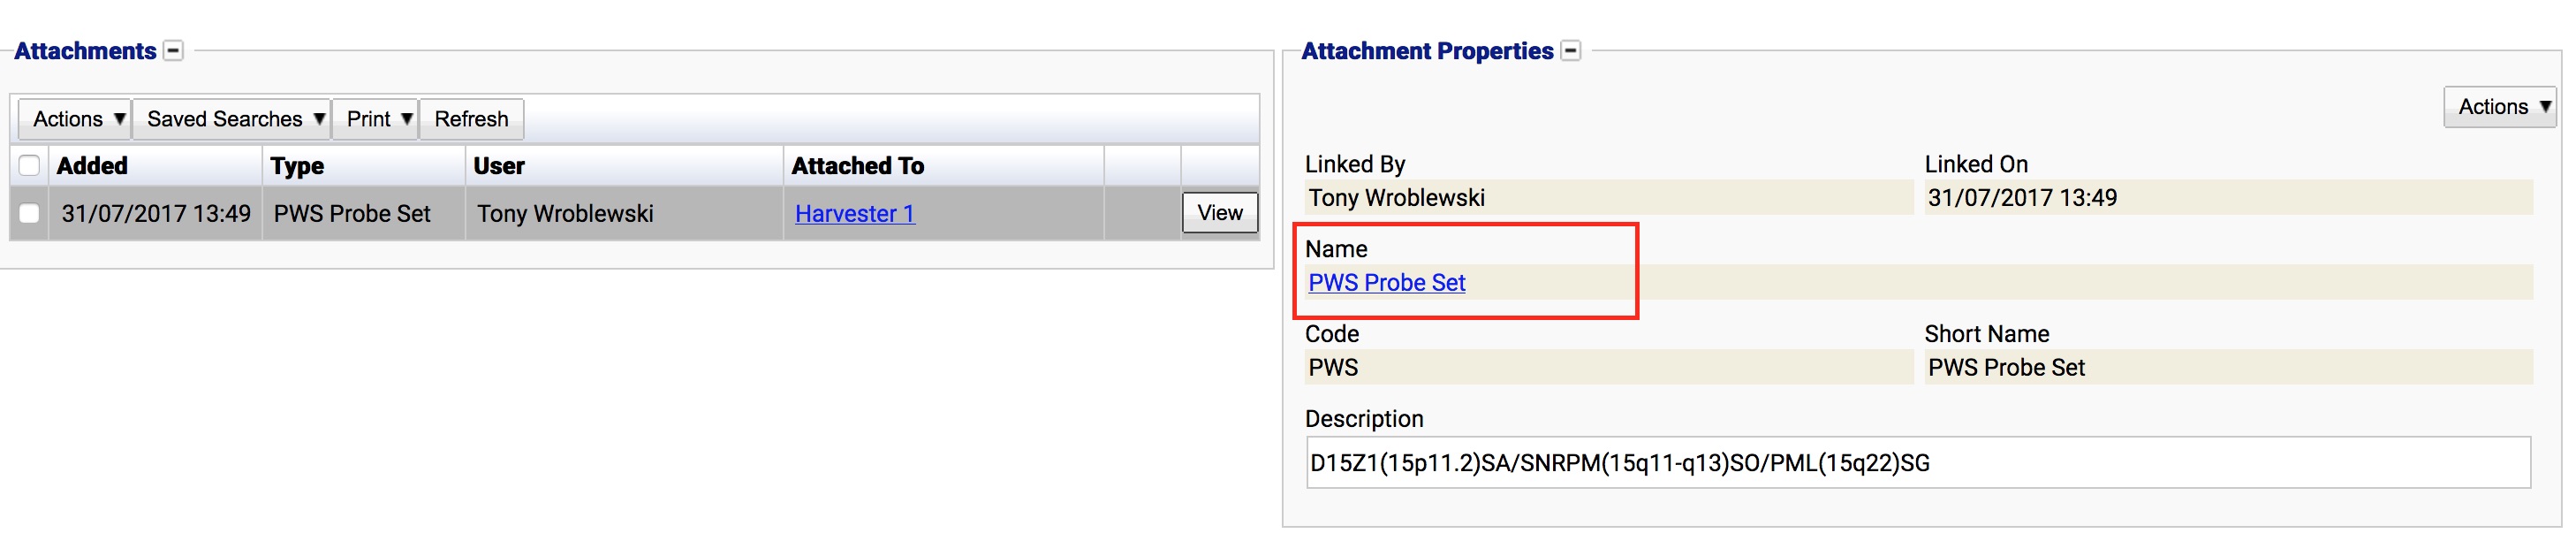
The link is now visible in the attachments/resources tab for both of the records. Clicking on the name field will open up that record allowing a quick way to jump between related items:
Resources are stored in a database table called Resource. Each resource has the following information:
| Field | Information |
|---|---|
| childId | The child record’s database ID, e.g. The image’s id linking to Image |
| childType | The child’s record type, e.g. Image |
| parentId | he parent record’s database ID, e.g. The patient ID |
| parentType | The parent’s record type, e.g. Patient |
The resource table contains both a polymorphic child and parent entry that describes this relationship. Since child and parent are both polymorphic, using this table in a report can be difficult and will require some additional filtering. The valid child types are:
- Image
- Notice
- Attachment
- Weblink
- Note
- Audio
- For linking resources, this can be any other table on the system