Test Statuses
The Test Statuses preference is used to define the statuses used in the Test Status Templates preference which in turn are selected when adding new Tests / Orderables . All together these preferences make up a Test Status Workflow.
Test Statuses are used to label tests / orderables and state which stage of the workflow they are in.

Location
The Test Statuses preference is located under the Administration > Preferences area of iGene.
In order to access the preference area, a user must be a member of a role that has the Administration: Preferences and Administration: Menu permissions assigned.
- Navigate to Administration > Preferences.
Find Test Statuses in the table and click View by either:
- The user can navigate through the table using the scroll arrows.
- Perform a search using an existing saved search for Name = Test Statuses.
- Perform a search using a new search. See the searching guide for information on how to create searches.
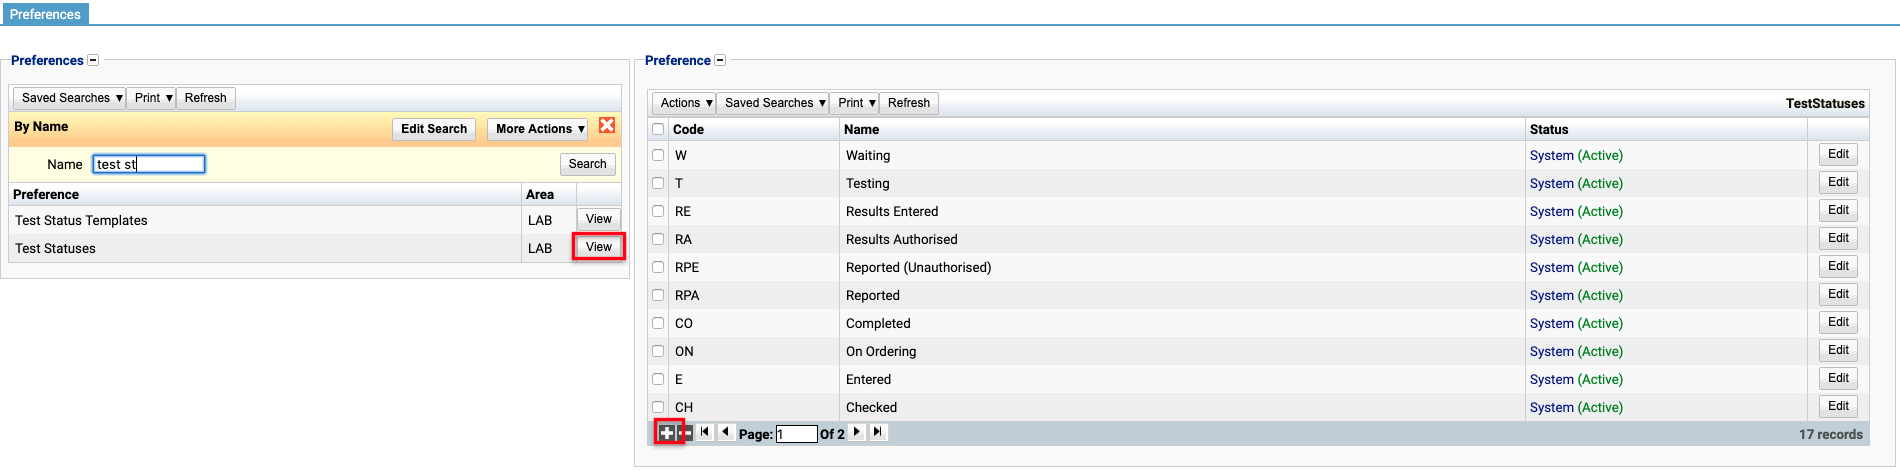
To create a new test status, click the + button at the bottom of the table, or select New Item from the Actions menu.
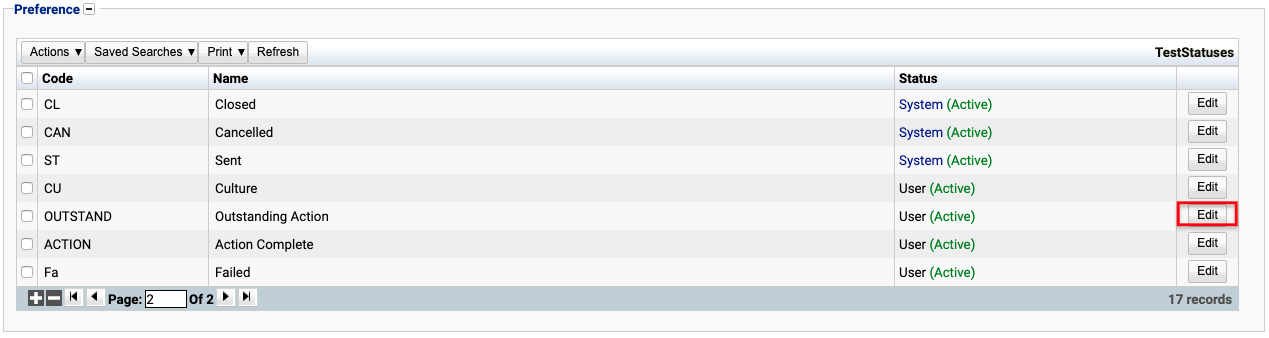
To edit an existing test status, click the Edit button.
The table for the Test Statuses will display the code, name and the status.
The Status field indicates two pieces of information:
User / System: User records have been added by users manually and are fully editable. System records are generally added via a data import or provided by default. Only the name can be edited on a system record.
Active / Inactive: Shows whether the record is currently active or inactive. Inactive items will not show up for selection for new records but will continue to show on entries that are using them.
Configuration
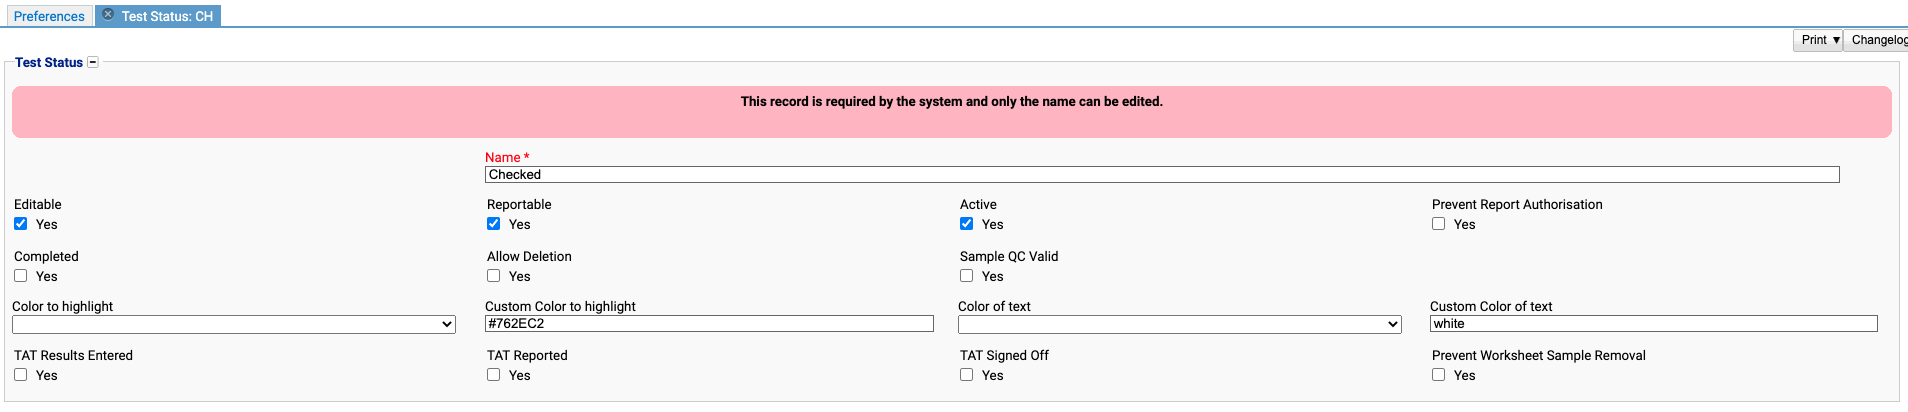
When adding or editing a Test Status, the following form opens to complete.
Always press Save in the bottom right corner of the window after making any changes.

Code
(Required, Unique) A unique code for the Test Status. This can be the same as the name but must be unique throughout the entire system.
Name
(Required) A name for the preference. It is advisable to keep this unique.
Editable
When ticked, this option indicates that a result can be entered.
Reportable
When ticked, reports can be generated on tests with this status.
Active
A checkbox to activate / deactivate an entry. If the preference is not active, it will not be selectable in any drop down lists.
Prevent Report Authorisation
When ticked, it stops reports being authorised on tests with this status.
Completed
When ticked, tests with this status are considered completed. The referral can now been closed (as long as billing has been approved).
Allow Deletion
A test status with this option ticked, allows a test to be deleted.
Sample QC Valid
When ticked, this confirms that the QC (quality control) result is valid.
Color to highlight
Selecting a colour form this drop down will autofill ‘Custom Color to highlight’. It sets the background colour of the test status label. Colours available are red, green, blue, gray and orange.
Custom Color to highlight
This field will copy any colour selected from the ‘Color to highlight’ dropdown.
Alternatively if ‘Color to highlight’ is left blank, then other colour options can be entered. It will accept simple colours as words, like pink, purple and white. It will also accept Hex colour codes for even more customisation.
When left blank there are no background details at all - the test status label appears only as plain text.
Color of text
Selecting a colour form this drop down will autofill ‘Custom Color of text’. It sets the text colour of the test status label. Colours available are red, green, blue, gray and orange.
Custom Color of text
This field will copy any colour selected from the ‘Color of text’ dropdown. Alternatively if ‘Color of text’ is left blank it will accepts simple colours as words, like pink, purple and white. It will also accept Hex colour codes for even more customisation. When left blank, text is plain black by default.
In the below example both colour drop down fields have been left blank meaning other colours can be selected for background and text.
N.B. As this is a system set test status the code field is not present and cannot be edited.
Try https://htmlcolorcodes.com/ to find Hex colour codes. Hex colour codes appear as the hash key followed by 6 digits (letters or numbers).
Example: #762EC2 is a shade of purple.

TAT = Turn around time.
Ticking any of these 3 options means it can be calculated and reported on how long a test took before it reached certain benchmarks / statuses. To calculate the Turn Round Time a start time and end time is needed.
The start time is usally asumed to be either the created at date and time, or the ordered at date and time - whichever is most recent.
The fields below, when ticked, mark the end time to be used.
The TAT values can be viewed under Laboratory > Setup > Edit Test.
TAT Results Entered
Ticking this checkbox will end the clock and register the end time for when a test changed to this status. It should be used when the results have been entered and saved.
TAT Reported
Ticking this checkbox will end the clock and register the end time for when a test changed to this status. It should be used when a report has been generated.
TAT Signed Off
Ticking this checkbox will end the clock and register the end time for when a test changed to this status. It should be used when a report on the test has been generated and signed off.
Prevent Worksheet Sample Removal
Tests with a test status with this checkbox ticked cannot be removed from worksheets.
Deactivating / Activating
Each Test Status has an active status that specifies whether the Test Status is available for selection. When deactivating a Test Status, it will no longer appear in dropdown lists for selection on the tests, but will still be displayed on any records that continue to use it.
To deactivate (or reactivate) a test status, right-click on the required entry in the table:
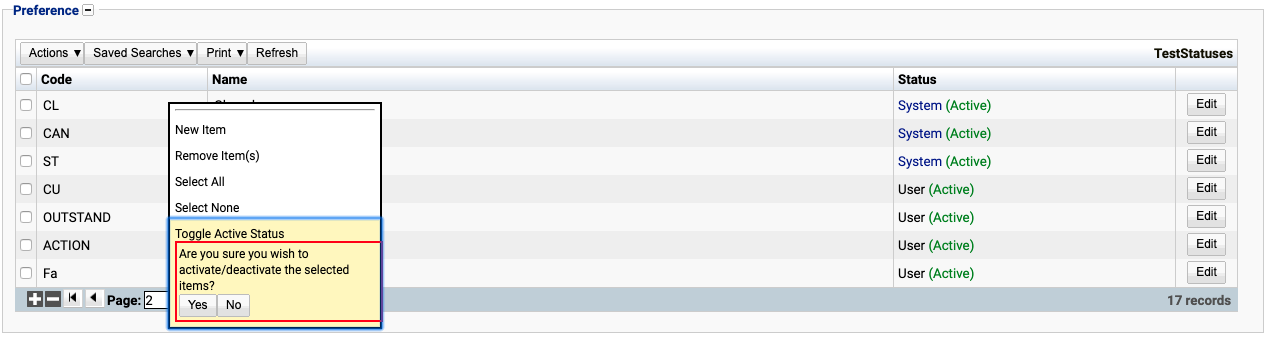
Then select Toggle Active Status:

Usage
The Test Statuses are needed to create Test Status Templates which in turn are selected when adding new Tests / Orderables.
All together these preferences make up the Test Status Workflow.
See these links for more details:
- Test Status Templates
- Tests / Orderables
- Test Status Workflow