Tasks
The Tasks page under the Home tab lists all the tasks within iGene. Use this page to add new tasks, edit existing tasks, and assign task ownership.
It is also possible to add a task to another task (see task window actions). The original task will become the parent task and the new task will be a child task.
The rows of tasks are colour coded:
- Green tasks are completed or closed.
- Orange tasks are due.
- Red tasks are overdue or late.
- Grey tasks are inactive.

Tasks Table
Reference Number - The task number. The format of the task number is set in the Nomenclature preference.
Parent - One task can be assigned to be part of another task. When this happens the original task becomes the parent task and the new task becomes a child task. The parent task reference numbers are populated in this column for child tasks.
Assignees - References to whom the task is assigned.
Description - A description or instructions for the task.
Due At - If set, this is the date the task should be completed by.
Original Due At - If the due date is changed, then the first date chosen will display here.
Due In - Days remaining before task needs to be completed. If late this field will show ‘Overdue’.
Priority - The task priority. Will show ‘Not Set’ if task has not been assigned a priority.
Owner - The user assigned to complete the task.
Status - The statuses used here are listed in the Tasks Statuses preference and can be assigned to use with different Task Types (also set in preferences).
View - This button opens the Task window. This window can be used to claim / resign task ownership, add a child task, edit the task or change the task status.
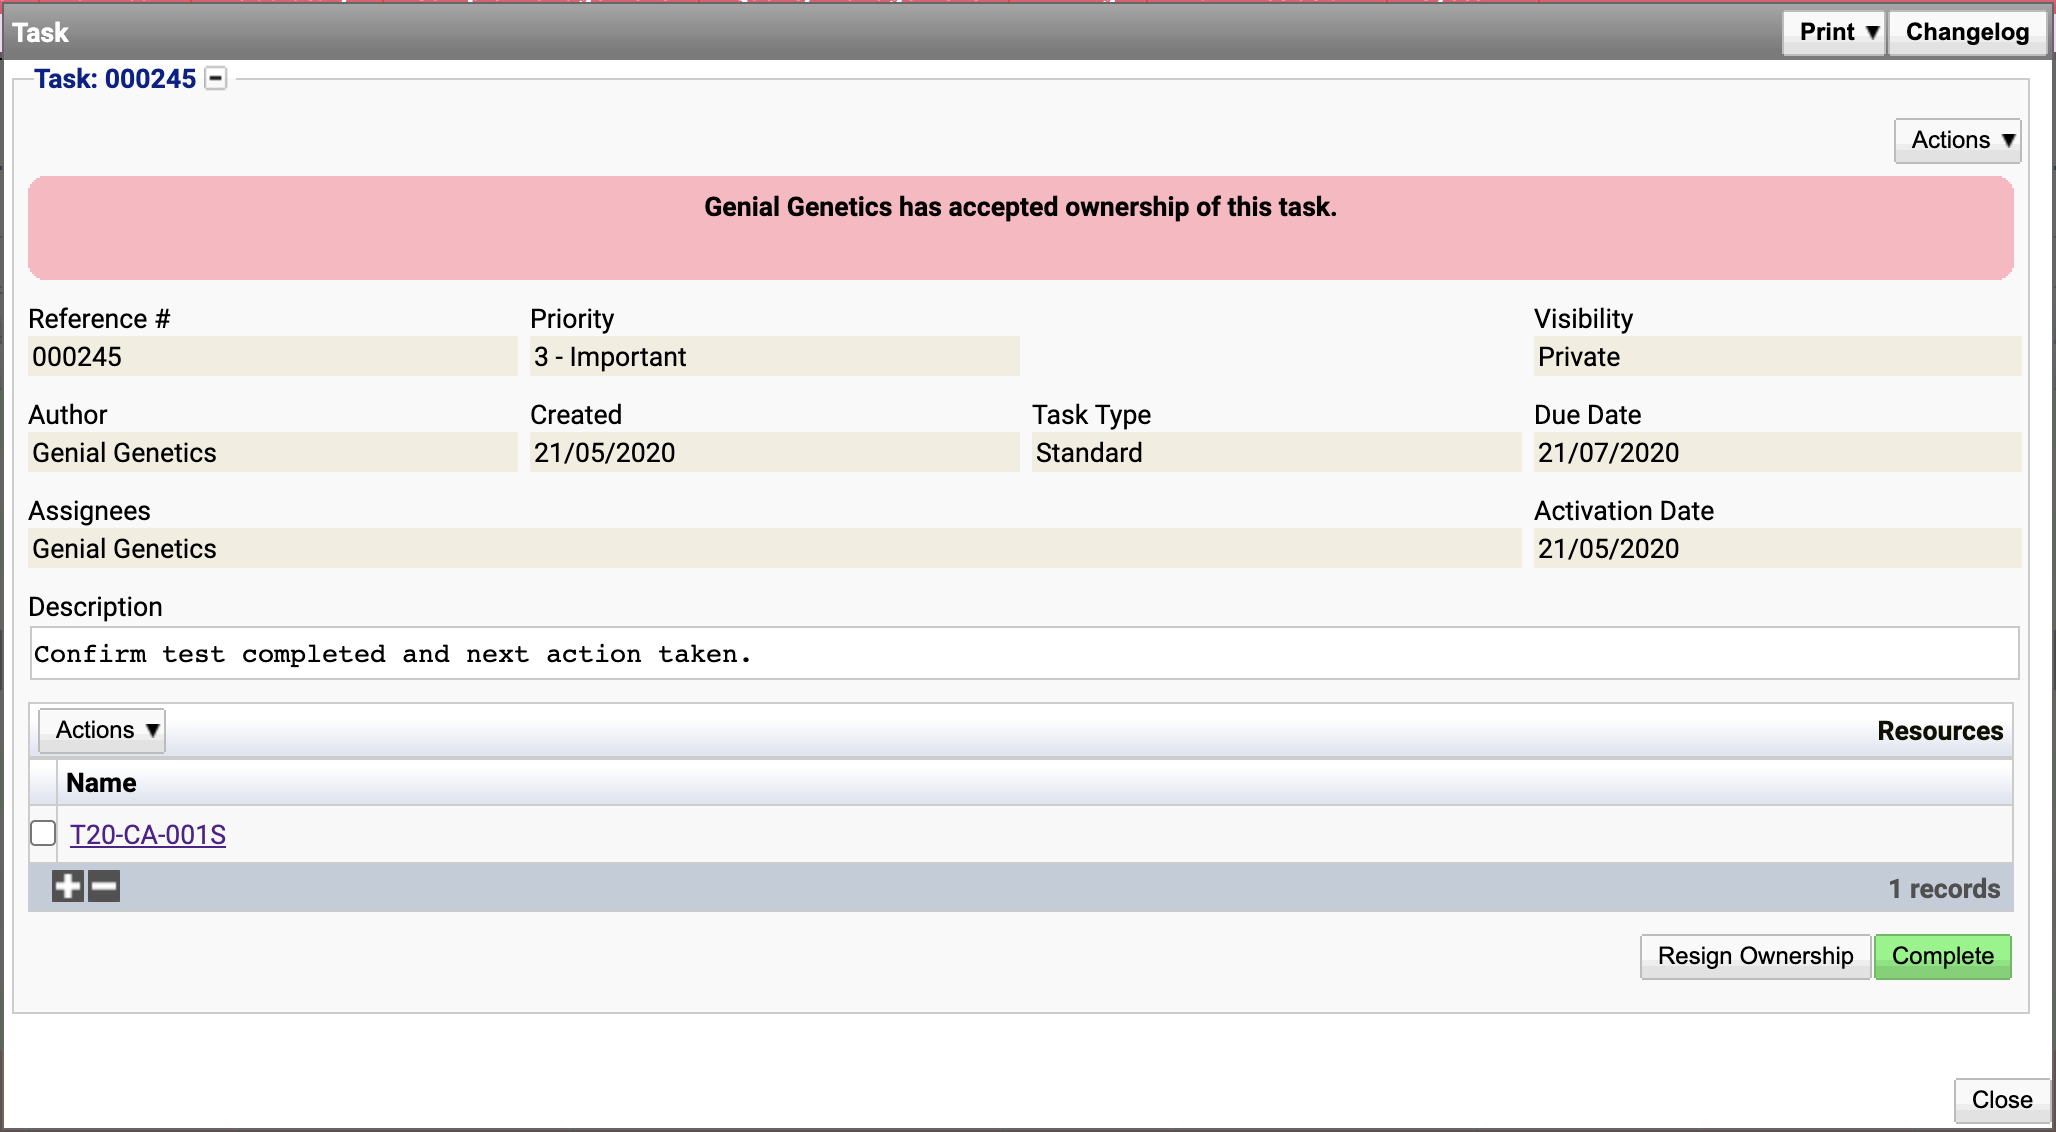
Task Window
This window displays all the current task data. It commonly displays buttons to either Resign Ownership or Take Ownership as well as a Close button that simply closes the Task window.
In this example there is also a Complete button. This button, and other task status change buttons, are added in the Task Type preference.
The Action button in this window is especially useful for adding child tasks.
Task Action Menu
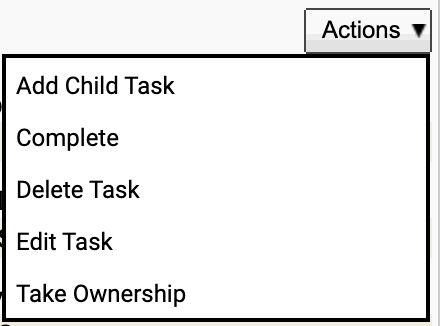 This action menu commonly contains:
Add Child Task
- Selecting this option will open a New Task window.
- Once the new child task has been saved and created, the child task will display below the resources table in the parent task window.

- The child task will be added as a new row to the task table.
Complete - This changes the status of the task to ‘Complete’. The status available changes depending on the statuses made available in the Task Type preference. This option may not always be available.
Delete Task - Will delete the task being viewed.
Edit Task - Will open the Edit Task window. It has the same layout and features as the New Task window.
Take Ownership / Resign Ownership - This option changes depending on whether the task has an owner. It allows a user to either claim or relinquish a task.
Tasks Table Functions
At the top of the Tasks table are 4 buttons: Actions, Saved Searches, Print and Refresh. These act in the same manner as they do in other screens within iGene.
- The Actions menu has a list of actions that can be applied to items in the table. To use it, tick the required samples, and then select the required action menu option.
- The Saved Searches function can be used to search for tests in the table.
- The Print button will allow the user to run a report if any have been set up for this page.
- The Refresh button will reload and update the table.

Tasks Table Actions Menu
Select All - Ticks and selects all tasks in the table.
Select None - Unticks and deselects all tasks in the table.
Delete Task(s) - Deletes the selected task(s) from the table. A notification message given when this action is completed.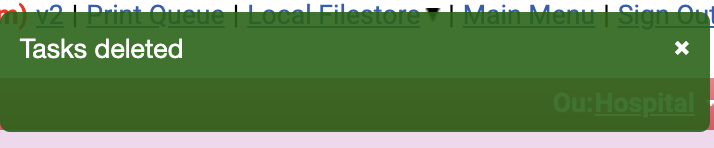
Edit Task - Opens the same popup as New Task except the window contains details of the selected existing task. Here, task details can be edited. When the editing has been finished, press Save Task.
New Task
This action opens up a blank Create Task popup window.
Fill in the empty fields and link to a resource if required.
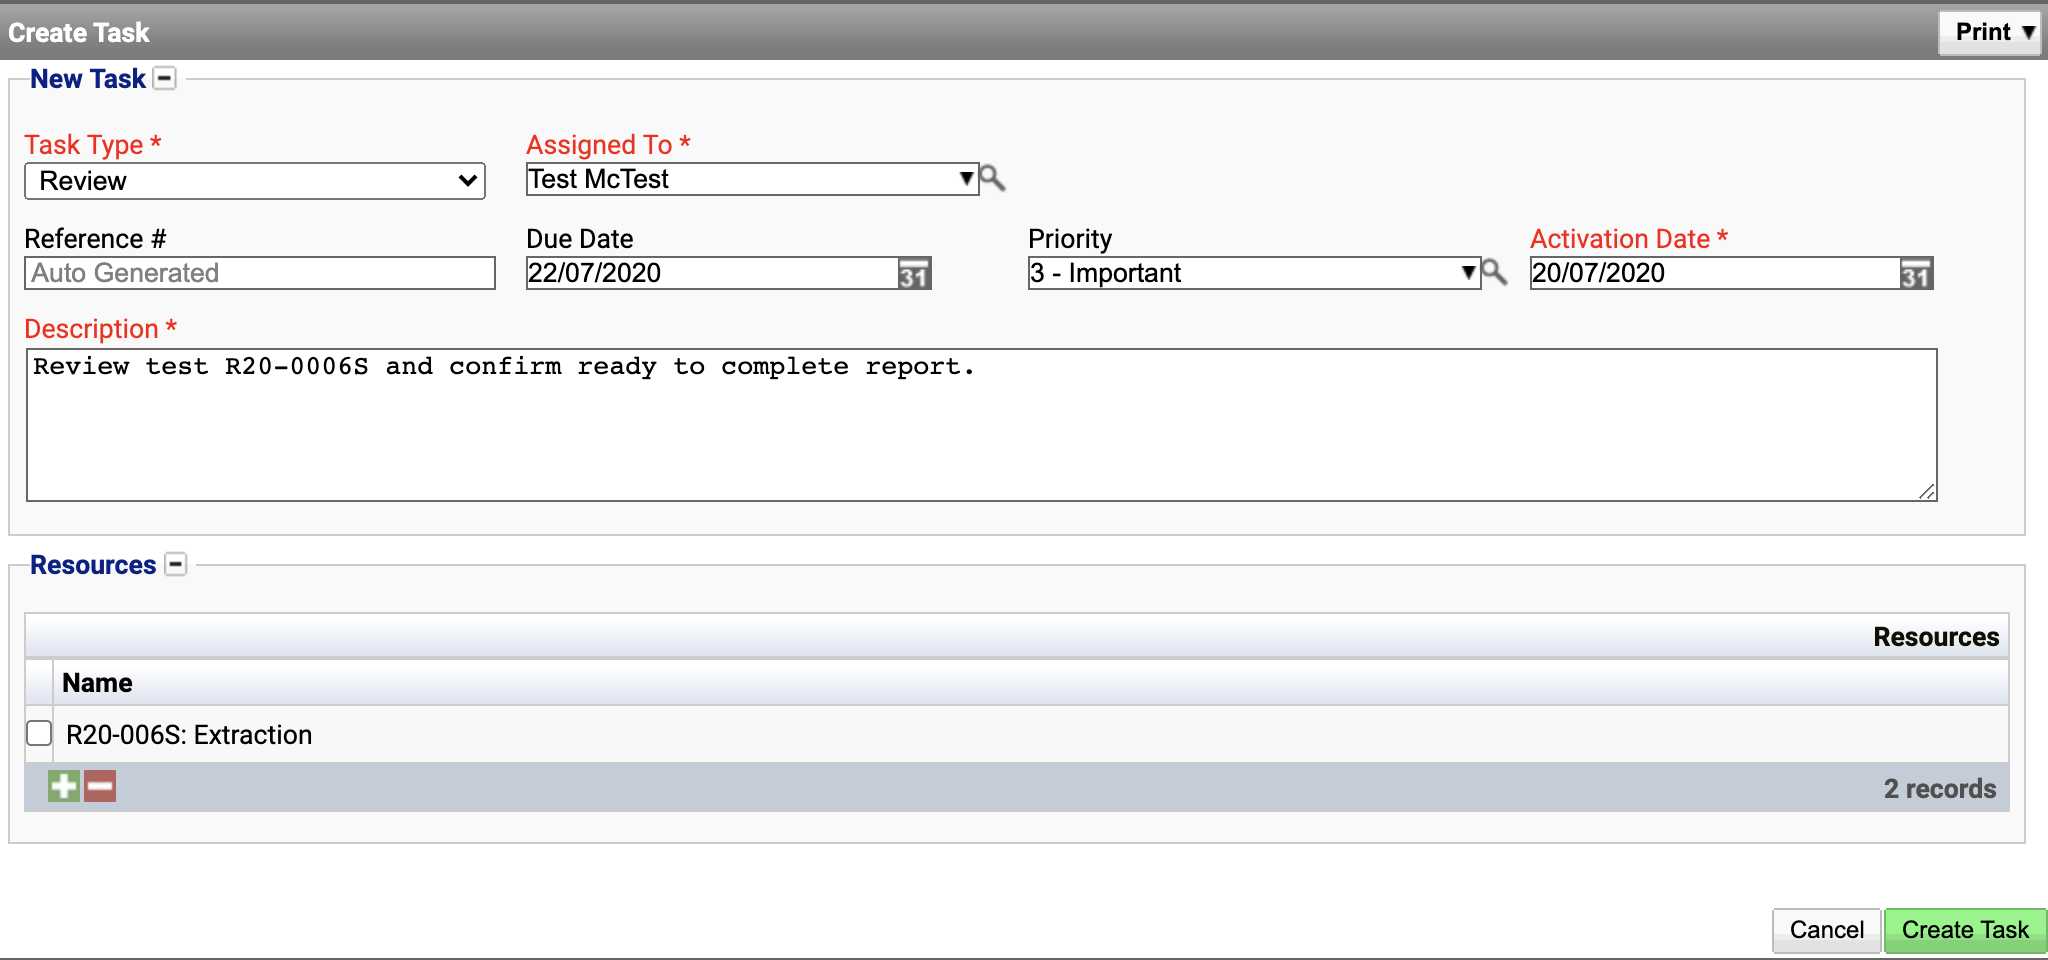
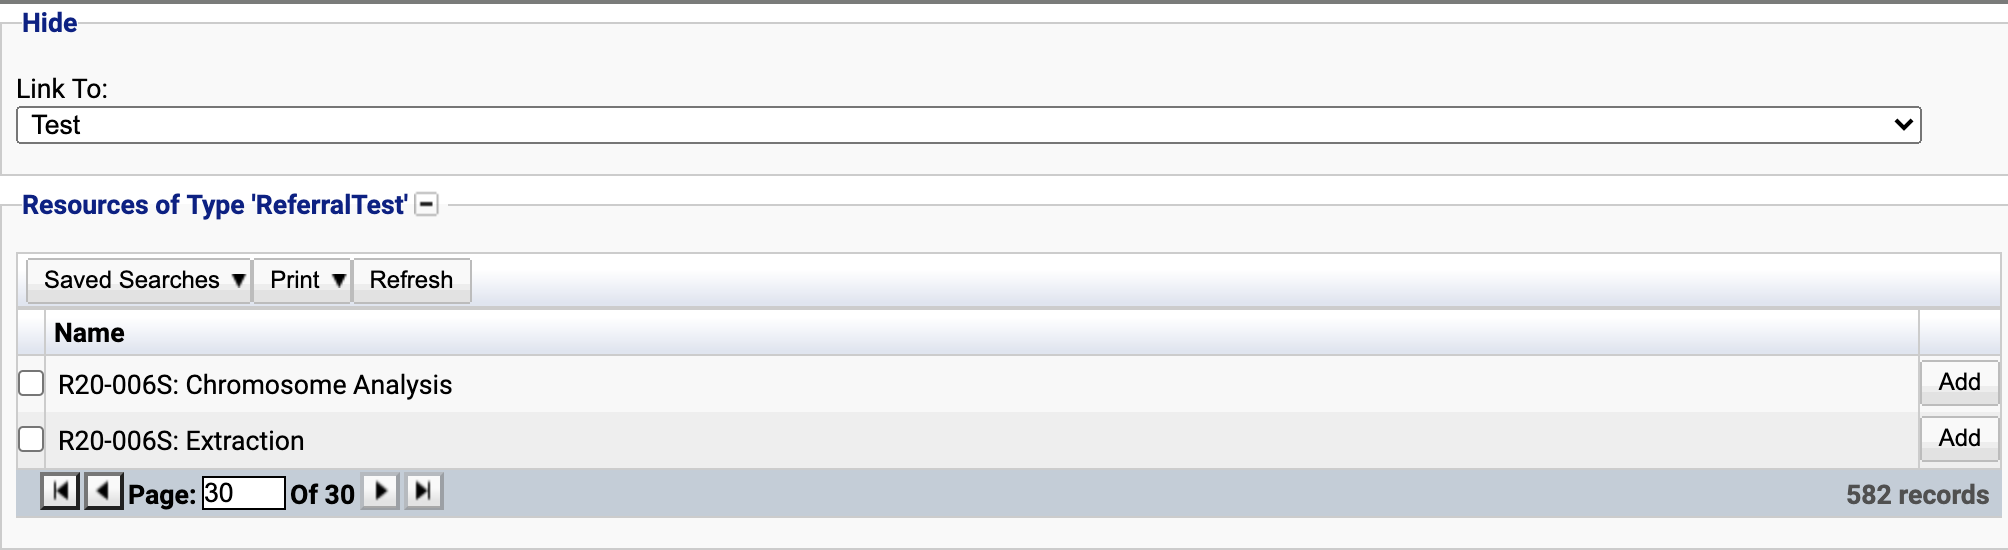
To link to a resource:
Press the + button at the bottom of the Resources table. A drop down list of resource types will be available to select from.
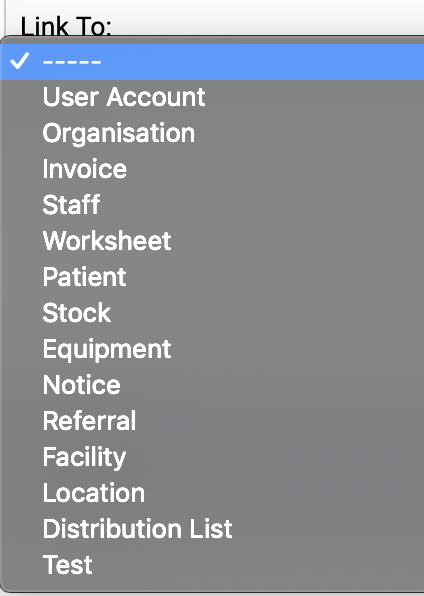
When the resource type has been selected, it will open a list of available resources. Press Add to next the required resource (in this example, a test). It will appear in the resource table.
Press Create Task to save the new task.
If Tasks are given a referral or patient resource, they will be listed in the task page for the referral or patient and in the main task page.