Alerts
Alerts are used mainly in the patient area to define alert messages that can be created on a patient. An alert defines a title and alert type for each alert, and whether the alert can contain additional notes.
Alerts are defined globally and are not limited per organisation unit.

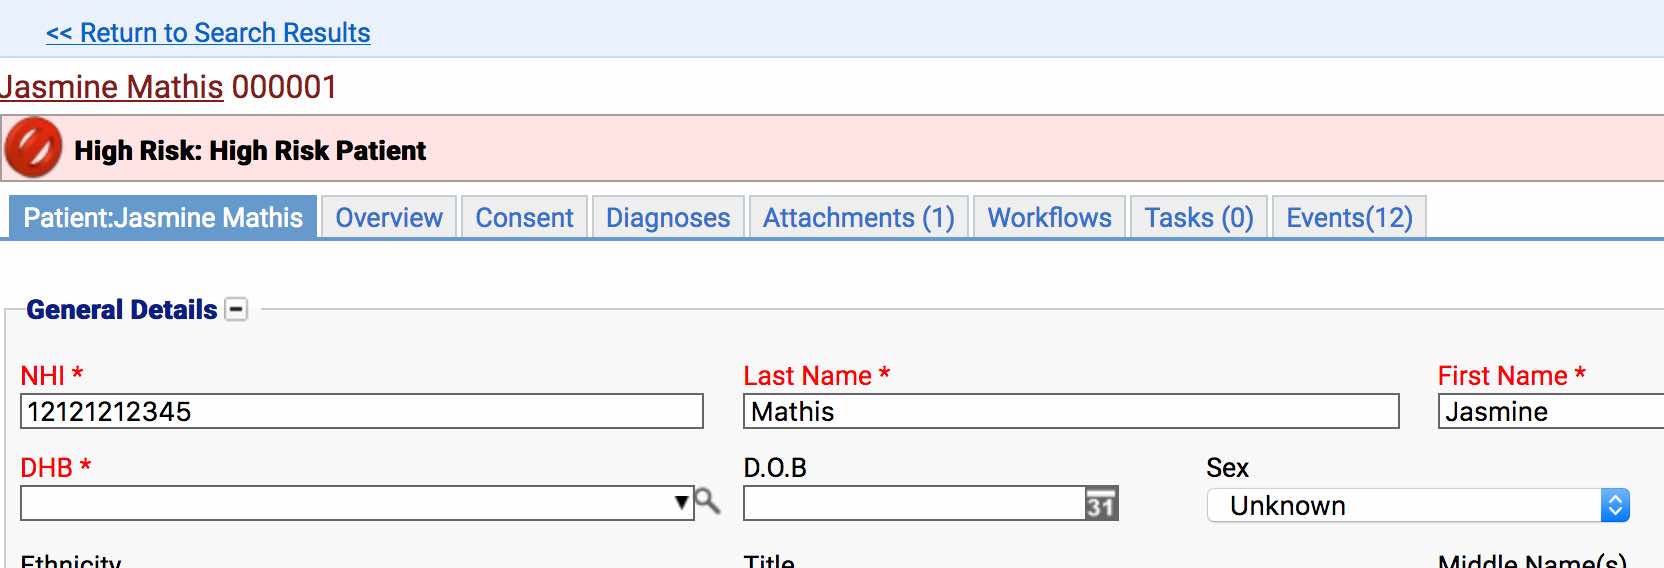
In the above example the text will come from the alert itself, while the colour and icon are set in the alert types.
Location
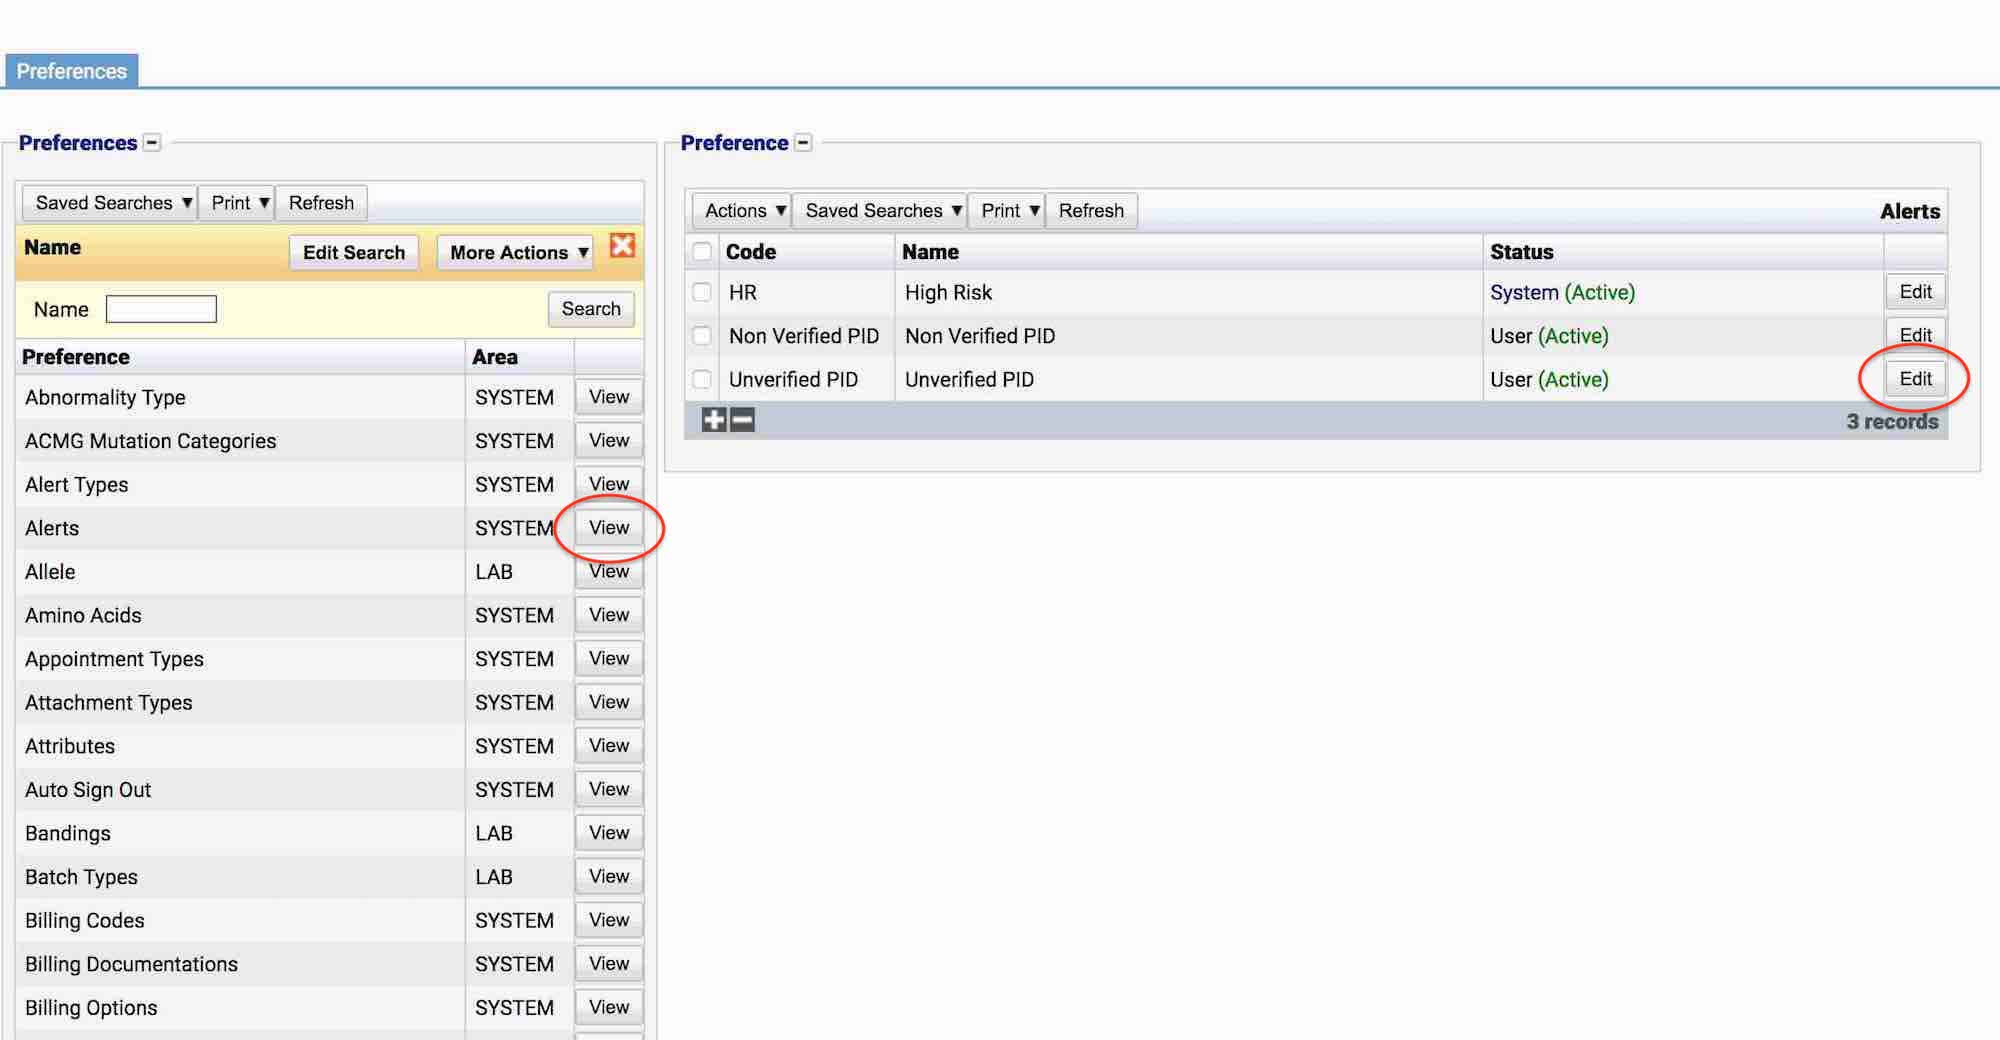
The Alert preference is located under the Administration > Preferences area of iGene.
In order to access the preferences area, a user must be a member of a role that has the Administration: Preferences and Administration menu permissions assigned.
- Navigate to Administration > Preferences.
- Find Alerts in the table and click View by either:
- Navigating through the Preferences table until the Alerts preference is found.
- Performing a search using an existing saved search for Name = Alerts.
- Performing a search using a newly created search. See the searching guide for information on how to create searches.
 3. To create a new alert click the + button at the bottom of the table, or select New Item from the Actions menu.
4. To edit an existing alert, click the Edit button.

The Alerts table will display the code, name and status for the alert.
The Status field indicates two pieces of information:
User / System: User records have been added by users manually and are fully editable. System records are generally added via a data import or provided by default. Only the name can be edited on a system record.
Active / Inactive: Shows whether the record is currently active or inactive. Inactive items will not show up for selection for new records but will continue to show on entries that are using them.
Configuration
When adding or editing an alert, users are presented with the below form.
Always press Save in the bottom right hand corner of the browser after adding or editing an Alert.

Code
(Required, Unique)
A unique code for the alert. This can be the same as the name but must be unique throughout the entire system.
Name
(Required)
A name for the preference. It is advisable to keep this unique.
Alert Type
(Required)
The alert type used for this alert. The alert type decides which colour and icon the alert will display. See alert types.
Active
A checkbox to activate / deactivate an entry. If the preference is not active, it will not be able to be selected for future result but it will still show for existing results.
Allow Notes
The allow notes checkbox indicates whether users who add this alert to a patient can add their own additional notes / text to the alert.
- The below image indicates that notes have been disabled, the notes box is greyed out so cannot be edited when adding the alert to a patient.

- If enabled, an added note is displayed next to the alert.
Here, the note ‘High Risk Patient’ is showing next to the ‘High Risk’ alert in the patient header.

Deactivating / Activating
Each item has an active status that specifies whether the item is available for selection. When deactivating an item, it will no longer appear in autocomplete lists for selection, but will still be displayed on any records that continue to use it.
To deactivate (or reactivate) an alert, either:
- Untick the Active checkbox inside the preference and Save.
Or
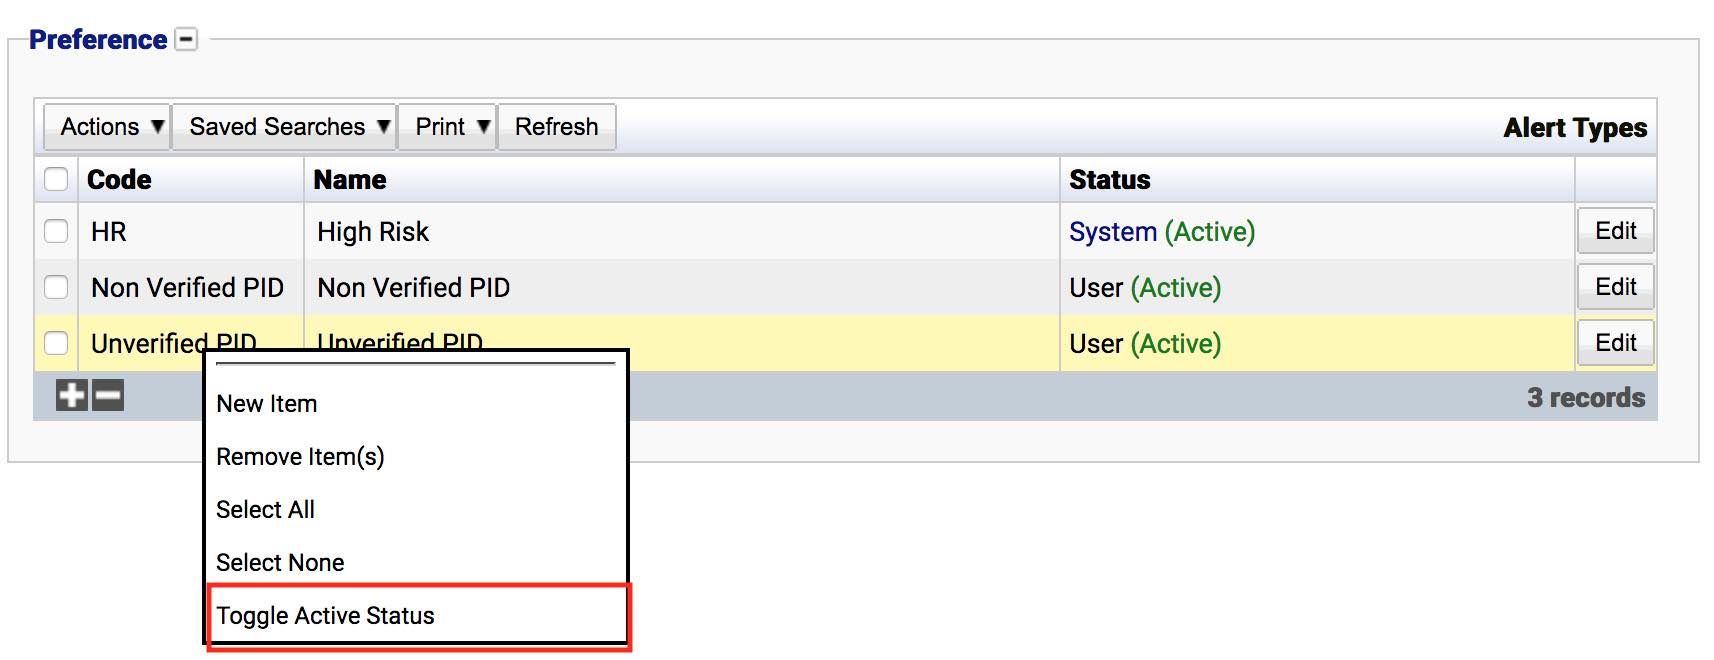
- Right-click on the required entry in the table and select Toggle Active Status. Click Yes when prompted.

The state of the alert will then be changed to either Active or Inactive.

Usage
The Alert preference is used with the following items: