Test Statuses
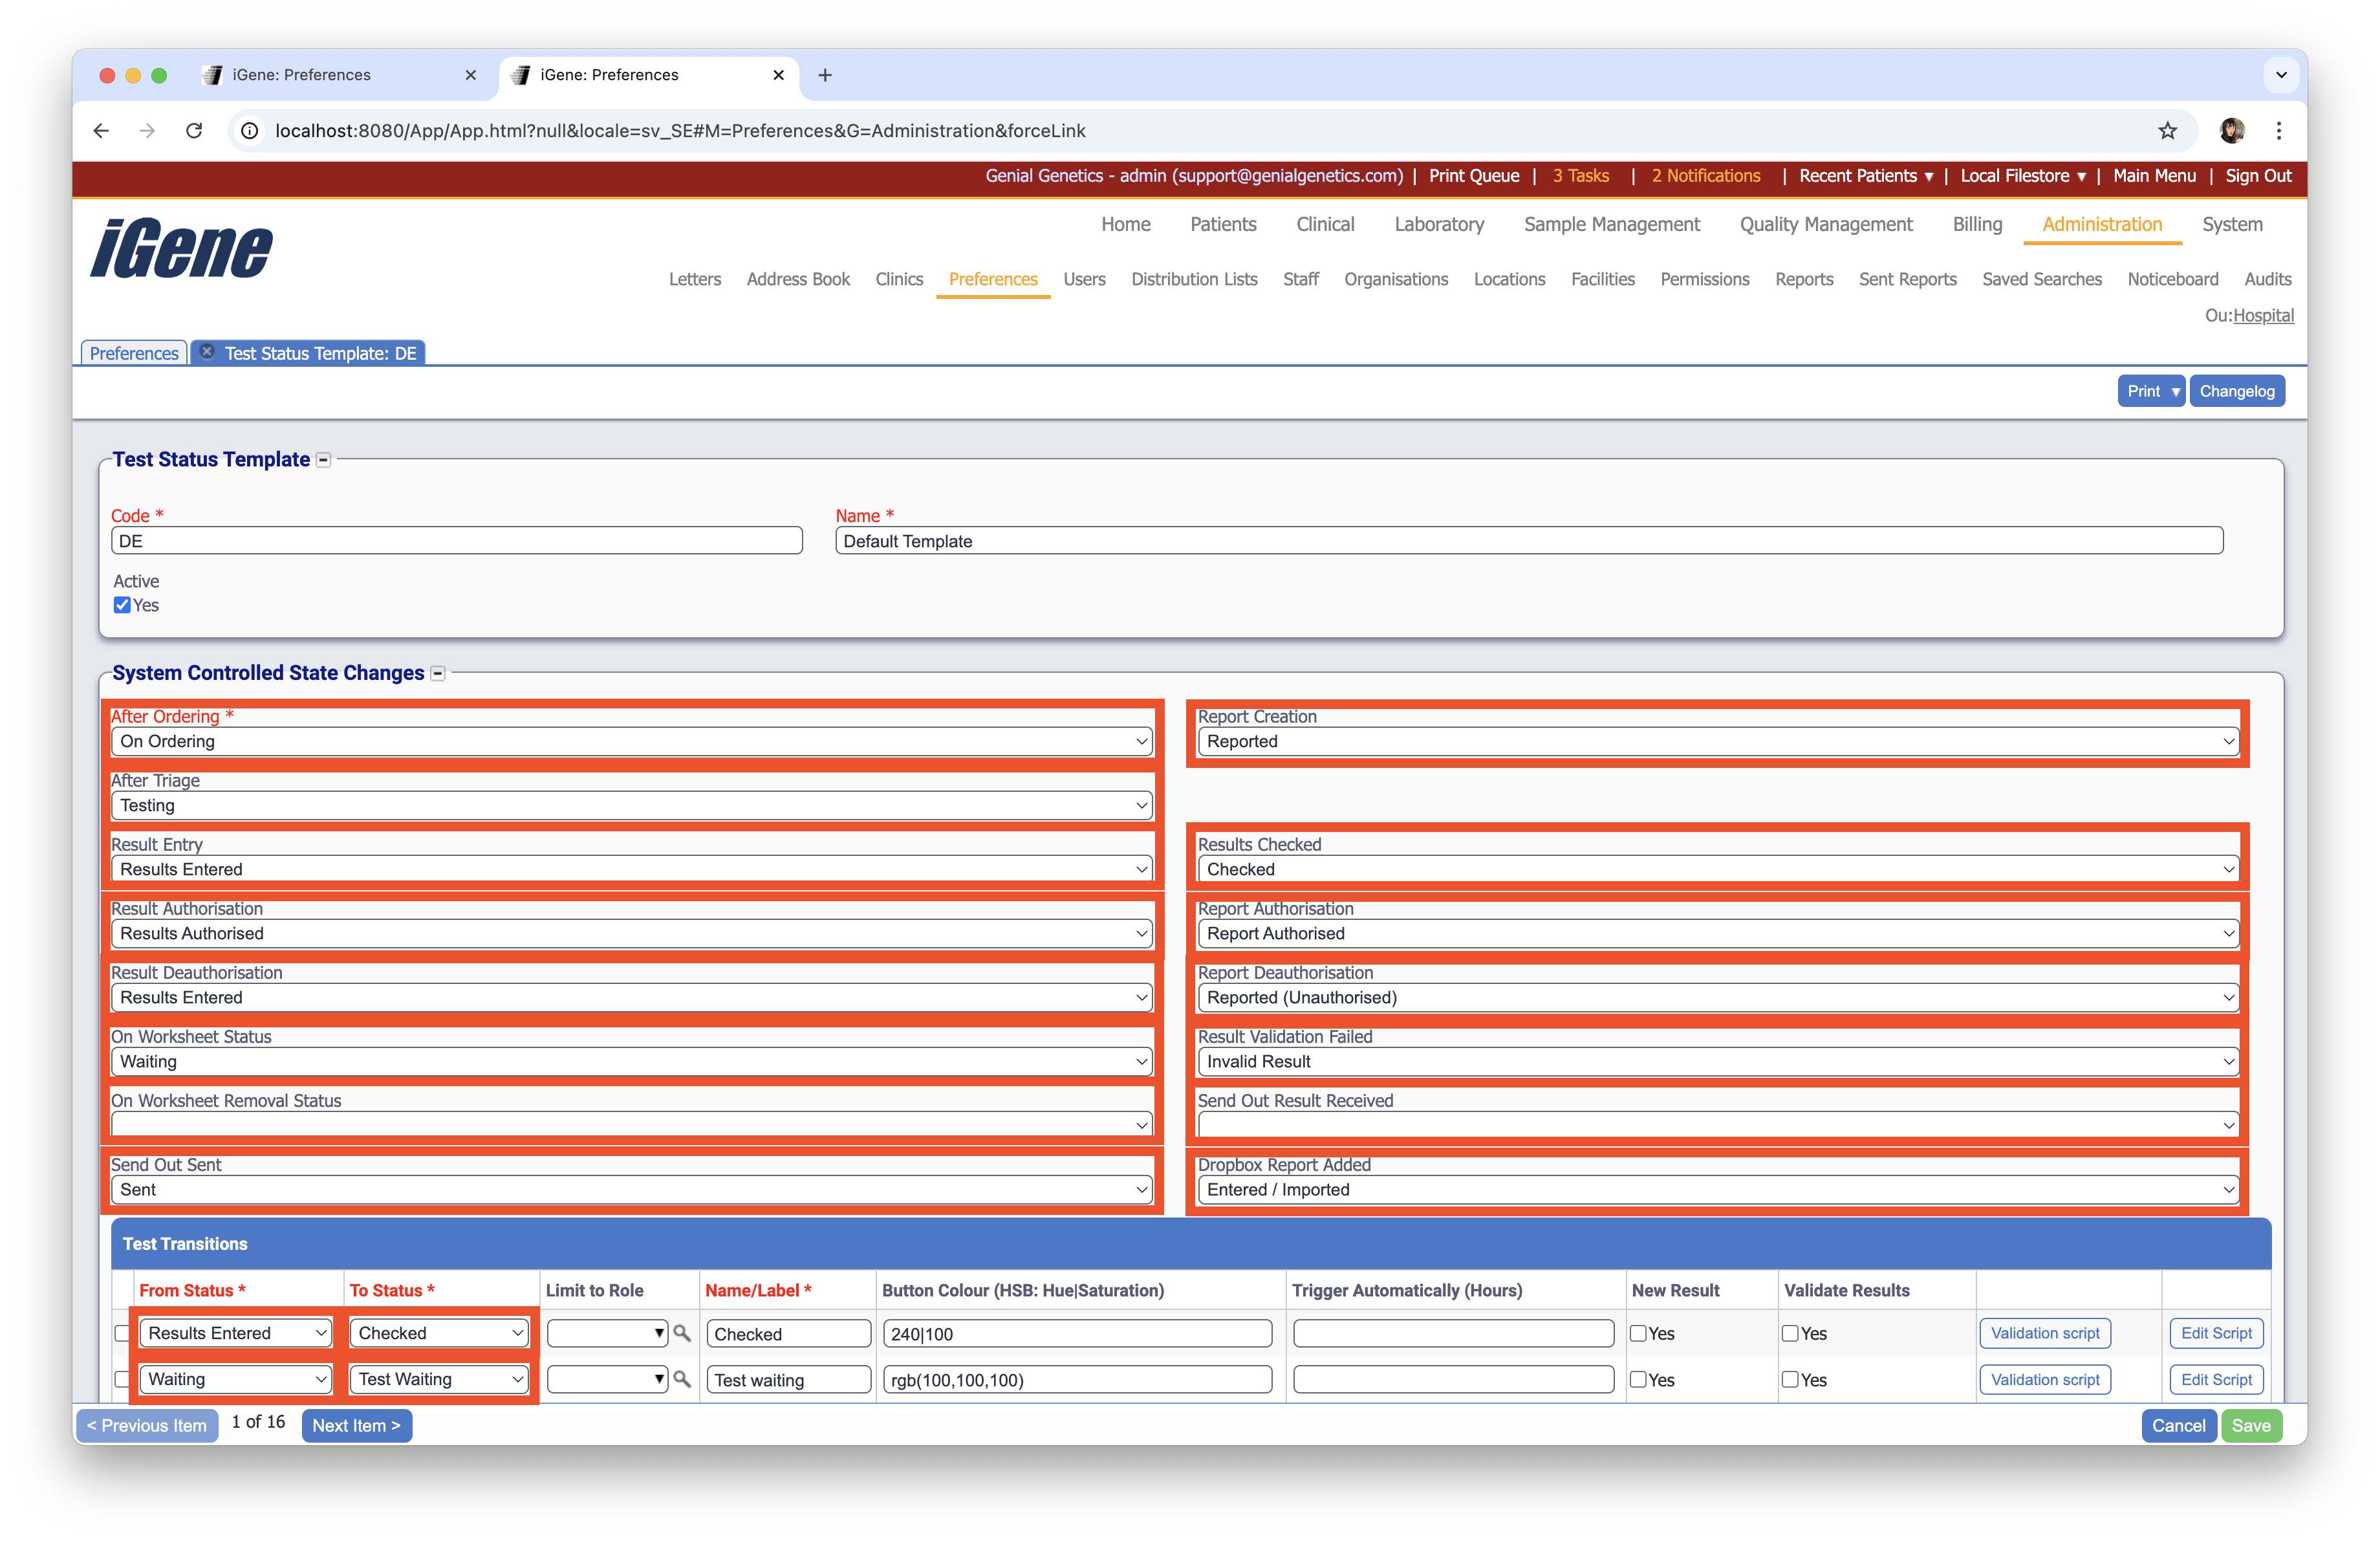
The Test Statuses preference is used to define the statuses used in the Test Status Templates preference which in turn are selected when adding new Tests/Orders.
Test Statuses are used to label tests/orders and state which stage of the workflow they are in.
Location

The table for the Test Statuses will display the code, name and the status.
Configuration
When adding or editing a Test Status, the following form opens to complete.
Always press Save in the bottom right corner of the window after making any changes.
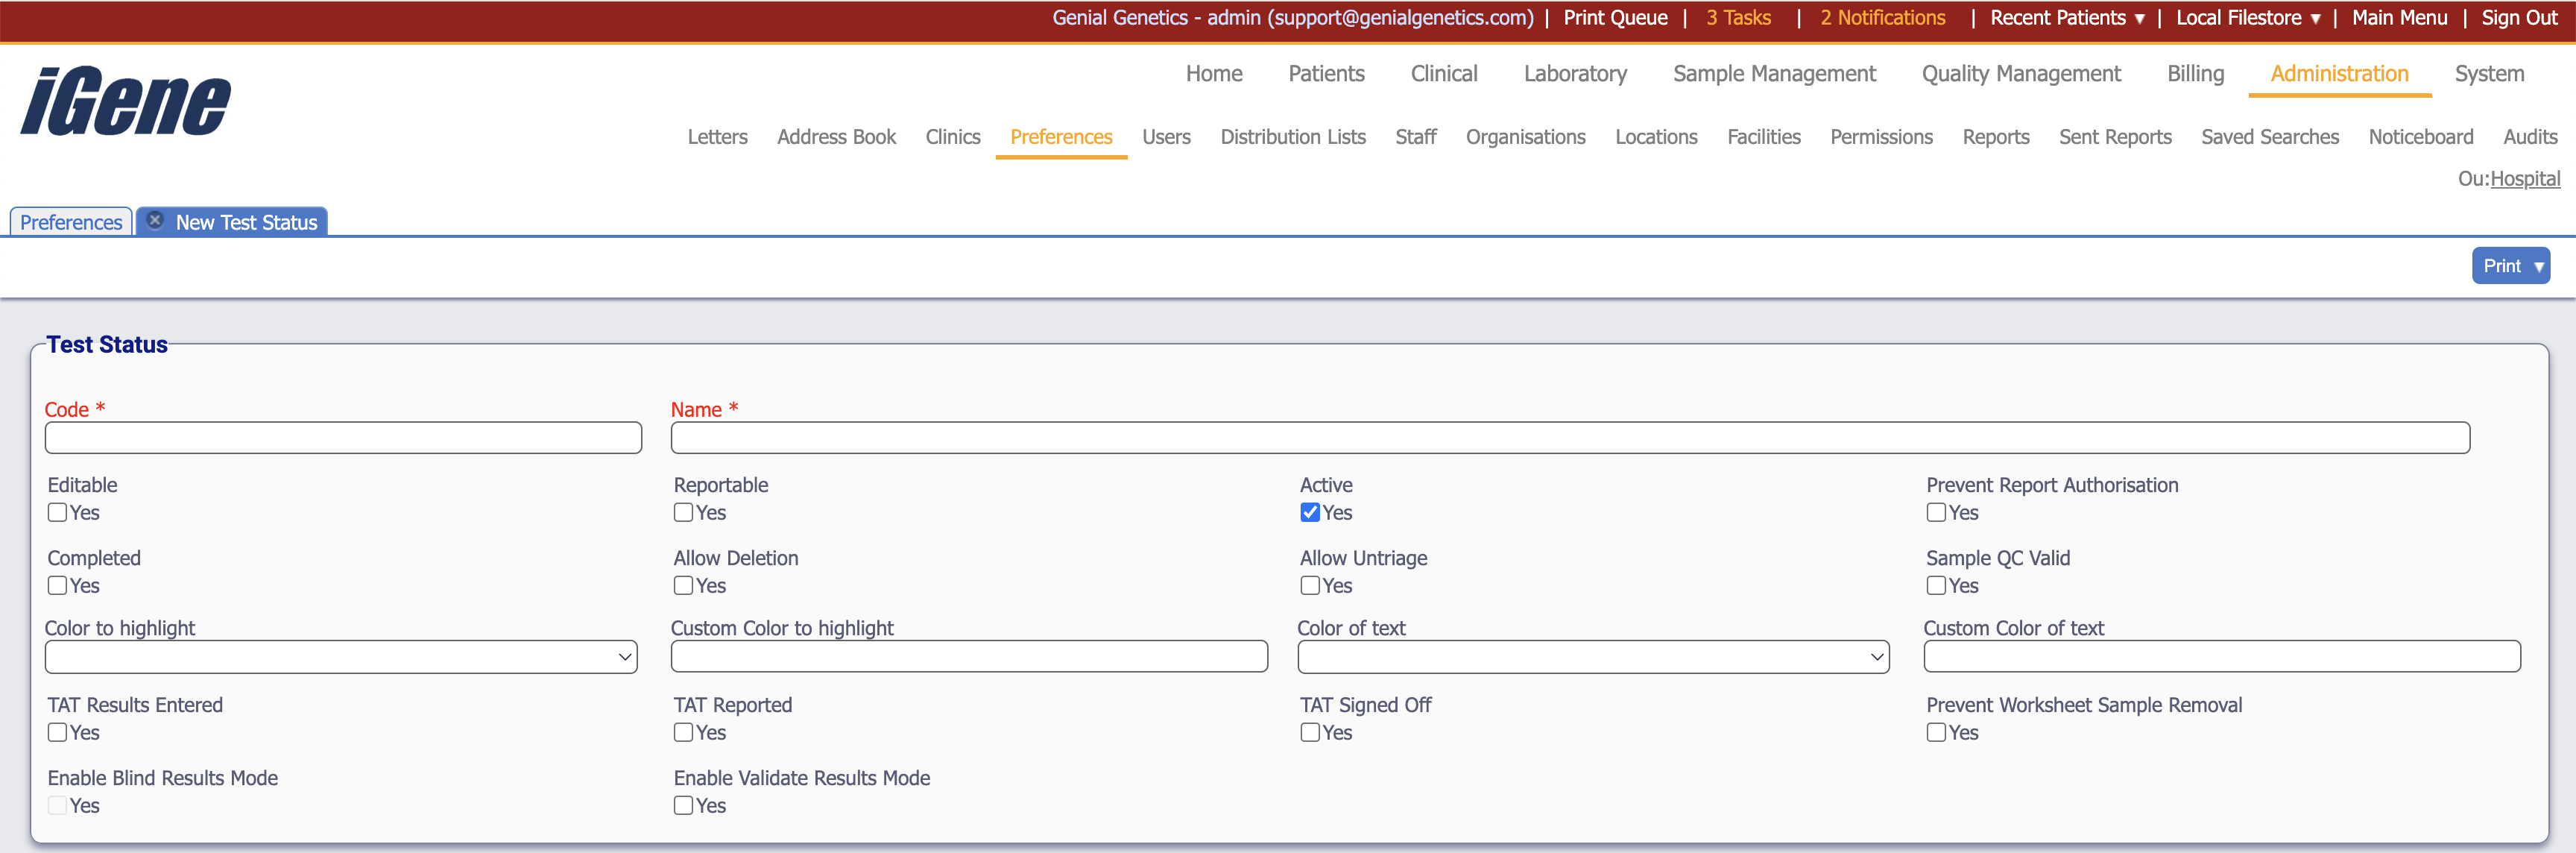
Code (Required, Unique)
A unique code for the Test Status. This can be the same as the name but must be unique throughout the entire system.
Name (Required)
A name for the preference. It is advisable to keep this unique.
Editable
When ticked, this option indicates that a result can be entered.
Reportable
When ticked, reports can be generated on tests with this status.
Active
A checkbox to activate/deactivate an entry. If the preference is not active, it will not be selectable in any drop down lists.
Prevent Report Authorisation
When ticked, it stops reports being authorised on tests with this status.
Completed
When ticked, tests with this status are considered completed. The referral can now been closed (as long as billing has been approved).
Allow Deletion
A test status with this option ticked, allows a test to be deleted.
Allow Untriage
When ticked, tests with this status can be untriaged.
Sample QC Valid
When ticked, this confirms that the QC (quality control) result is valid.
Color to highlight
Selecting a colour form this drop down will autofill ‘Custom Color to highlight’. It sets the background colour of the test status label. Colours available are red, green, blue, gray and orange.
Custom Color to highlight
This field will copy any colour selected from the ‘Color to highlight’ dropdown.
Alternatively if ‘Color to highlight’ is left blank, then other colour options can be entered. It will accept simple colours as words, like pink, purple and white. It will also accept Hex colour codes for even more customisation.
When left blank there are no background details at all - the test status label appears only as plain text.
Color of text
Selecting a colour form this drop down will autofill ‘Custom Color of text’. It sets the text colour of the test status label. Colours available are red, green, blue, gray and orange.
Custom Color of text
This field will copy any colour selected from the ‘Color of text’ dropdown. Alternatively if ‘Color of text’ is left blank it will accepts simple colours as words, like pink, purple and white. It will also accept Hex colour codes for even more customisation. When left blank, text is plain black by default.
TAT = Turn around time.
Ticking any of these 3 options means it can be calculated and reported on how long a test took before it reached certain benchmarks/statuses. To calculate the Turn Round Time a start time and end time is needed.
The start time is usually assumed to be either the created at date and time, or the ordered at date and time - whichever is most recent.
The fields below, when ticked, mark the end time to be used.
The TAT values can be viewed under Laboratory > Setup > Edit Test.
TAT Results Entered
Ticking this checkbox will end the clock and register the end time for when a test changed to this status. It should be used when the results have been entered and saved.
TAT Reported
Ticking this checkbox will end the clock and register the end time for when a test changed to this status. It should be used when a report has been generated.
TAT Signed Off
Ticking this checkbox will end the clock and register the end time for when a test changed to this status. It should be used when a report on the test has been generated and signed off.
Prevent Worksheet Sample Removal
Tests with a test status with this checkbox ticked cannot be removed from worksheets.
Enable Blind Results Mode
When ticked, this option allows the test status to be used in blind results mode.
Enable Validate Results Mode
When ticked, this option allows the test status to be used in validate results mode.